Thursday, December 30, 2021

Canning 2021 Roundup

I put up far more this year than I ever have in my life, thanks to the new canning pot and Sure Jel for pie fillings.  I don't regret any of it, and there isn't anything that I would not make again, but maybe I won't do it in such quantities next time.

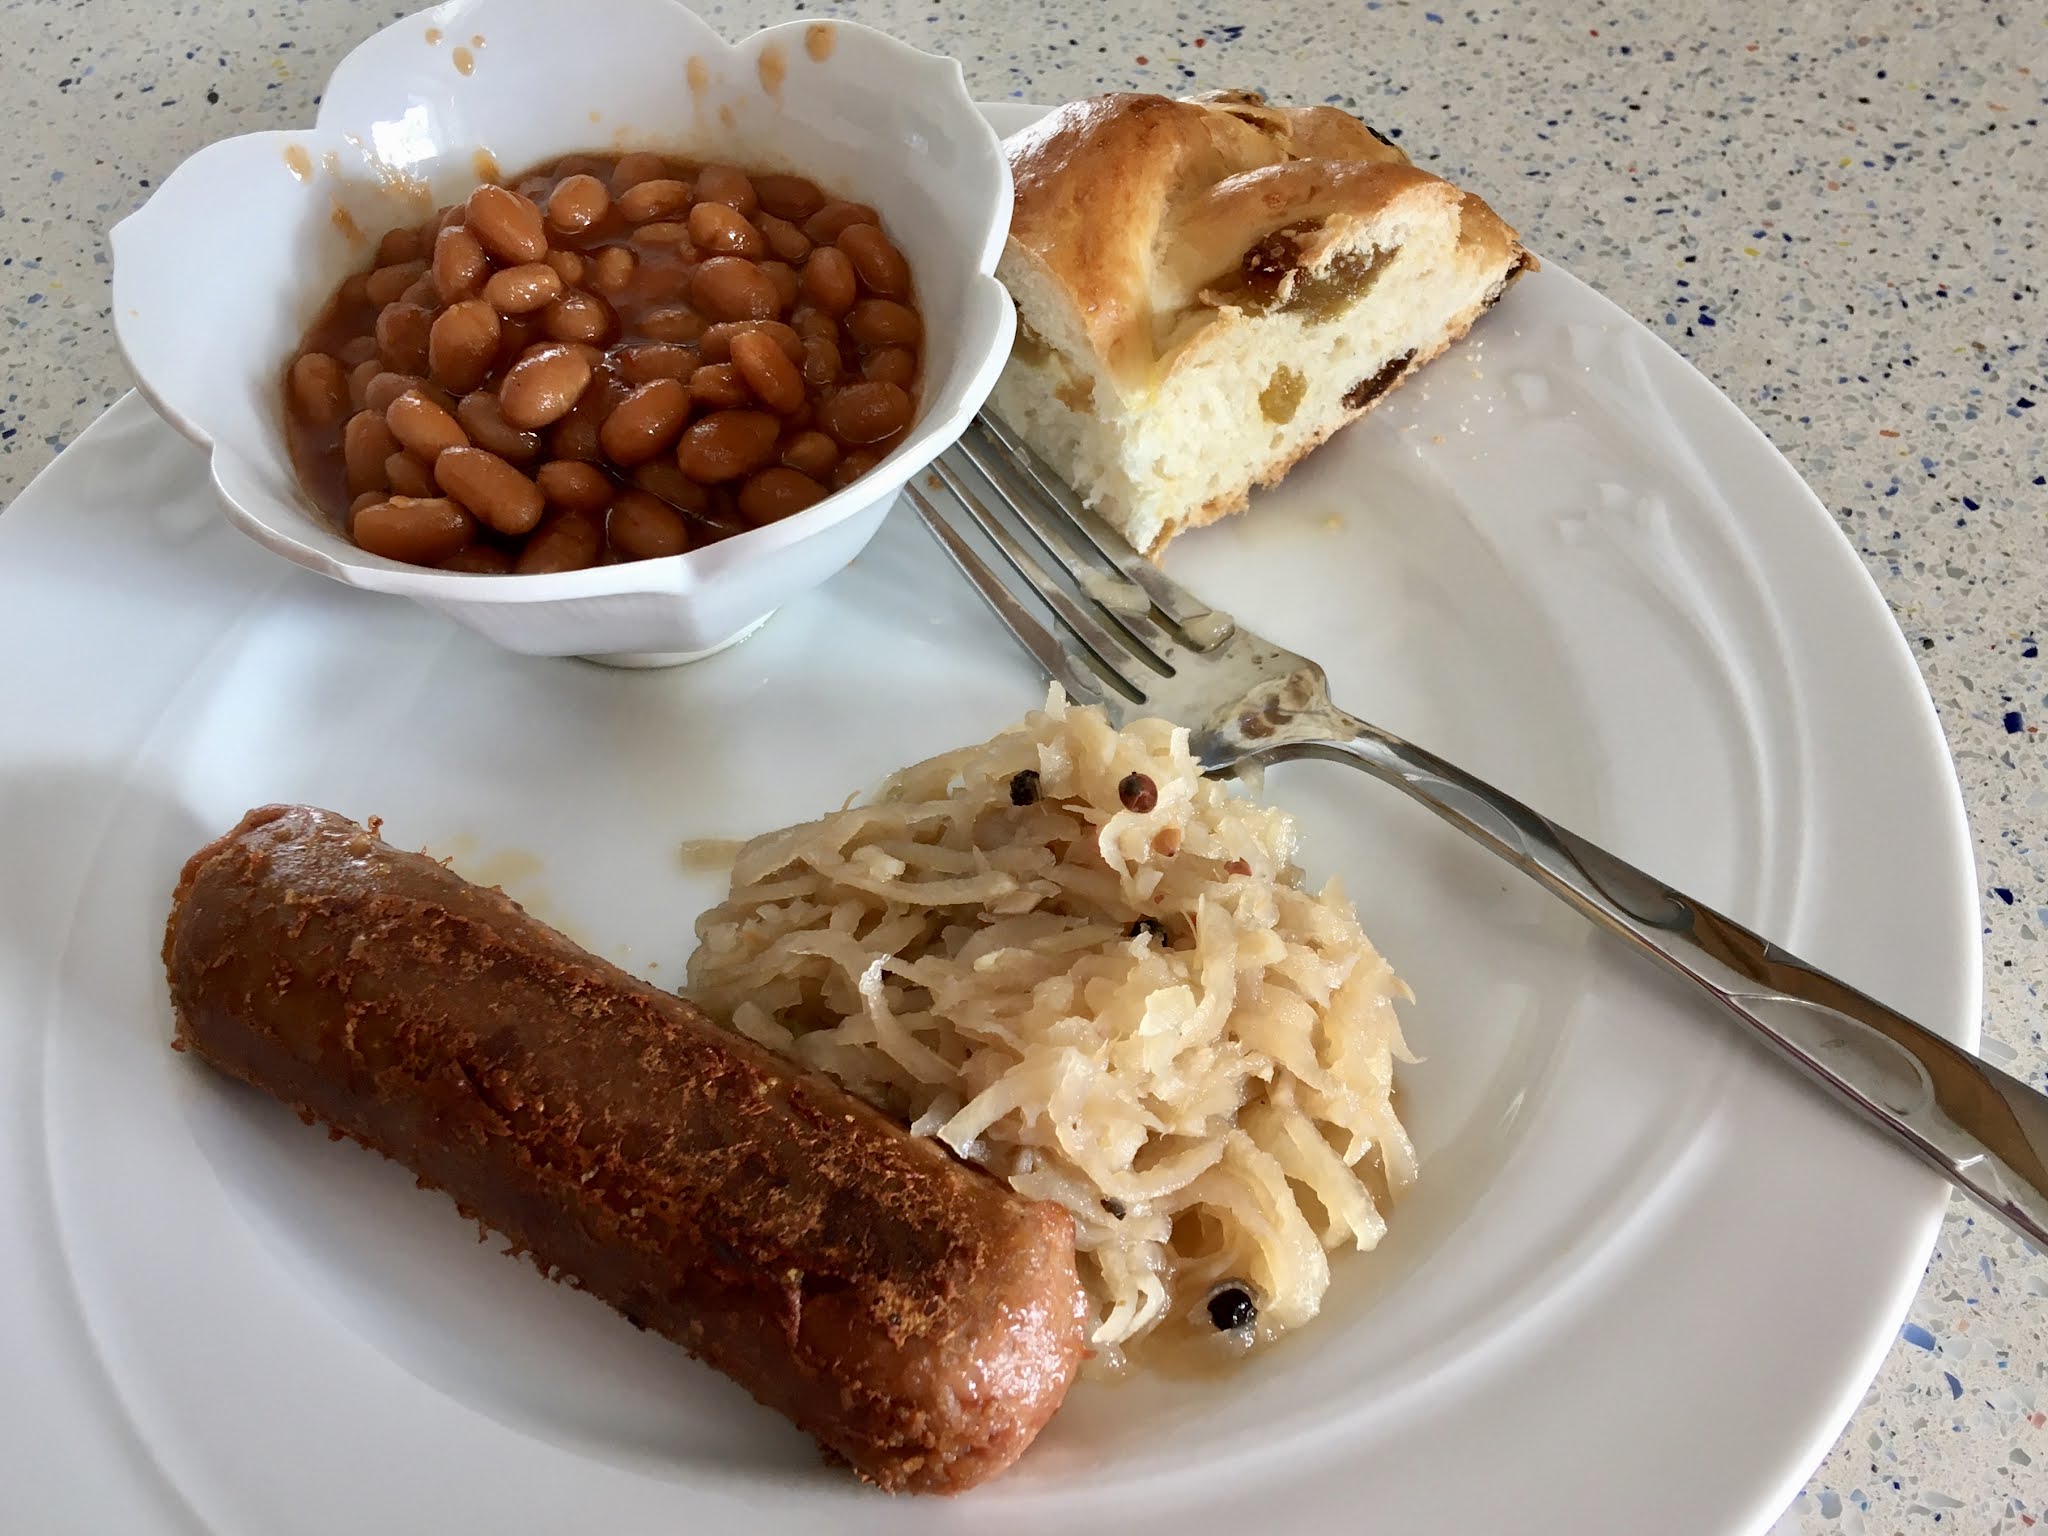
I'm making a distinct effort to use everything I canned.  There's no point in just looking at how pretty they are, all lined up.  I do use jams frequently, both on toast and stirred into plain yogurt.  I opened a pineapple jam for the first time in months and couldn't believe how good it is.  Pickled veggies like season-end artichokes end up in salads or over pasta, so that's all gone.  It's the sauerkraut and kohlrabi relish I've been struggling to use.  Both are best with red meat, and I've been eating much less of that than in the past.

I was hoping Blogger had a spreadsheet tool for posting this year's canning output.  The most interesting feature I found was that you can call up a virtual keyboard for alternate languages.  Played with the Hebrew one a bit, then gave up looking for the spreadsheet.  I'll try to create a logical formatting the old-fashioned way, by changing to a non-justified font.  I did grow up when the Commodore 64 was one of the coolest home computers.

Product                                        Date     Amount Made         Amount Remaining

Fig Mustard           1-21  3 4oz + 1 8oz    4oz/8oz
3-Citrus Marmalade    1-21  3 8oz              -
Applesauce            2-21  4 8oz              -
KLP Ketchup           2-21  4 4oz              3
Kohlrabi Relish       4-21  4 pts              1

Rum-Infused Grapes    4-21  6 pts              2
Wholegrain Mustard    4-21  6 4oz              4
SB-Lavender Jam       4-21  4 8oz              2
Blackberry-Rhubarb    4-21  2 8oz              1
Sauerkraut            5-5   4 pts + 1 8oz      2 pts

Tomatillo Salsa       5-19  6 8oz              3
Kimchi                5-19  3 pts              -
Pineapple Jam         5-19  6 4oz              4
Apricot-Date Chutney  5-27  6 8oz              3
Pickled Artichokes    5-27  2 8oz              -

Apple Pie             6-9   4 pts + 1 8oz      3 pts
Rhubarb Pie           6-9   4 pts              2
Amaretto Peach Butter 6-23  2 8oz              1
Peach Pie             6-23  2 pts-ish          1 pt
Cherry Jam        6-30/7-22 6 8 oz             4

Cherry-Sabra Jam  6-30/7-22 4oz/8oz            all
Cherry Pie            6-30  4 pts              2
Mincemeat             10-13 4 pts              3
Pumpkin Martini Jam   11-3  7 8oz + 1 4oz      all
Cranberry Sauce       11-3  4 8oz + 1 4oz    3 8oz/1 4oz

That took a lot longer than I expected.

Ok, that was even more jars than I thought.  Twenty individual products?  My inventory sheets are by type of preserve: Pickles/Relish/Salsa, Fruit & Pie, Jams & Butters, and Condiments.  Breaking it up looks shorter than all in a row.

You can also see that I've used quite a bit.  Several items are gone, while others are close to it.  I didn't can anything in March, August, September, or December.  I've actually opened a few jars between taking the photos and writing the chart.

What this chart-ish tells me is that I shouldn't make so much in general, but especially not items that are primarily for meat dishes.  And I'm not using as much mustard and ketchup as I thought I did, probably because of the less meat thing.  The pie filling usage is about what I was expecting: not frequent, but a good enough pace to use it in a year.

So what's my canning plan for next year?  First, I'm not canning anything until I need it.  I still have about six months of jams at the current rate, and that's the main thing I like to have.  I do still have a few things tabbed that I want to try, like fruit cocktail, but those are going to wait until similar items are gone.  Part of "Cooking for the Future" is making sure you can use everything before it goes bad.  Otherwise, it's just a waste of money and your hard work.

Monday, December 27, 2021

Cranberry-Orange Scones

There seems to be an anti-fruitcake conspiracy this year.  The only place I've been able to find the glacé fruits is online, and I don't want to risk the containers leaking in transit.  Meanwhile, I made glacéed peel, expecting to use it before now, and that stuff doesn't keep forever.  So I made a batch of fruitcake using maraschino cherries and part of the peel, and put the rest in these scones.

This is a different concept than my basic scone recipe.  I had some extra cream in the fridge and decided to do cream scones.  They are richer than milk ones, of course, and also have a slightly more cakey texture from the added fat.  They are also drop scones, not rolled.  I found a recipe on Café Sucre Farine that was mostly what I wanted.  I just cut it in half and made a few tweaks, not the least of which was making the scones smaller.  I found a use for my new 1oz scoop!  Cranberry can be an intense flavor, so I wanted to make these more like large cookies, or the small scones you get at tea when they offer more than one flavor.

Because of cranberry's sharp tang, you really do need the glaze.  These definitely end up on the dessert-end of the scone spectrum.  Or breakfast pastry.  You don't need to put jam on them, and butter or cream is optional.

*1/2 C whipping cream
1/4 C butter
1 C flour
2 Tb sugar
1/2 Tb baking powder
1/4 tsp salt
*3 Tb glacé peel, finely chopped
2/3 C chopped fresh cranberries

1.  Melt the butter and set aside to cool.  Place the whipping cream in the freezer for about 10 minutes.

2.  In a medium bowl, stir together flour, sugar, baking powder, and salt.  Reserve 1 Tb of glacé peel for garnish, and stir the rest into the flour along with the cranberries.  And yes, it's hard to chop cranberries without sending them flying.  You can do it by two or three pulses in the food processor, or use an onion chopper because it contains everything.

3.  Get the cream out of the freezer.  Stir the butter into it and allow it to re-chill into globules.  This saves you the step of cutting the butter into the flour, which frankly I find therapeutic.  But ultimately, this is faster and leaves less of a mess.  You won't get a super-flakey scone, but cream scones aren't known for that anyway.  Stir cream mixture into the flour.  It will be thick, and you'll be tempted to think there isn't enough liquid.  Give it a minute.

4.  Line a baking sheet with parchment or a baking mat.  Spray a 1 oz cookie scoop with pan spray (or estimate 2 tablespoons), then scoop out scones, leaving about 2" between in case of spread.  Place prepared scones in the fridge for about 15 minutes, or however long it takes to preheat your oven to 400º.

5.  Bake 15-18 minutes, until lightly browned and set.  Cool on a rack while you prepare the glaze.


Glaze

2/3 C powdered sugar
1 tsp milk or cream
Orange juice as needed to thin

1.  Combine all ingredients in a small bowl, adding juice as needed to achieve desired consistency.  Be careful, it goes from too thick to runny in the blink of an eye.  Give it a minute after each addition to settle.  You want something that drizzles in an unbroken stream, but holds its shape for a few seconds.

2.  Drizzle icing over scones, then top with reserved glacé peel (chop them into tinier bits if necessary).


Makes one dozen

Difficulty rating  :)

Friday, December 24, 2021

Vietnamese "Nachos"

I am in full Pantry Challenge mode, and it isn't even Christmas.  One of the things I've been chipping away at is the package of spring roll wrappers I bought in July.  Like pasta, they have a long shelf life, so it isn't a worry about expiration dates.  The rolls are just so finicky to make that I find easier dinners to schedule.

Then I found out that you can fry them in wedges, and making nachos instantly came to mind.  I decided to serve them as a deconstructed summer roll.  The dipping sauce becomes a salad dressing, and you have a light meal with minimal fuss.

The salad part is pretty easy, and is basically whatever you would have put in the summer roll if you had wrapped it.  Chopped lettuce of choice, carrot, and whatever else sounds good.  I had one leftover tomato, so that got diced and tossed in.  It isn't an authentic Vietnamese ingredient, but it really worked.  Some radishes, mint, green onion, and cilantro from the garden livened it up.  I got out the V-slicer with the julienne blade for the carrot and radish, just to have a bit of fun.  I opened a can of salmon for protein, since the price of fresh could give you a heart attack these days, and the meal came together in a snap.

Unlike flour or corn tortillas, the fried rice paper will not support other ingredients.  It's really more of a crouton.  The nacho design is just for presentation, which is why it's in quotes in the post title.

Dressing


*1/2 tsp ground coriander seed
1/8 tsp red pepper flakes
1/8 tsp ground lemongrass
2 Tb rice vinegar
3 Tb grapeseed (or other neutral) oil
*1 Tb hoisin sauce
* tsp fish sauce

1.  Add all ingredients to a lidded container.  Seal and shake.  Set aside until ready to assemble.

Salad

*about 8 leaves lettuce of choice, chopped
1 carrot, shredded or julienne
*2 radishes, shredded or julienne
1 green onion, chopped
*1 Roma tomato, diced
2 Tb cilantro leaves, chopped
*1 Tb fresh mint leaves, chopped
*1 14-oz can pink salmon, drained 

1.  Toss together everything except the chopped lettuce and salmon.

2.  To assemble salad, lay a portion of lettuce on the plate.  Top with a quarter of the salmon, then a quarter of the salad toppings.  Repeat to make four plates.  Drizzle all with an equal amount of dressing.

Chips

*8 small pieces of rice paper (6" if you can find them)
vegetable or peanut oil for frying
salt to taste

1.  Heat 1/2" of oil in a heavy-bottomed pot over medium-high heat.  Oil is ready when a drop of water pops.

2.  Cut the dry rice paper sheets into wedges.  I scored them with a knife and then folded until it snapped.  Warning, shards might fly off.  Close your eyes or do it into the sink.

3.  Drop pieces one at a time into the oil.  This is where it gets fun.  They fry in literally two seconds:

Remove pieces from the oil with tongs or a spider and drain on paper towels while you work on the rest.  Be quick and pull them as soon as the puffing stops, or you could burn them.  Turn down the heat if they are starting to brown in under five seconds.

4.  Arrange fried rice paper around the salad as garnish, sprinkle lightly with salt, and serve immediately.

Difficulty rating  :)

Tuesday, December 21, 2021

Double Chocolate Chip Cookies

Forget electronics.  I asked for ambidextrous cookie scoops for Chanukah.  And a brown apron in the style I bought over the summer, because it's very comfortable but I don't want to ruin the yellow one.  The scoops came in 1, 2, and 3 Tb sizes.  I prefer small cookies and expect to use the #60 (1 Tb) the most often.  The largest actually got used first, when I realized it was the perfect size for scooping latkes.  It's also good for tamale masa and smaller scoops of ice cream.  The 2 Tb (1 oz) probably won't get used much.  I'm not into large cookies because you don't get to eat as many.

So of course I had to make some kind of scooped cookie the next time I was baking a dessert.  Preppy Kitchen posted these the same week.  I like John's recipe selections, but some of the recipes themselves need a bit of tweaking.  His drop cookies in particular have the flaw of using all butter instead of part margarine or another oil-based fat.  This recipe doesn't have you chilling the dough, but every time he chills a butter-based cookie dough, they end up baking unevenly.  If you are pre-making this to freeze in balls for later, always use margarine instead of butter.  I'm changing it here to margarine only and omitting the salt.  You could use half unsalted butter and half margarine without burning these.

Which brings up another point.  It is very easy to burn a dark cookie.  You can't tell if they're done by color.  It's important to know your oven before making these.  I know not to bake cookies the full amount of time on the bottom rack and rotated these halfway through.  Every oven has its own hot spots, so if you've never made cookies in yours before, experiment with Tollhouse or peanut butter first.  Those will be close enough in consistency and ingredients to give you a rough idea how these will react.

John weighs all his ingredients, which is the proper way to bake, but I got lazy and just did cup measuring for this.  If you're going to do flour by volume, make sure to fluff it first or spoon it into the measuring cup, as flour settles in the bag.

1 C flour
*1/3 C unsweetened cocoa powder
1/2 tsp baking soda
1/2 C (1 stick) margarine
1/2 C light brown sugar, lightly packed
1/3 C granulated sugar
1 egg, room temperature
2 tsp vanilla
1 C semisweet chocolate chips (or chips of choice)

1.  Preheat oven to 375º.  Line two baking sheets with parchment or a silpat.

2.  Sift together flour, cocoa powder, and baking soda.  I'm usually not huge on sifting, but cocoa powder tends to clump.  Set aside.

3.  In a stand mixer with the paddle (or electric hand beater), cream together margarine and both sugars until smooth.  Scrape down bowl.  Add egg and vanilla and beat again until light and smooth, 3-5 minutes.  Scrape down bowl and run a few more seconds to make sure everything is mixed.

4.  Add flour mixture to bowl and beat in on low until mostly combined.  Add chips and beat on low until evenly distributed.

5.  Scoop or spoon batter onto lined sheets in 1 Tb mounds two inches apart.  Bake 5 minutes, then switch racks and bake 3 more minutes.

6.  Allow cookies to sit on baking sheets 5 minutes to firm up before transferring to a wire rack.  Cool completely before storing in an airtight container or freezing for longer storage (dough can also be scooped onto parchment and frozen for later baking).


Makes about 2-1/2 dozen

Difficulty rating  π

Saturday, December 18, 2021

Kidney Bean Chowder

Whenever I can't find what I want to make online, I get worried that it's a bad idea.  But this just felt like a good pantry meal on a winter day.  It's mostly a can of kidney beans and a can of tomato soup.  Add some potato, onion, celery, herbs, and a touch of cream, and it's done.  For vegan, purée the potatoes instead of adding cream.

I keep waffling between prepping and really not liking how much processed food is in the pantry.  Every time I'm determined to just work my way through the canned goods and be done with it, there's a new variant, product shortages, or warnings of inflation.  Doing Pantry Challenge January did save me a lot of inconvenience when I had to quarantine.  But a two-week meal plan is not the same thing as having two months of food on hand.  Weather will never strand me in my house.  I have both gas and electric forms of cooking in the kitchen, plus the charcoal grill and a couple of fondue pots.  The only thing I really should be storing is water, in case an earthquake disrupts it, and that's covered.

So I'm going to start January a couple of weeks early and make a concerted effort to use foods on-hand.  After the $60 grocery trip the day I bought the lamb for the Wellington, cutting back on grocery bills is an admirable goal.  I'll still purchase extreme deals when I find them, but only if I can foresee exactly what they will be used for.  (I'm looking at you, tomato soup.)

1 medium russet potato (about 8oz)
1 C diced onion
*1/2 C diced celery
1 Tb olive oil
1/4 tsp each dried thyme, parsley, and oregano
1/8 tsp black pepper, or to taste
*1 10.5 oz can tomato soup
* 1 15 oz can light red kidney beans
water to thin
*1/2 C cream

1.  Dice potato into 1/2" cubes (peeling optional).  Place in a saucepan with water to cover.  Bring to a low boil, reduce heat to a simmer.  Cover and cook while you make the rest of the soup.

2.  Heat oil in a soup pot over medium heat.  Add onion and celery and allow to cook until softened, about 10 minutes, stirring occasionally.  You don't want them to brown.  Add herbs and pepper and cook until fragrant, another minute.

3.  Drain and rinse kidney beans.  Add to the soup pot along with the tomato soup.  It's going to be very thick, like a stew.  Add water to reach desired consistency.  I used about half a cup.  Remember that you will also be adding half a cup of cream.  Heat to a low boil, then lower heat to simmer.

4.  Test the potatoes.  If done, they should break apart when pierced with a fork.  Drain and add to soup.  Stir in cream.  Taste and add salt if necessary, but canned tomato soup already has a lot, even the "healthy" versions.  Serve immediately.


Difficulty rating  π

Wednesday, December 15, 2021

Stuffing Helper

I'm not a huge fan of stuffing, but got a box of it for cheap before I knew for sure if I'd be having Thanksgiving at home.  At the least, I could have it with the chicken I picked up that day.

I'm the sort of person who makes boxed food exactly according to the instructions on the package.  It was a bit mind-blowing to learn that you could doctor up something out of a can or box and it would taste ok.  I still haven't done any of the cake mix ideas, mainly because I don't use mixes anymore.


This one started with needing to trim down the celery again.  Even post trim (photo), it's still huge and borderline an invasive species.  As long as I was at it, might as well cook up some onion.  Then I started wondering if anything in the liquor cabinet could add to the flavor profile.  In the end, maybe half of the volume is what came out of the box and it made twice the number of servings as mix alone.

This recipe is by no means an end-all definitive doctoring of stuffing mix.  It's designed to get you out of your comfort zone and make someone else's idea your own.  Got fennel?  I didn't, but it would be wonderful here.  I threw in diced carrots because there were going to be mushrooms in the green bean casserole and I didn't want to duplicate.  You could be fancy and add chopped frozen artichokes.  Leafy greens are acceptable.  Drain a can of corn.  I considered asparagus, but the flavor is too strong and would overwhelm everything else.  I added walnuts, but pistachios, almonds, and pecans could all be equally enhancing.  Browned sausage or pre-cooked beans turn this into a one-pot meal.

So what is the advantage of doctoring up a mix to making your own stuffing?  It does still save time.  You don't have to pre-cut and dry out your bread.  All of the seasonings are stirred in for you.  It does take about 10 minutes longer because you have to chop and cook the veggies.  But 10 minutes longer than boiling water and letting the mix steep for 5 minutes isn't that big of a deal.  Aside from the absurd amount of salt in the box, everyone will think you made it entirely from scratch.

*1 6 oz box turkey or chicken stuffing mix
2 C diced onion
*2 C diced celery
1 C diced carrots
2 Tb oil or butter
1-1/2 C water
*2 Tb gin (optional)
*1/2 C chopped walnuts
other chopped vegetables, sausage, beans, etc as desired

1.  If using sausage or another ground meat, brown in a large saucepan.  Drain and set aside.


2.  Melt butter or heat oil in the large saucepan over medium heat.  Add onions, celery, carrots, and any other harder vegetable you might be using.  Cook to soften, stirring frequently.  This will take about 10 minutes.  If the heat is too high, the onion will brown instead of softening.

3.  If using, add gin at this point and let it boil off.  Add walnuts and any leafy greens and cook until wilted, 2 minutes.  Add any meat, beans, or other mix-ins and cook until heated through.

4.  Stir in stuffing mix, including a seasoning packet if it has one.  Add water, remove from heat, and cover.  Let sit 5-8 minutes, until liquid is fully absorbed.  Fluff, taste, and adjust seasonings as needed.  Serve immediately.


Serves 8-12

Difficulty rating  π

Sunday, December 12, 2021

Vanilla Bonanza

I'm still looking for ways to use the alcohol in the bar.  My super-weak cocktails a few times a week use well under an ounce each.  It's basically flavored water.  I did some math, and it would take 48 drinks to use a fifth of something.  That's why I keep dumping scary amounts into my cooking and boiling it off.  The martini jam and mincemeat knocked off about four months of actually drinking anything.

So I decided to buy a pack of vanilla beans and make 8 ounces of vanilla extract with bourbon.  I still have most of a bottle of KLP extract made with potato vodka, but that's for when it's the only extract option.  This one would be for the other 51 weeks of the year.

DO NOT buy vanilla beans at the grocery store!  They are $11 each, and you have no idea how old they are.  Go on Amazon or somewhere online you've bought spices before.  You get better prices there anyway, but the 2020-2021 growing season was phenomenal.  I got 25 for $12, for what is usually the second most expensive spice in the world.


As for the extract itself, it's the same procedure as before.  Split the beans, stuff them in a bottle, and fill it up with alcohol of choice: vodka, rum, bourbon, or brandy.  Vodka will be the most neutral, brandy the least.  Rum and brandy bring sugar.  Bourbon (or whiskey) is an almost fruity depth.  Regardless, you need to let it sit for at least six months and shake it regularly, every day at first.  I was using a clear maple syrup bottle, so it has to live in the extract cabinet, where it's dark.  If you have a dark tinted bottle, it can be out in the light.

You will notice that the new bourbon mix is the same color as the 18+ month old vodka version.  The final result will be much darker.  I won't even start to use it until at least next summer.

Since I still have a lot of vanilla beans left, I cut up one to set in a container of sugar to make vanilla bean sugar for whatever recipe I want to use it in.  The rest are in a quart jar, and I have about six months to use them before they start to dry out.  I should probably get a new FoodSaver, but I wasn't using it much even before the sealer went out.

So don't be surprised if I start using vanilla beans in my recipes.  I still have over half the package left.  I will offer alternatives using vanilla extract or paste.  You just won't have the pretty beans floating in it.

Thursday, December 9, 2021

Lamb Wellington

I invited some people over for a Chanukah dinner, even though the holiday started three days after Thanksgiving.  Poultry was out, so I started considering other red meats.

Meat really is getting expensive, even for everyday cuts.  When ground 80/20 is $5 per pound, it's easy to see why I'm choosing to eat vegetarian more often.  However, semi-boneless leg of lamb was $9 per pound, considerably cheaper than a cut of beef of the same quality and two dollars cheaper than the available lamb for stew.  I only needed a one-pound slab for this recipe, so I ended up cutting it in three pieces: two roasts and the bone with a lot of meat on it.  That third part will be great for a tagine or honey lamb.

This recipe is very similar to the original Beef Wellington post.  A few different spices went into it, and I cheated on the sauce.  I was terrified that the lamb would be too well done, but it came out great.  The ends were medium to medium-rare, and the center two or three slices were just past rare.  One of the guests prefers his meat medium, so he got first crack at those and everyone was happy.

1 to 1-1/2 lb boneless leg of lamb
1 Tb olive oil
salt and pepper to taste
1/4 tsp each paprika and cumin
1 Tb butter
1 C minced white or crimini mushrooms
1 medium shallot, minced (divided)
1 Tb balsamic vinegar
1 sheet puff pastry, thawed
flour for the board
1 egg
1 packet "au jus" seasoning mix
*1 Tb Marsala, optional


1.  Preheat oven to 425º.  Rub roast all over with olive oil, then season with salt, pepper, paprika, and cumin.  Place on a baking sheet or in a small roasting pan and cook until internal temperature reaches 130º, about 30 minutes.  I checked after 20, then ten minutes after, then every five until I decided that 122º was close enough.  It's scary how much it's going to shrink and get dark because of the high heat, so trust your thermometer.  Set roast aside to stand at room temperature for at least 30 minutes, or refrigerate if longer than 2 hours.

2.  While the roast is cooling, melt butter in a saucepan.  Add mushrooms and about 2/3 of the shallots and cook over medium heat until the mushrooms have given up their water and everything is softened.  Add balsamic vinegar and allow that liquid to boil off.  Set aside while you prep the pastry.

3.  Open puff pastry sheet on a lightly floured surface.  Roll out into a rectangle that will leave about 4" on each side of the roast when it is placed in the middle.  If desired, cut off some bits of pastry to use as decorations.  Start heating the oven back up to 425º.

4. Beat egg with a tablespoon of water into an egg wash.  Brush surface of pastry lightly with the egg.  Place cooked mushroom mixture (duxelles) in the middle.  Place roast upside-down on top of the mushrooms.

5.  Bring up sides of pastry to cover the roast.  Turn over and place on lined baking sheet, making sure all sides of the roast are covered.  I quartered the remaining mushrooms in the package and roasted them along with the pastry.  Cut a few small holes in the pastry for venting.  Brush exterior of pastry with more egg wash.  If you reserved some trimmings, make designs with them and brush again.

6.  Bake for about 25 minutes, until pastry is crisp and golden and the center of the roast temps at 140º-150º, depending on how well done you like it.  Set aside to rest for 15 minutes while you make the gravy.

7.  Stir 1 Tb of flour into the powdered au jus mix.  Add as much water as the directions suggest, followed by the remaining shallots.  Bring to a boil for 3 minutes, then add the Marsala, if using, and boil another 3 minutes to evaporate some of the alcohol.

8.  Show off the roast first, then slice into portions.  Serve with gravy on the side.

Difficulty rating  :-0

Monday, December 6, 2021

Sopes

When we were on vacation in Mexico a few years ago, we had lunch at an excellent little restaurant that served sopes as an appetizer with any main dish.  Honestly, I would have found these mini-pizzas a hearty meal.

I was trying to think of something to have with a jar of tomatillo salsa, and these came to mind.  I'm really trying to use everything I canned this year.  There's no point in putting in all that work and grocery money  for the jars to sit on the shelf.

The fillings can be adjusted for personal taste and time of day.  A breakfast sope might have fried potatoes and chorizo.  I went more of the burrito-filling route.  Skipped the sour cream, but crema is more traditional anyway.

The recipe is the same as a corn tortilla.  It's the preparation that differs.  These are thicker, so they come out with a smaller diameter and stay softer once cooked.  They're quick to make, freeze well, and can be popped in the toaster from frozen to be topped as an impromptu snack.

*2 C masa harina
1-1/2 C water, plus more as needed
1/4 tsp salt, optional

1.  In a bowl, stir together masa flour and salt, if using.  Stir in water to form a dry dough that barely holds together.  If you can't make a golf ball-sized amount stick together, add water one tablespoon at a time until it does.  Let sit 10 minutes to let it finish hydrating evenly.

2.  Divide dough into 8 pieces.  I got nerdy and put the dough on a scale, then weighed out 1-1/4 oz portions from the 10 oz ball.

3.  Start heating a griddle or large skillet over medium-high heat.  Place a ball between two pieces of wax paper or parchment.  If you have a tortilla press, you can use that and just not press down all the way.  Roll the dough into a 4" round about 1/4" thick.

4.  Place sopes on hot, dry griddle.  Cook until set and lightly browned, about 5 minutes.  Flip and cook another 3 to 4 minutes.

5.  Remove discs to a plate.  While still hot, carefully pinch up edges into a rim.  This is when it comes in handy to be a baker and have no heat nerve endings on your fingertips.  Once cooled, the rims will stay folded up.  Top with fillings of choice and serve warm.

Makes 8 as an appetizer, 4 as a main dish

Difficulty rating  π

Friday, December 3, 2021

One Step Beyond

I decided to give fake meat a try.  In general, I don't like vegan food that pretends to be meat.  Ok, Bac-O's get a pass.  I've heard that the sausages most closely resemble the meat they are pretending to be, so I started with that.

The cost was about the same as dinner sausages, so that was a plus.  What I didn't do was read the nutrition label before purchase.  I probably wouldn't have bought them.  That was a lot more saturated fat than I was expecting, primarily from coconut oil being the third ingredient.  There was also a lot of sodium.  They bring the flavor.  Both were less than the average pork sausage, but not turkey ones.  I could probably develop something healthier; it wouldn't taste quite as rich.

Cooking the sausage is easy.  Pan fry, no oil added, and turn frequently until heated through.  The directions discourage microwaving, and tell you not to boil/steam.

They do taste like a sausage.  No outrageous seasonings.  I had them with some kohlrabi relish, but found myself wishing I had opened a jar of ketchup instead.  Mustard would have been good too.  I didn't put them on rolls, just on their own with some canned beans and one of the remaining round challahs from Yom Kippur.  Probably should have counted how many grams of fiber that was beforehand.  You don't get fiber in meat sausage.

Would I buy it again?  I really can't get past the saturated fat.  Haven't read the labels on any other varieties or brands.  People talk about plant-based oils as "good fats", but saturated is saturated.  It would have to be a rare treat.  At least with meats, I render out as much of the fat as I can during cooking.  None of this is about the taste or texture.  It's all related to the nutritional value.  Feel free to make your own choice.