Monday, August 31, 2020

Parmesan-Basil Burgers

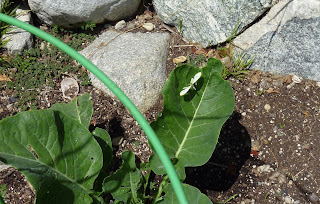
After starting the summer getting munched on by some kind of pest, my basil has rebounded.  I turned around one day and it needed to be trimmed significantly before it started to bloom.
Molly photobomb
Instead of taking the easy way out with pesto, I sort of did a deconstructed pesto with this burger.   The garlic, pine nuts, and parmesan are in the burger itself, the olive oil is on the tomato and on the bun before toasting, and the basil takes the place of lettuce.  A bit of plain Greek yogurt instead of mayo, and it's a Mediterranean theme.  Made a chunky Greek salad to go with it.

*1 lb 80/20 ground beef
*2 Tb toasted pine nuts
*2 cloves minced garlic (about 1 Tb)
1/2 C shredded parmesan (or 1/4 C grated)
*about 16 fresh basil leaves
4 hamburger buns
olive oil
tomato slices
salt and pepper
*1/4 C Greek yogurt (optional)

1.  Combine beef, pine nuts, minced garlic, and parmesan in a bowl with salt and pepper to taste.  Knead until evenly distributed.  Refrigerate at least half an hour, to let the flavors meld.
2.  Start the broiler or grill.  These came close to falling apart before cooking, so I'm inclined to suggest a rack over a lined pan rather than the grill.  Make four quarter-pound patties that are thinner in the middle and wider than you want the finished product.  Meat seizes up as it cooks.  Broil to desired doneness, flipping halfway through.

3.  Meanwhile, prepare the bread.  Brush the insides of the buns with olive oil and toast.  Drizzle the slices of tomato and sprinkle lightly with salt and pepper.

4.  To assemble burgers, spread one or both sides of the buns with yogurt.  Top bottom piece with tomato slice (or slices, depending on size of tomato).  Then layer on the burger patty and top with about 4 basil leaves.  Close into a sandwich and serve hot.

Difficulty rating  π

Friday, August 28, 2020

Quiche Lorraine

I always thought there were more ingredients in a Quiche Lorraine, like leeks or something.  Nope, just eggs, bacon, and cream with some seasonings.  Julia Child's version doesn't even use cheese.  It's just an omelet in a crust.  Not in my house; this recipe is using a touch of Swiss cheese as seasoning.  However, there was an onion recall the week I made this, so we're skipping that part.

The recipes in the Bible and Grandma Sophie's recipe box are almost identical.  And they both refer to "12 bacon slices", without specifying weight.  Are we talking thin packaged bacon from the 1970s, or thick-cut farmers' market slabs?  I decided to call it half a pound and used bacon ends, since they were going to get crumbled up anyway and those are cheaper.  It's very easy to put too much filling in a quiche.

And then there was Julia Child's approach to the bacon.  She had you simmer it first, to get rid of the smoky flavor.  I paid good money for that smoky flavor!  That recipe is from the 1950s.  Tastes and trends do change.  While it's fascinating to make older recipes, sometimes there's a good reason for updates.

1 9" unbaked pie shell or tart crust, chilled, preferably pâte brisée
1 Tb softened butter
1/2 lb bacon
4 eggs
1-1/2 C cream (or half-and-half)
1/2 tsp salt
1/8 tsp nutmeg
1/2 C shredded Swiss cheese

1.  Rub softened butter over surface of crust, then put back in the freezer.  This will reduce crust shrinkage and sogginess as it bakes.
2.  Cook the bacon in a medium skillet until crisp and crumbly.  It's an odd feature of quiches that the fillings don't really cook any more in the oven, despite the high temperatures and being surrounded by stuff that's baking.  Drain on paper towels.  I save the rendered fat for other uses.

3.  Start preheating oven to 425º.  Whisk together eggs, cream, salt, and nutmeg to make the custard base.
4.  Retrieve the pie shell from the freezer.  I put it on a baking sheet because I used a tart pan with a removable bottom.  They're a pain in the butt to move otherwise.  Crumble bacon around the bottom.  Sprinkle with cheese.  Pour the custard into the shell.

5.  Bake for 15 minutes.  Reduce oven to 325º and bake another 35 minutes, until custard is set and crust is browned.  Allow to cool in pan at least 10 minutes before cutting.  Can be served warm or room temperature.

Serves 4 to 6, depending on sides and whether it's lunch or dinner

Difficulty rating  :), including making the crust yourself

Tuesday, August 25, 2020

Pâte Brisée

I found this recipe for pastry crust in the recipe box.  On the card was Grandma Sophie's handwritten note "Quiche crust that does not get soggy".

As observed in a previous pastry crust recipe, an enriched dough is more forgiving than shortening pie crust.  It's ok that the ingredients are above freezing.  You probably won't overwork the dough.  Think of it more as unsweetened shortbread.

The ingredients list doesn't look like it makes enough, but I got an 11" tart shell out of this...and then forgot to take a photo of it.  It came out crispy and not tough.  A thicker crust might have been harder to cut or chew.

Normally, I try to clean up and simplify recipe directions.  These are such a hoot that I'm going to keep them intact.  There's nothing wrong with them.  My personal observations will be in brackets [].

1 C flour
1/2 tsp salt
1/4 C butter or margarine, softened
1 egg
1 to 2 Tb water

1.  Mix flour and salt in a bowl or on a board.  Make a well in the flour mixture and add butter in small pieces.  Add egg and work quickly with fingertips or pastry blender until crumbly.  Work in just enough water to make a soft dough which clings together.  [This step can also be done by pulsing in a food processor.  If you do that, you're looking for wet sand.]
2.   Round up dough, then flatten with the heel of the hand twice.  Then round up again, wrap in waxed paper and refrigerate at least 2 hours.  [If using food processor, pour out grains onto board, then round up.  What looks like a pile is going to turn into the photo at the top of the post with no additional water.]
3.  Roll out on a floured surface to a round 1/8 in thick.  Pastry is firm, so requires vigorous rolling.  [Or just leave it at room temperature for 10 minutes first and it will be easier to roll.]  Fit into quiche dish or pie pans and trim or flute edges.

The recipe ends here.  I presume it was part of a larger page in the newspaper devoted to quiches and tarts, so each recipe would have its own baking instructions.  In case you need a pre-baked crust, I'm going to give a basic instruction.

4.  Preheat oven to 425º.  Prick crust all over with a fork to vent and/or weigh down with beans.  Bake 15 minutes, until golden and set.  Allow to cool, then fill.

Makes one 9" pie/quiche/tart crust

Difficulty rating  π

Saturday, August 22, 2020

Butter White Bread

It's been a long time since I've made a normal loaf of ordinary white bread.  I didn't get into the sourdough craze because I don't like sourdough and I already have a pet.  I went back to review my original post on the bread ratio of ingredients, and it didn't even have a photo.  Quite possible I didn't make a loaf then.  It was the early days of blogging.  So here's an improvement on that post, plus a lot more butter in the product.
I decided to make this as mini-loaves.  It takes three mini-loaf pans to equal one full-sized loaf.  That is true both for yeast and quick-bread recipes.  What you change is the time it takes to bake.  I can never manage to slice my own bread as thin as a machine can, so the mini loaves help me to portion control with the thicker slices.  It's also great to find the loaf in the freezer you forgot about a few weeks later.

Not to say I'm great or anything, but this bread came out very nice.  It's basically self-buttered after the extra brushing step.  It's what you always wish "butter-top bread" tastes like.  You could have it with a meal, as a sandwich, or toasted up with jam.

*1 C milk
1/4 C butter, divided, plus more for pan
*1 tsp yeast
2 Tb sugar
~3 C flour
1 tsp salt
vegetable oil

1.  Heat milk, 2 Tb butter, and sugar to 100º, about 1 minute in the microwave.  Butter does not need to melt.  I used actual butter this time, and unsalted.  If you use salted butter or margarine, cut down the salt later to 1/2 tsp.  Stir in yeast and allow to get foamy, about 5 minutes.

2.  In mixer with the paddle, combine milk mixture and 1 C flour.  Beat into a batter for 2 minutes.  Add another cup of flour and the salt and beat again into a stringy dough for another 2 minutes.
3.  Generously flour a work surface and turn out dough.  Knead until smooth and elastic, working in as little flour as you can manage.  This takes 5-10 minutes.  Round into a ball.  Lightly oil a bowl and turn dough to coat all sides.  Let rise in the bowl in a warm place (100º-105º) until doubled, about an hour.

4.  Punch down dough and allow to rest 10 minutes.  Grease loaf pan (or pans) with butter.  Melt remaining 2 Tb of butter and set aside for a minute.  If dividing dough into multiple pans, I recommend using a scale.  The dough should weigh roughly 22-26 ounces, depending on how much flour you ultimately worked in.
5.  Roll out dough into a rectangle 1/4" thick.  The wider side should be slightly wider than the width of the loaf pan.  Brush surface with about 2/3 of the melted butter, like you were making a cinnamon roll.  Roll up into a log, tuck under the ends, and set in loaf pan, seam-side down.  If you ever wondered where the heel of the bread came from, it's the tucking under of the edges.  It's going to look small in the pan, and possibly a little uneven or bowed in the middle.
6.  Set pan in a warm place to rise for another hour, and watch the magic of yeast.  Preheat oven to 375º and brush top of loaf with remaining butter.  If desired, slit the top into a design about 1/2" deep so it can spread during the first phase of baking.
7.  Bake 25-30 minutes (20 for minis), until medium gold and the loaf sounds hollow when thumped. Cool in pan for 5 minutes, then turn out to cool completely.  Can be stored at room temperature for 2 days, or wrapped in foil and frozen for up to a month.
Makes 1 full loaf or 3 mini-loaves

Difficulty rating  :)

Wednesday, August 19, 2020

Date and Rosewater Muffins

Date-nut breads can get heavy.  I decided to make something lighter for teatime and adapted the blackberry muffin recipe.

In the process, I found that the recipe is more dense than I remember and was really baked at the wrong temperature.  The UFO shape that you can sort of make out in the photo is from being baked too hot for the type of product.  The outside sets up too fast, forcing the middle to become a parabola instead of dome.

The taste of the muffins is what I was shooting for.  For those who want more subtlety to the rosewater flavoring, drop it down to 2 or even 1 tsp.  And remember, you won't smell it in the batter or finished product.  It will still come through in taste.

3/4 C cake flour
1-1/2 C all purpose flour
1/4 C rolled oats
1 Tb baking powder
1/4 tsp salt
1/3 C sugar
1 egg
*1-1/3 C milk
6 Tb (1/4 C + 2 Tb) oil
*1 Tb rose water
*6 oz dates, chopped
2 Tb brown sugar
1.  In a medium bowl, combine both flours, oats, baking powder, sugar, and salt.  Toss in chopped dates, reserving a handful for garnish, and toss in the flour to coat the individual pieces so they don't clump up.  Separately, combine egg, milk, oil, and rosewater.  Stir wet into dry until just moistened.  Set aside for 5 minutes.

2.  Start preheating oven to 375º.  Pan spray or line muffin tins for 18.  I don't know how the original recipe made 12.  Portion batter into cups 3/4 full.  Top with the reserved dates and a light sprinkle of brown sugar.
3.  Bake muffins 18-20 minutes, until set and starting to brown around the edges.  Verify with a toothpick.  Cool in the pan 5 minutes, then turn out to cool completely on a wire rack.  Can be frozen once cooled, or keep about 2 days at room temperature.

Makes 18

Difficulty rating  π

Sunday, August 16, 2020

Root Vegetable Stir-Fry over Soba Noodles

I had one beet in the pond taking off, plus several carrots whose leaves were shading the cucumber vines.  After some debate, I decided to mash up cuisines and do this as a vegetarian meal.

Obviously, it's far easier to buy soba than to make it.  I had the afternoon off and hadn't made pasta by hand in a while.  With most of the ingredients on hand, this became a cheap option.  I only bought the tofu and turnip.

Root vegetables present an issue with stir-frying.  Many, like potatoes, need to be thoroughly cooked.  But then they get mushy.  I compromised and added a 5-minute steaming step before switching to the stir-fry portion of the recipe.  The result was vegetables that were cooked through, but not overly soft.  You don't really have to do it to the carrots, but I made the sticks thick so they would be the same size as the other veggies, and decided to cook them to the same texture.

*2 large carrots
*1 large beet
1/2 lb turnips
*4 stalks green onion
2 Tb oil
1/2 C soy sauce
*1 Tb black bean garlic sauce
1 package firm tofu
1 tsp cornstarch
4 servings soba noodles

1.  Peel carrots, beet, and turnip(s).  Cut into similar-sized, 2" long sticks.  Trim green onions and also cut into 2" long pieces.  I also kept the beet greens and chopped them to add with the stir-fry.
2.  Add root vegetables only to a large skillet with a lid.  Add 1/4 C water, cover, and heat on medium.  Cook for 5 minutes, while you start boiling the water for the noodles.  Also stir cornstarch into 1 Tb water and set aside.

3.  Uncover the vegetables and allow the water to boil off.  The turnips will have turned slightly pink from the beet, and even the carrot will be rosy.  You won't be able to tell once the soy sauce is added.  Add oil and stir to coat vegetables.  Continue to stir-fry for about 2 minutes.  Add onions, soy sauce, and black bean sauce and stir again to coat.  Chop tofu into sticks or cubes and add.
4.  Around now, the water should be boiling for the noodles.  Cook according to directions: 2 minutes for fresh pasta, about 6 for dried.  Continue to stir vegetables on low heat until the noodles are done.

5.  To thicken pan juices, drizzle cornstarch slurry into the skillet and stir until gelled.  It happens fast.

6.  Drain pasta and plate, topped with a generous amount of stir-fry mixture.

Difficulty rating  :)

Thursday, August 13, 2020

Herbed Arborio Rice

The instructions on the back of the expensive bag of Arborio rice I bought do not mention risotto.  They're basic rice directions.  Risotto is a process designed to create a specific texture.  For the heck of it, I decided to follow the package directions and see what happened.

This was the same day I had to pull a fennel that was bolting and trim the basil, so a simple pot of rice ended up turning into a post.  I had it with some turkey Meatballs with Coconut-Peanut Sauce, and it wasn't as odd a combination as I thought it would be.  Fennel and peanuts apparently work together.
While I was using what I had in the garden, you could substitute any fresh herb that works with your meal.  Pay attention to the "fresh herb" part of that sentence.  Dried herbs are much more concentrated.  You want a subtle flavoring to rice, not a salad with rice in it.

*1/2 C fennel fronds and stems, minced
*1/2 C fresh basil leaves, finely chopped
1 Tb olive oil
1 C Arborio rice
1-1/2 C water
salt to taste


1.  In a 2 quart saucepan, heat oil over medium.  Add chopped fennel and basil and cook until fragrant.  Add rice and a pinch of salt.
2.  Add water and bring to a low boil.  Reduce heat to simmer, cover and cook for 20 minutes.  Remove from heat and continue to steep for 10 more minutes.  Fluff rice with a fork.  If too dry or undercooked, add more water.  I like very soft rice and added half a cup.

3.  Serve hot immediately, or you could add a bit of rice vinegar and more salt and use it for onigiri the next day.

Serves 4-5

Difficulty rating  π

Monday, August 10, 2020

Apple Cinnamon Rolls

These rolls were mentioned as a variation in the Chocolate Breakfast Rolls post way back when.  Since I make them more often than the chocolate ones, I thought they deserved their own mention.

I'm focusing on the roll part here, because it's a wonderful, sweet bread recipe.  The apples and roll shape are just to keep things interesting.  I didn't frost them this time because they didn't really need it.

Rolls
2/3 C milk
1/4 C butter
1/3 C sugar
2 tsp yeast
2-3 C flour
1/4 tsp salt

1.  Warm milk and butter to 100º (about 45 sec in microwave).  Butter does not need to melt.  Stir in sugar and yeast and allow to get foamy, about 5 minutes.

2.  Add 2/3 C flour to stand mixer fitted with the paddle.  Beat in milk mixture until smooth, about 2 minutes.  Add another 2/3 C flour and the salt.  Beat until a somewhat stringy, thick batter, another 2 minutes.  Turn out onto a well-floured surface.  Knead until smooth, adding as little flour as necessary.  The dough should still be soft and easily shaped.

3.  Shape dough into a ball.  Turn over in a lightly oiled bowl and allow to rise in a warm place until doubled, about 1 hour.  Punch down and let rest on a surface 10 minutes while you make the filling.

Filling
1 Tb butter, melted
2 tsp sugar
1/2 tsp cinnamon
*1 small apple, petit diced

1.  Combine sugar, cinnamon, and diced apple.

2.  Roll out dough into a rectangle about 10" x 18".  Brush all over with the melted butter.  I set out my dry and wet pastry brushes in the photo above so you can see the difference.  The left one is used only on dry things like brushing excess flour off something, while the other can go in butter, oil, or egg.  You don't absolutely have to do this, but I find it helpful.  Oils never come out 100% from a brush.
3.  Sprinkle filling on the rectangle, leaving 1" of a long side with only butter on it.  Make sure the filling goes all the way to the left and right edges.  Roll up a long log, with the buttered end on the outside to seal it.  Cut 2" rolls and place, cut side up, in a buttered 8x8 pan.  And yes, I do have a cooking measuring tape.
4.  At this point, you can cover the rolls with plastic wrap and store in the fridge overnight.  Or, go straight to proofing them.  When ready to bake, allow to rise in a warm place until they fill the pan, about 45 minutes.  Bake at 375º for 25-30 minutes, until dark golden.  Cool in pan at least 5 minutes, to make them easier to remove.  These can be stored at room temperature for a day, or frozen for up to a month.

Difficulty rating  :)

Friday, August 7, 2020

Hawaiian Baked Beans

I'm trying to figure out why so few of the recipes I looked at used Spam.  To me, that and pineapple are the definition of Hawaiian savory dishes.  This is a recipe for sweet and sour baked beans with Spam.  Just getting that out of the way, so there are no surprises.
It's been years since I've bought Spam, so I didn't realize it was on the list of things people were hoarding.  The beans were already soaking while I was at the market, so I was kind of committed to this recipe.  They had a few cans of the reduced sodium version.  I never have a problem with that, as I'm perfectly capable of adding salt when necessary.  There was still plenty of salt in it and I only added a touch to the beans.

So anyway, if you're one of the people who bought a whole bunch of dry beans and Spam in March, here's something to do with them.

1 C dry Navy beans
*1/2 C diced sweet onion (Maui if you can find it)
salt and pepper to taste
*1 C canned pineapple chunks in juice
1/2 C ketchup
1 Tb apple cider vinegar
1/4 tsp chili powder
1 Tb brown sugar
1 can Spam

1.  Sort and rinse beans.  Soak for 8 hours or overnight.

2.  Preheat oven to 250º.  Drain beans and place in a 2 quart casserole with the diced onion and a touch of salt.  Add 3 C boiling water, cover, and bake for 2 hours.
3.  Dice half the can of Spam the same size as the beans.  Add diced Spam and remaining ingredients, stirring until the ketchup is evenly mixed.  If too dry, add a little water, just enough to barely reach the top beans.  Cover again and bake another two hours.
4.  If beans are too soupy, remove lid and leave in the oven while you do the next step.  Slice remaining Spam and pan fry until browned.  Slice and top each serving of beans with strips of Spam. (Cilantro is optional.  I like it and happened to have some on hand.)

Difficulty rating  :)

Tuesday, August 4, 2020

Whole Roasted Cauliflower

I wanted to call this a Bloomin' Cauliflower, but then I looked up what that entailed.  You pour a batter into the cauliflower head and deep fry it, then remove the core and serve it upside-down with spicy dressing.  It's probably very good, but there were other recipes in the search that were closer to what I had in mind.

A whole cauliflower makes for a neat presentation, but it's still cauliflower and therefore a bit bland.  There were two general themes of seasonings, Indian curry and parmesan.  I'm going for the latter, and using the last of the Pandemic Parm that's been in and out of my freezer since March.  Blocks of Parmesan cheese were never out, but I didn't know that in March when I bought the wedge.  After all, no one foresaw TP hoarding or the still-unexplained run on bananas.

This recipe is super simple.  Season, bake halfway while covered, add cheese, bake the rest of the way uncovered.  It takes up to an hour, but that's just how long it takes to roast vegetables.

1 large cauliflower
salt and pepper
about 1 tsp paprika
1 oz grated Parmesan cheese

1.  Preheat oven to 375º.  Line a rimmed baking sheet with foil.  Trim leaves off cauliflower and cut so it sits up flat.
2.  Season with salt, pepper, and a generous amount of paprika.  Cover lightly with another piece of foil and roast 30 minutes.
3.  Remove from oven, discard top foil, and sprinkle with cheese.  Return to oven until cheese is browned and florets start to soften, about 15-20 more minutes.  Cut into wedges and serve.

Difficulty rating  π

Saturday, August 1, 2020

Gardening and Grocery Store Sushi

These two topics aren't related.  There was no point in making two posts for a lifestyle update.

I've been cooking pretty much every meal for the past four months.  (Five?  I've lost track.)  As a result, I haven't had to do any filler garden posts.  You missed in-depth discussions about the butterflies I'm at war with.  I just glossed over it by admitting to non-organic pesticides, but it's been an almost daily battle against their larvae.  I had to wait for the Eight-treated kale leaves to be replaced by healthier leaves that had only been treated with Neem oil before I could eat any.

I planted butternut squash seeds where I can see them from my kitchen window.  Since they don't get watered by the sprinklers, it's a good reminder to do it.
That little butterfly is destroying my harvest
The pond did much better pest-wise.  The butterfly also knew I would nail it with the garden hose every time I saw it.  Brat would go back the second I closed the door.  I've been eating carrots and some radishes transplanted from my neighbor's garden.  He didn't understand the concept of thinning and ended up with far too many plants.  I have one beet large enough to use and several that are working on it.  The carrot tops seem to be hiding the cucumbers, but I do still have one cucumber vine in the front yard and planted some more seeds to keep it company.
My neighbor is having the larva issues, plus a snail invasion.  I tamed mine months ago, and loaned him the box of snail bait.  They love sunflowers, apparently.  Neighbor Smurf has warned me that he's going to give me yellow squash.  Why me?!  I need to find some recipes.
The second part of the post title is because I realized I hadn't had sushi since restaurants closed in March.  Probably the last time I went to the mall, which happens to have a really nice sushi bar in the food court.  I picked up a rainbow roll at the market that was enough for two meals.  It was even a brown rice roll.  The taste wasn't quite as good as when you watch it made, but it filled a need.