Showing posts with label Cakes. Show all posts

Thursday, May 29, 2025

Cheesecake Experiment

I haven't actually made a cheesecake in some time.  I overloaded on store-bought snacks and had to work through them.  Then the price of eggs got too stupid to "waste" them on dessert.  Then, even though this year's A1C wasn't bad for all the sugar I've been having, I really did want to cut back.

One day, as my afternoon tea was getting way too sweet from the stevia leaves I forgot to fish out, I got an idea for a sugar- and egg-free cheesecake.  I know, what's the point in that?  I also had a brick of cream cheese in the fridge that wasn't getting any younger, so out came the 6" springform.

The first step was to make a very sweet stevia water.  The plan was to use that as the water for the egg replacer and the sugar.  Now, sugar in a baking recipe isn't just for sweetness.  It's also for texture and structure.  Cheesecake is more forgiving than a gluten treat and can handle being messed with.

I put two packets of granulated stevia in the almond flour crust.  Following this recipe, minus the spices, I put together the cheese batter.  I whipped in the dry egg replacer with the other ingredients, then added the sweetened water until the desired consistency was reached.  It ended up being more like 1/2 cup instead of 1/4, and was still a thicker batter than usual.

So, did it work?  Drumroll...yes and no.  It did bake into a cheesecake.  I forgot it was going to be very white without egg yolks.  The wax paper under it got very stuck and I had to cut off the outer edges.  It was more dense than average, and not nearly sweet enough.  I had it with canned cherries (which I would have used even if it was perfect) and whipped cream to make it less bland.  It was edible, so that's good, and counted as dessert for the week.  But I'm not going to make it again.  Sugar and eggs are necessary for how I like my cheesecakes.

Friday, October 25, 2024

Apple Honey Cake

I've been wanting to make a honey cake for Rosh Hashanah for several years and never got around to it.  I don't know that I've ever had one.  If I had resorted to the kosher market for a pomegranate, I would have bought one to find out what they're supposed to taste like.  Avoided that madhouse and started looking for a recipe.

As expected, none of them were exactly what I wanted.  I had no idea there was coffee in a honey cake.  Then I looked for honey cake with apples, and that opened up a lot more options.  The upside-down ones looked intriguing, and closer to what I had in mind.  In the end, I settled on Tori Avey's Bundt recipe, scaled it down to a 6" round pan, and added an almond crumb topping instead of icing.

Tori's recipe calls for a Granny Smith apple.  I have Galas at home.  When I cut the recipe, I rounded down all the sugars to account for the natural sweetness of the Gala.  Just make sure you're using a cooking-type apple and not a Red Delicious.  They aren't dense enough.  Gala and Fuji are kind of pushing it.

I don't think I've ever used the grating plate in the blender's food processor, but one apple isn't worth getting out the big guy, and I wasn't in the mood to do it by hand.  There's only one plate for slicing and grating.  You flip it over to switch between them.  That's different.  I didn't peel the apple, because me.  Have a blast.

Crumb

2 Tb flour
*2 Tb almond flour
1 Tb light brown sugar
*2 Tb sliced or slivered almonds
*1 Tb shortening

Cake

1 C flour
1/3 tsp baking powder
1/3 tsp baking soda
1/2 tsp cinnamon
1/4 tsp salt
dash allspice
dash cloves
1 egg, room temperature
6 tb vegetable oil
1/4 C honey
3 Tb sugar
1 Tb light brown sugar
1/2 tsp vanilla
1 apple, cored, peeled, and shredded
powdered sugar for topping, optional

1.  To make the crumb, combine flour, almond flour, brown sugar, and slivered almonds in a small bowl.  Cut in shortening to make coarse crumbs.  Set aside.

2.  Grease a deep 6" or regular 8" round cake pan.  The cake would have overflowed a standard 6", so I'm thinking this is really an 8" recipe.  I also lined the bottom with parchment because I don't trust myself.  Preheat oven to 325º.

3.  In a small bowl or pie pan, sift together flour, baking powder, baking soda, salt, and spices.

4.  In another bowl, beat egg until frothy.  Add oil, honey, both sugars, and vanilla and beat until smooth and thick.  If you use the 1/4 C measure for the first 4 Tb of oil, the honey will come out easier.

5.  Stir shredded apple into the wet ingredients.  Gently stir in flour for several strokes, let it rest a minute, and stir again until mostly wet.  Do not over mix.

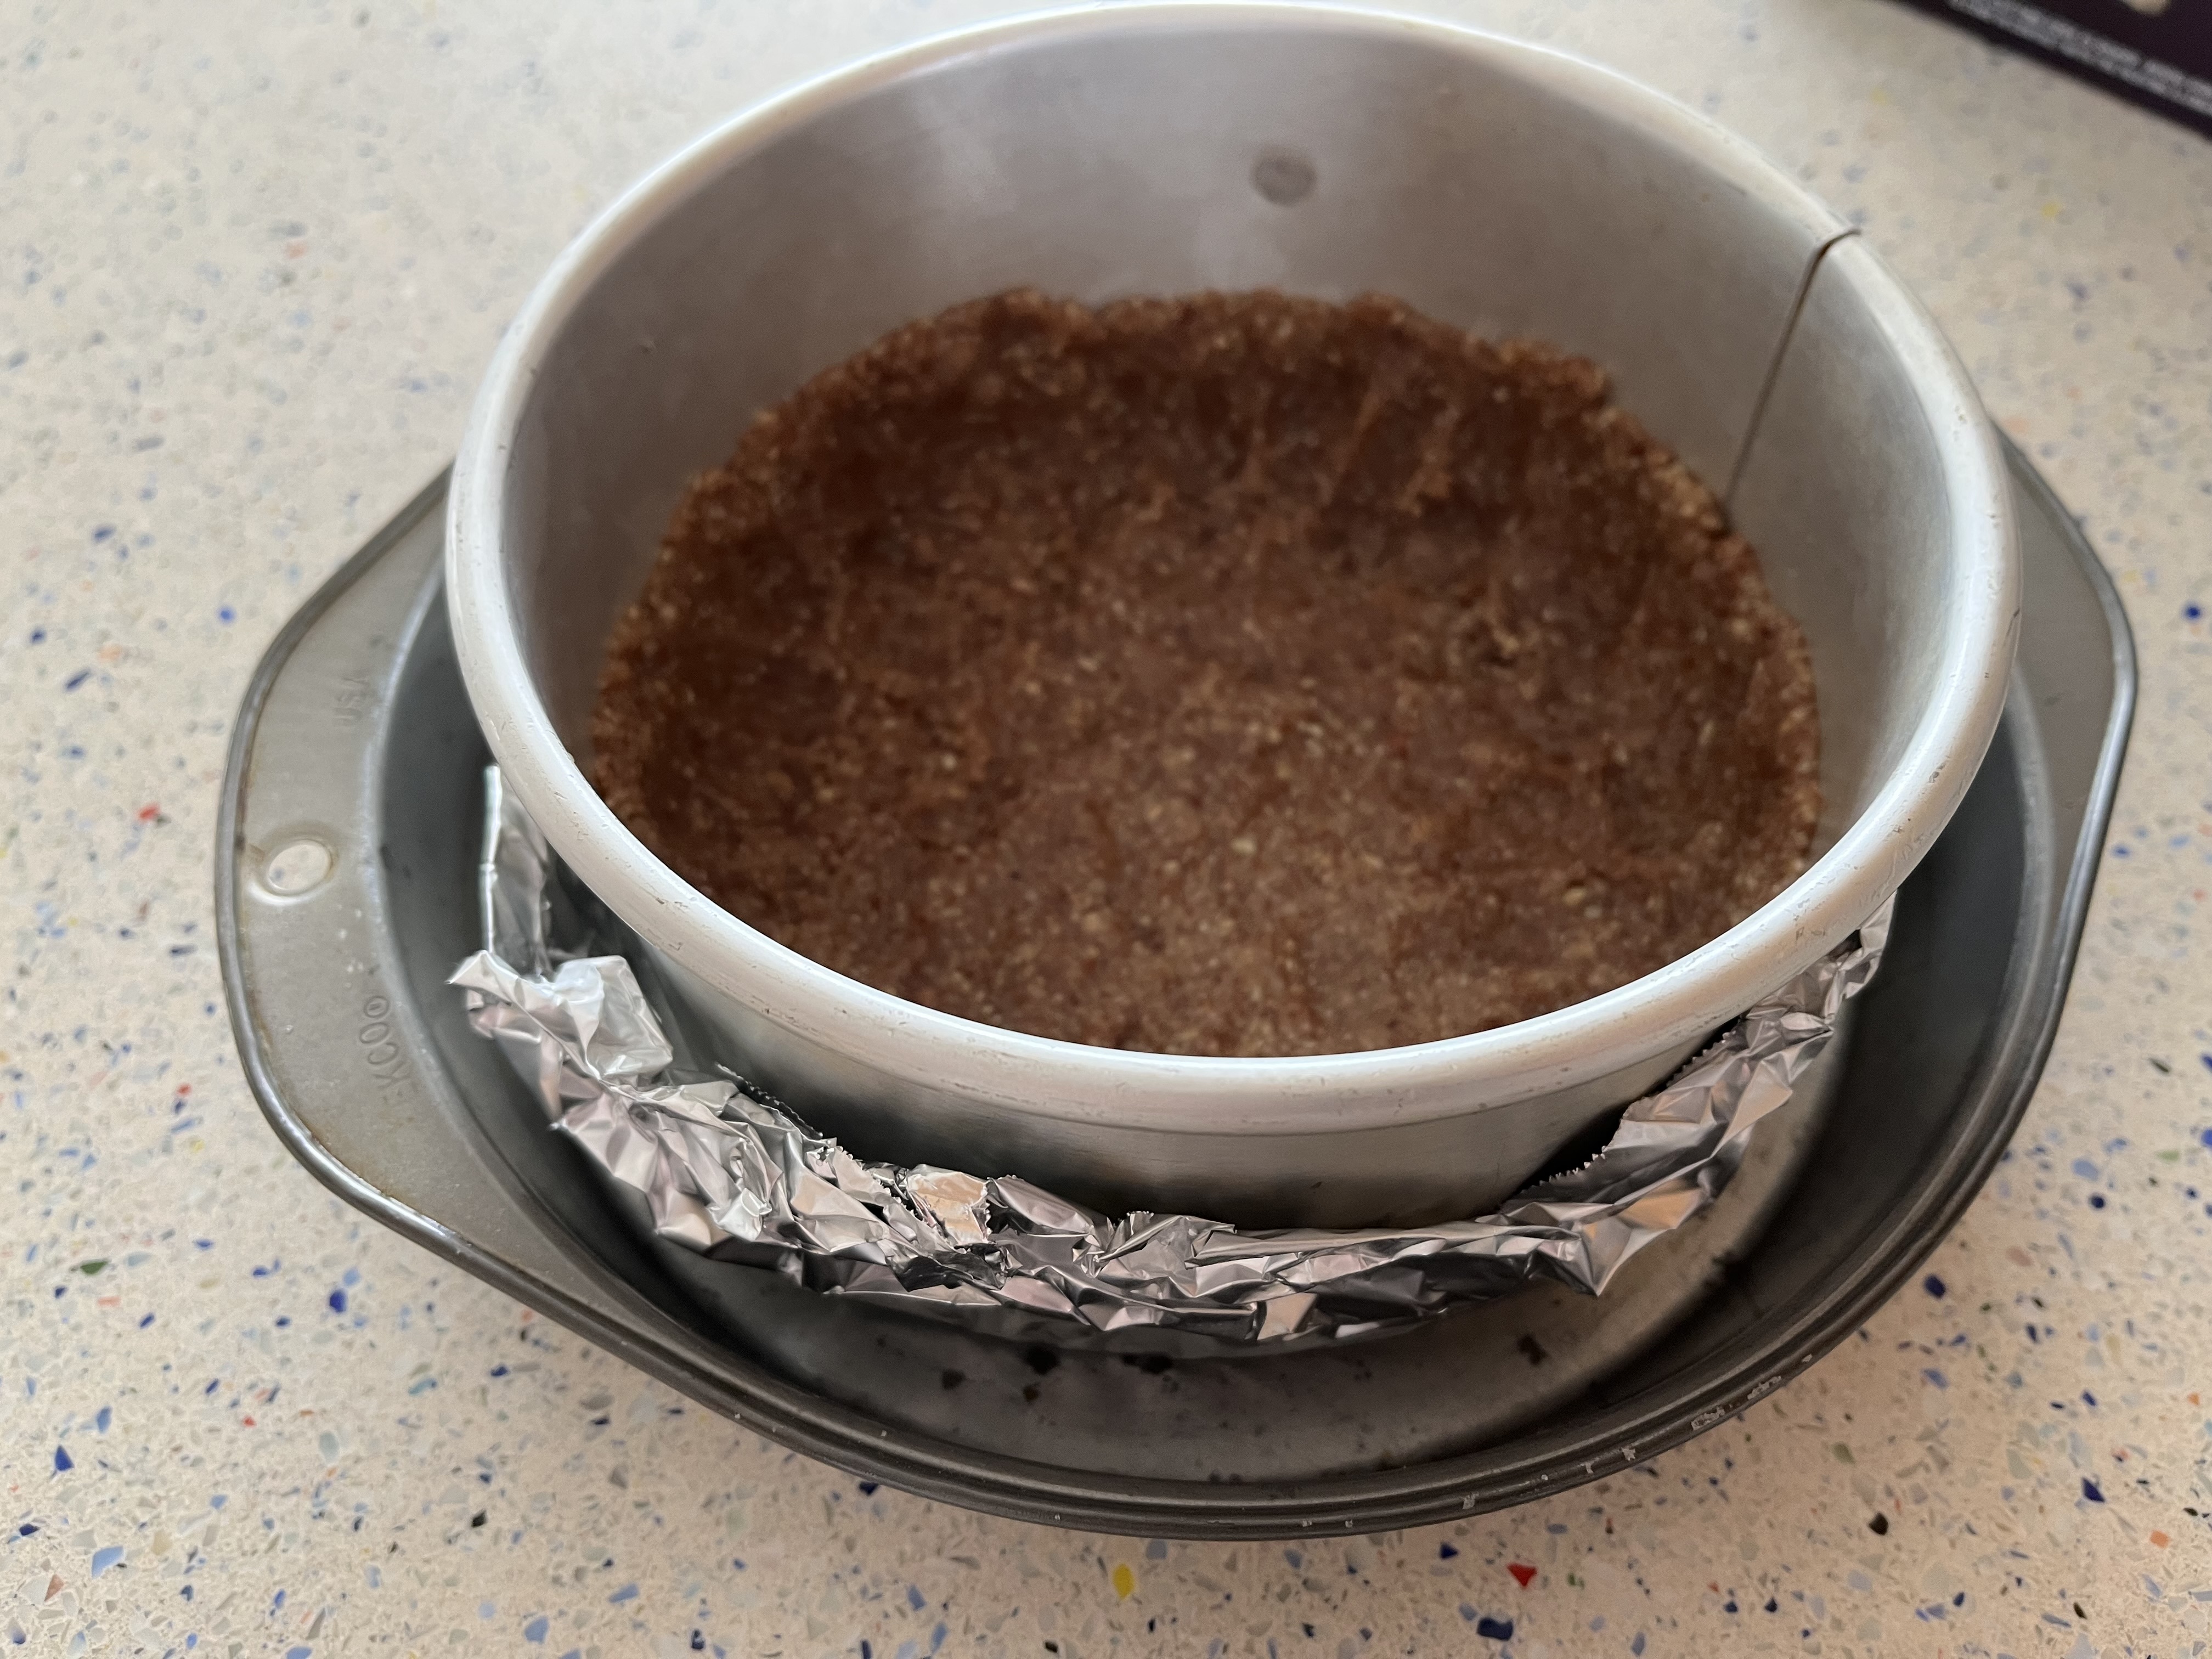
6.  Pour batter into prepared cake pan.  Sprinkle crumb on top.  If using, add wet cake baking strip to the pan.

7.  Bake for 50-60 minutes, or until center passes the toothpick test.  This one takes a while because it's baked at a lower temperature.  Plus, it's really more of an apple quick bread than a cake.  Let sit in pan 10 minutes, then remove to a rack to cool completely.  I did that by inverting it onto a plate, removing the parchment, then re-inverting onto the rack.  If desired, dust with powdered sugar before serving.

Makes one cake, 6-8 servings

Difficulty rating  :)

Sunday, July 21, 2024

Almond and Cherry Layer Cake

I haven't made a cake in ages, probably since the whole high blood sugar thing.  That seems to be under control, so I'm going for it.

Before Purim, the only hamantaschen filling I could find was cherry, so I bought a can.  Later, I found the prune in the fifth store I tried.  It has been sitting in the pantry since, waiting for me to figure out how to use it.  I've been on a kind of Pantry Challenge, trying to find ways to use items I bought without a specific purpose.  This one used the filling, some almond flour, and the KLP almond milk I never opened.  Really, the only thing in it that I would have to replace was the eggs.  I even had enough leftover frosting in the freezer to do a naked cake look.

I'm basing this recipe off my Lavender Cake, with a few changes for the almond flavor.  The amaretto in the filling is optional, but does enhance the almond in the cake.  I made a 1/3 recipe in a 6" pan, and it didn't rise as much as I was expecting.  I think because I was trying sugar substitute.  It just doesn't dissolve properly.  It's a learning curve.  I have over half the can of filling left, and might try again.  Besides, I really liked the cake.

3/4 C sugar
3/4 C margarine
3 eggs, room temperature
*2/3 C milk or almond milk
*1-1/2 C cake flour
*1/4 C almond flour
2 Tb baking powder
1/4 tsp salt
*1/2 tsp almond extract
*1/2 C cherry pastry filling
*1 Tb amaretto (optional)
frosting, powdered sugar, or fondant for top
sliced almonds and fresh or maraschino cherries for garnish

1.  Grease two 8" round cake pans.  Line the bottoms with wax paper or parchment and grease again for guaranteed removal.  Preheat oven to 350º.  If using, start soaking cake pan strips.

2.  Cream together margarine and sugar.  Beat in eggs one at a time, then milk.

3.  Sift together cake flour, almond flour, baking powder, and salt.  Stir into wet mixture, then beat until smooth, about one minute.  Beat in almond extract to finish the batter.

4.  Divide batter evenly between pans, preferably using a scale.  Bake until lightly browned and a  toothpick inserted in the middle is clean, about 30 minutes.  Allow to cool in pan 5 minutes, then turn out onto a rack and pull off the paper from the bottoms.  Allow cakes to cool to room temperature before topping.  It's easier to freeze them once cooled and finish another day.

5.  To make filling, stir together cherry filling and amaretto, if using.  If you can't find filling without chunks of fruit, either use jam or scrape the goo off the cherries in traditional pie filling.

6.  Place bottom layer of cake on serving platter.  Level the top if necessary, then spread the filling to the edges.  Top with other cake.  If frosting, chill in the fridge 10 minutes so things don't slide around as much.  For powdered sugar or fondant topping, no need to wait.  Decorate and serve.

Makes one 8" cake, about 8-10 servings

Difficulty rating  :)

Saturday, February 10, 2024

Torta Caprese

Ok, I first saw this on Mediterranean Living, so we're going to pretend it's on my diet.  Man, it's a lot of butter.  My doctor did say not to be afraid of using butter.  I'm not sure she had 11 tablespoons in mind, even for an 8-serving cake.  No matter what recipe you research, it's going to have way more butter in it than you think it should.

I planned to make a smaller 6" one for my first try.  There was a rather annoying 3 eggs in this recipe, so I went in search of one with easier math.  Chef Dennis's version has the advantage of using a standard 10" springform, so we're going with that one.  I made a third, and it fit nicely in the 6".  I cut the cake in quarters, based on the original serving size, but it really could have been six slices.  10 out of a 10" cake is a very generous serving.

This torte is naturally gluten-free.  It's kosher for Passover (dairy) if you omit the powdered sugar topping and go for a side of sweetened whipped cream instead.  Vanilla ice cream and berries are also welcome garnishes.

It is very important not to over-bake this cake.  The edges will be crispy regardless, but you want the center to just barely pass the toothpick test.  Otherwise, it will be like an overdone brownie.

6 eggs, room temperature, separated
1 C sugar, divided
10 oz dark or bittersweet chocolate, chopped
10 oz unsalted butter (2-1/2 sticks), softened
*3 C almond flour
1 Tb *Sabra, vanilla, or chocolate liqueur, optional
powdered sugar for dusting (unless for Passover) and/or whipped cream

1.  Grease a 10" springform with butter.  My 6" has a weird, textured bottom, so I also lined it with wax paper and buttered that.  Set on a rimmed baking sheet in case/when butter leaks and preheat oven to 350º.

2.  Whip egg whites and 1/2 C sugar to firm peaks.  Chill for the few minutes you're working on the rest of the batter.

3.  Melt the chocolate, either in a double boiler or in short bursts in the microwave.  Stir in liqueur or extract, if using.  Set aside to cool slightly.

4.  In a stand mixer with the whisk, whip butter and remaining 1/2 C sugar.  Scrape down bowl and whip in egg yolks one at a time until smooth.  There will be a lot of bowl scraping.

5.  Fold in almond flour by hand.  Rewarm chocolate a little if too stiff and stir it in until you get an even batter.

6.  Go get the egg whites from the fridge.  Gently fold in a spatula full at a time, taking care not to work the batter too hard and deflate them.  Once the big streaks are gone, pour batter into prepared springform.

7.  Bake until lightly set and it passes the toothpick test, 40-50 minutes.  That's a large variance because there are so many ways to build a springform pan.  Start checking when the cake no longer jiggles.

8.  Allow pan to cool on a rack for 10 minutes.  Run a knife or offset spatula around the rim, then release spring.  Let the cake cool another half hour on its base.

9.  Ok, here's what I should have done... Place a second cooling rack on top of the cake and invert.  Remove base and wax paper, if using.  Once bottom of cake is cool, invert serving plate and position for serving.  Invert again, and you've hopefully transferred the cake without breaking it.  I only lost a small chunk.  Remember, gluten-free torte.

10.  Dust with powdered sugar, if using, or garnish as desired.  Serve slightly warm or room temperature.


Serves 10-14

Difficulty rating  :)

Thursday, September 7, 2023

Spiced Cheesecake

I told the doctor I was making keto cheesecakes, and she was ok with that.  Ok, then here's another one.

I considered making a pumpkin cheesecake, then decided to just use the spices.  What people don't realize when they get something "pumpkin spice" is that there isn't necessarily any pumpkin in it, just the spices you would use when making a pumpkin pie.  It isn't false advertising.  There's a specific spice blend called "pumpkin pie spice".

I opted here to use a pretty decent amount of those spices, plus some cardamom, to make a vaguely pumpkin/chai flavored cheesecake.  With a cinnamon and nut crust and a maple yogurt topping, this came together about as fast as my other cheesecakes.

Crust

1-1/2 C nuts (walnuts or pecans work best)
3 Tb sugar (or substitute)
1-1/2 tsp cinnamon
2 Tb butter, melted

1.  Put nuts, sugar, and cinnamon in the food processor and run until grainy.

2.  Add melted butter and pulse into a paste.

3.  Press into the bottom and sides of a 9" springform. (I'm doing my usual 1/3 recipe in a 6")

Filling

3 8oz bricks cream cheese (light ok), room temperature
6 eggs, room temperature
2-1/4 C plain yogurt (nonfat ok)
1-3/4 C sugar (or substitute)
2 Tb cornstarch
*3 Tb pumpkin pie spice (or combined cinnamon, ginger, nutmeg, cloves to make 3 Tb)
*1 tsp ground cardamom
2 tsp vanilla

1.  Preheat oven to 350º.  Surround bottom of springform with foil, and place in a slightly larger pan.

2.  Place all ingredients in blender or food processor.  Run until smooth.  Spices take a while to distribute evenly, and won't dissolve as much as you expect.  Pour into prepared springform.

3.  Place springform with its larger pan in the oven.  Pour water into the surrounding pan, up about 1" on the cake pan.  Bake until center is just set, but still moves a little, about 1 hour to 80 minutes.

4.  Turn off oven and leave the cake inside for another hour.  Then open the oven door and allow the cake to slowly cool to a warm room temperature, another hour.  This process will minimize how much it collapses.

5.  Place cooled cake in the refrigerator until chilled, about 4 hours.  Before serving, run a knife or spatula around the rim before releasing the spring.  Carefully transfer cake to serving platter.  One of these days, I'll do it without cracking the cake.  I ended up keeping the wax paper I had tried using on the bottom.

Topping

1 C plain yogurt
2 Tb maple syrup

1.  Stir together yogurt and syrup.

2.  Spread on top of cake.  Decorate with more spices if desired.

Makes one 9" cheesecake, 12-16 servings

Difficulty rating  :)


Sunday, July 9, 2023

Rosewater-Pomegranate Cheesecake

Cheesecake reminded me that there is such a thing as a reduced-carb dessert.  And this one is Passover-friendly if you sub potato starch instead of cornstarch.

I had a coupon to get two free single-serve Greek yogurt cups.  No problem, I could get two plain yogurts, like I always do, and they would both be free.  They only had one.  What?  Then I looked at the nutrition information on the vanilla cup and decided I could use that instead of adding sugar to the cake.  Yes, there's that much sugar in yogurt, which is why I buy plain.

Once again, I made a one-third recipe in the 6" springform.  I'm guessing you can't get this whole recipe in the food processor.  It's the blender cheesecake recipe, but I had already gotten the Cuisinart dirty making the crust and figured I would just rinse it out and do the filling in it.  The one-third version was kind of pushing it.  One half is likely the maximum for a standard food processor.

Crust

2 C pecans, walnuts, or almonds
3 Tb sugar
 1/4 C butter, melted

1.  Run nuts and sugar in a food processor until finely ground.  Add melted butter and pulse until a damp mixture forms.

2.  Press crust paste into the bottom of a 9" springform, then up the sides as far as it will go.  Wrap bottom of springform in aluminum foil and place in a roasting pan.  (Or larger cake pan)


Filling

3 8 oz bricks cream cheese (low fat ok), room temperature
6 eggs, room temperature
*2-1/4 C vanilla yogurt (Greek ok)
2 Tb cornstarch or potato starch
1/4 C sugar if not making low carb
*1/4 C heavy cream
*1 Tb rosewater
1/2 C pomegranate arils, divided

1.  Preheat oven to 350º.   Add all ingredients except pomegranate to a large blender.  You may have to work in batches.  If that's the case, have a bowl ready for stirring the batches together.

2.  Pulse the blender at first, to break up the cream cheese, then run until smooth.  You will probably have to scrape down the sides.

3.  Pour filling into crust.  Sprinkle with half of the pomegranate.  I expected them to sink.  Maybe it was because I was working with frozen arils.  If necessary, stir a little to distribute them.

4.  Place roasting pan with cake pan inside on oven rack.  Pour 1" of boiling water into the roasting pan.  This is your bain marie.  Bake for 1 hour before checking for set.  You want the cake to jiggle a little, but not have a liquid center.  This may take an extra 10 to 20 minutes.

5.  When cake has set, turn off oven and keep the door shut for 30 minutes.  Then crack it open and let the cake continue to cool until you can take it out without oven mitts, another hour or so.  Refrigerate in the springform until ready to serve, 4 hours or the next day.


Topping

1 C plain yogurt or sour cream
2 Tb sugar
1 tsp rosewater
remaining pomegranate from filling section

1.  Beat together yogurt, sugar, and rosewater.  Spread on top of cheesecake.

2.  Carefully remove springform ring and transfer cake to serving plate.  Decorate with remaining pomegranate arils.


Serves 12-16

Difficulty rating  :)

Wednesday, April 19, 2023

Passover Vanilla Cake

I had a hard time finding the Passover cake I liked from last year and kind of panicked.  I bought a poundcake to have at Seder, but wasn't sure if I would have cake for the rest of the week.  So when I went to make my own birthday cake, I thought I would come up with a recipe.  If it didn't work, at least it was only a 6" and I could make another.

The prohibition against leavened food at Passover is only for gluten leavened by yeast.  Non-gluten flour leavened by KLP baking powder is just fine.  And what makes the baking powder ok to use is that the anti-caking agent is potato starch instead of cornstarch.  I don't make the rules, I just exploit them.

Similarly, you can't use commercial extracts during Passover because the alcohol used in them is grain based.  I make my own KLP extracts with potato vodka, so I can use them.  For those who don't think six months ahead, I'm making vanilla sugar here.  That only takes two days.  You can also buy it, especially at kosher markets.

So I did find my cake at a kosher market sort of on my way home, and only a couple of blocks from where Techie Smurf once lived.  It's small, but organized, and not the huge detour some of the other markets are.  I only got a few specialty items and racked up a $40 bill.  The ladies ahead of me in line must not have been local, because they spent over $1,000.  If I ever did go truly kosher, which I'll be the first to admit is not likely, I would certainly shop there on a regular basis.

This recipe is simply a kosher for Passover version of my basic vanilla cake, first seen on this blog as a walnut cake.  I didn't mix anything into it, but you can certainly flavor it with any nuts, chips, or coconut you choose.

3/4 C neutral oil (can sub in 1/4 C applesauce for part of it)
3/4 C sugar
*1 vanilla bean
3 eggs, room temperature
*3/4 C buttermilk or almond milk
*1/2 tsp KLP vanilla (optional)
3/4 C potato starch
*3/4 C matzoh cake meal
2 Tb Passover baking powder
1/4 tsp kosher salt
1/2 C mix-ins, optional

1.  A few days before, split the vanilla bean and place in a sealable container with the sugar.  Shake daily.  When ready to make the cake, remove the bean.

2.  Spray an 8" cake pan with pan spray.  Line the bottom with parchment or wax paper and spray again.  Preheat oven to 350º.  If using baking strips, start soaking (I forgot).

3.  In mixer, beat oil and sugar until combined.  Add eggs and beat until pale and fluffy.  Add milk and vanilla, if using.

4.  Add potato starch, matzoh meal, baking powder, and salt.  Beat until a whipped, uniform batter is formed, about 2 minutes.  Stir in nuts or chips.

5.  Pour batter into prepared pan, cover with the wet baking strip, and bake until cake passes the toothpick test, about 30 minutes.  If you don't use a baking strip, the cake will dome and crack a bit.  Still wait until the toothpick comes out clean.  Allow to rest in pan 10 minutes, then turn out to cool completely.

6.  Most frostings are not used on Passover because they contain powdered sugar.  You can top this with Swiss buttercream, which uses granulated sugar, or a chocolate ganache.  The ganache is easier to make pareve if you're having it with a meat meal.

Makes one cake, 8-10 servings

Difficulty rating  :)

Sunday, April 16, 2023

Butterfly Cake

My birthday was during Passover this year, which did not stop me from making a cake.  I just made it two weeks early.  Actually, I was recipe testing a KLP cake, but the frosting was out of a jar.

All you need for this design is round cake pans, frosting, food coloring, and something to be the body, like a Twix.  You will need toothpicks or skewers if you want to do the antenna balls.  No shaped pan that you'll never use again required.  You can use a piping bag and shaped tips if you want, but I went for the soft, kind of Smurf cartoon look (shocker) and brushed on the contrasting frosting with an offset spatula.  Decorative sprinkles or chips are entirely up to you.

The fun part of this design is how much "garbage cake" you end up with.  Some of it is used for the antennae, but mostly it's snacks.

Quick note, I let the cake dome up on purpose, so the wings would have some height.  If I was making a taller cake, I would level everything off.

1.  Start with a round cake.  Layers are fine, but you'll have to stack them while cutting.

2.  If doing any kind of layer, fill and crumb coat.  Freeze at least half an hour to make it easier to handle.

3.  Cut the cake in half.  I probably should have used a ruler or something.  One half was definitely larger than the other.  On the cake plate, you will be putting the halves back-to-back.

4.  Get out a melon baller and a bowl and gently carve the halves into the shape you want.  I wasn't going for precision and eyeballed it.  With flat cakes, you can stack them with parchment inbetween and get perfectly symmetrical wings.  Save the scraps for the antenna balls.  You won't need all of them, so snacking is permitted.

5.  Crumb coat the cut edges.  Freeze the cake again to set the coat before frosting again for the final layer.  I was glad I had already decided not to make a "perfect" frosting job, because even this was hard.  I was kind of wishing I had bought fondant; but then, you have to eat the fondant.

6.  When the base frosting is the way you want it, transfer halves to the serving platter with the candy body between them.  I really liked the look of the Twix, and then you get to eat the other one.

7.  Decorate wings with other colors of frosting, sprinkles, or anything else that seems appealing.  Working with a small cake, I went simple with one color and more of the chips that I had used in the filling.  For a larger cake like a 9", you would have more room for more intricate designs.

8.  Mix a little frosting into the cake scraps, just enough for them to hold together, and make two little balls.  I put too much frosting in mine and had to freeze them before they would stick to the toothpicks.  Skewer onto toothpicks or wooden skewers and coat in sprinkles or coconut if desired.  Attach to the "head" of the candy and you are done!

Difficulty rating  :)

Sunday, February 12, 2023

Pumpkin Coffee Cake


I had just a bit of roasted pumpkin in the freezer from my home-grown pumpkins last year.  I've been having more breakfasts at home lately, choosing to get up a little early and eat a small something before a 5am shift, in case my first break isn't until after 8.  My weekly challah doesn't always make it the whole week because of that, so I needed something else.

Sally's Baking Addiction had a pumpkin coffee cake recipe without eggs, which has knocked it way up on searches.  Pumpkin is one of those ingredients that works as an egg or oil replacement, like applesauce or banana.  This recipe also uses very little butter.  I needed the 8x8 casserole for something else that day and cut the recipe in half to fit in a loaf pan, which also makes it four breakfast-sized servings.  The recipe acknowledges it makes a lot of crumb topping, so I cut that in quarters.  I like crumb, but not as half the cake.

This version is going to simplify the spice listing by calling for pumpkin pie spice.  Most bakers with extra purée in the freezer to use up also have a half-used jar of pie spice.  If you are using defrosted pumpkin, make sure to mix the water back in.  Some will have separated from the purée while it was in the freezer.  I drained mine off, which might have made it too dry, but fresh is different than canned.

Crumb

2 Tb flour
2 Tb brown sugar
1/2 tsp cinnamon
1 Tb cold butter

1.  Stir together flour, brown sugar, and cinnamon.

2.  Cut in butter until mixture kind of looks like rolled oats.  Chill until ready to use.


Cake

1 C flour (125g) spooned in, not scooped
1/2 tsp baking soda
1/4 tsp baking powder
1/4 tsp kosher salt
1-1/4 tsp pumpkin pie spice
*1/2 C pumpkin purée
1/4 C brown sugar
1/4 C vegetable oil
2 Tb maple syrup
*2 Tb milk or buttermilk

1.  Preheat oven to 350º.  Coat a regular loaf pan with baking spray.

2.  In a bowl, sift together flour, baking soda, baking powder, salt, and pie spice.  Sally was serious about not overdoing the flour.  If in doubt, weigh it.  In a separate bowl or measuring cup, whisk together remaining ingredients.  I was using powdered buttermilk, so that went in the dry and the water for it went in the wet.  Also note, since I was using roasted mashed pumpkin instead of commercial purée, the consistency and water content will be different than what you get out of a can.

3.  Stir wet ingredients into dry.  It will form a thick batter, almost like a scoopable cookie dough.  Mine was very thick, so I added another tablespoon of milk just so I could work with it.  Again, because the water content of the pumpkin was not regulated.  Spread in loaf pan.  Sprinkle top with crumb.

4.  Bake 25-30 minutes, until a toothpick comes out clean.  Cool in pan, then serve.  If desired, you can glaze it with a drizzle of powdered sugar glaze or even just powdered sugar.  I was happy with it being a little less sweet than the average coffee cake.  If I had made the full amount of crumble, it would have been too sweet.

Makes 4 breakfast/dessert servings or 6-8 snack slices

Difficulty rating  :)

Tuesday, January 31, 2023

Fig and Rose Cake

This is the fun part of doing a pantry challenge.  When odd ingredients turn into something other than stew or quiche, it's a fantastic win.

I don't remember where the other half of the package of figs went, probably into a mezze dinner.  And it's embarrassing to admit that I bought the rosewater before the pandemic.  Most of the searches for fig-and-rose-cake ended up with Persian Love Cake, which I have made without the figs.  I changed the search to cake-with-dried-figs and other options appeared.

I'm adapting a recipe from Martha Stewart.  It sounded too sweet, so halving the figs and subbing buttermilk was a solution.  Some comments said it was dense, so I'm subbing part of the flour with cake flour.  I do see how the original ingredients make it kind of like a big Welsh cake.  It won't be as light as a layer cake, but much lighter than a scone.  And of course, the lemon is being changed to rosewater.  The original recipe did not have any kind of frosting, but I thought a basic powdered-sugar glaze would be appropriate.

1/2 C olive oil, plus a bit for greasing the pan
*1/2 C buttermilk
1 egg
*2 tsp rosewater
1 C all-purpose flour
*1/2 C cake flour
3/4 C sugar
1/2 tsp baking powder
1/4 tsp baking soda
1/4 tsp kosher salt
*5 oz dried figs

1.  Preheat oven to 350º while you're chopping the figs into bite-sized pieces.  Make sure to remove the stem if the fig has one.  They don't soften when baked.  Grease a 10" tart pan with removable bottom with olive oil.  If you only have regular cake pans, grease, line with a parchment or wax paper round, and grease the round.  The original recipe left off that part, and the full cake did not release; I was able to get the removable bottoms off without breaking the tartlets by using an offset spatula.  Broken scraps are still yummy.  For a tart pan, place on a parchment-lined baking sheet.  Some of the batter is bound to leak through.

2.  In a small bowl or pint measuring cup, whisk together oil, buttermilk, egg, and rosewater.  In a medium bowl, sift together both flours, sugar, baking powder and soda, and salt.  Since I was using powdered buttermilk, the milk solids went in with the dry and I mixed water in the wet.

3.  Pour the wet mixture into the dry and stir until mostly moistened.  Add figs and stir again to distribute and make sure there are no large pockets of dry mix on the bottom.

4.  Pour batter into prepared pan.  I used my four individual tartlet pans and one 6" round, rather than make one full sized cake.  Considering that the cake broke, that was a good idea as far as food photography goes.  You could also make muffins out of this batter.  I'm guessing about a dozen.

5.  Bake 35-40 minutes, until golden on top and firm to the touch.  If you're using the tart pan, it might be a bit thin for a toothpick test, but you can try.

6.  Cool in the pan 15 minutes, then gently remove the ring (or turn out of a regular pan) and cool completely.  Can be served as is, or with a dusting of powdered sugar or glaze.

Cake release fail

Makes one cake, about 8-10 servings

Difficulty rating  :)