Monday, July 30, 2018

Galaxy Mirror Cake

Get ready to make a mess.

If you've followed this blog for the past week or so, you've seen this coming.  I could have done this as part of the Mirror Glaze post, but I'm following my own rule of breaking down each cake into manageable recipes.

Now that I've done a mirror cake, it really is as easy as it looks on YouTube.  I probably didn't even have to stress as much as I did about getting the frosting smooth.

You can't do this in a rush, though.  The glaze will be at the right temperature whenever it feels like it.  This took something like half an hour in my un-air-conditioned kitchen on an 80+ degree day.  I didn't even try to do it during the heat wave.

You also can't leave these cakes out for long.  I set a personal limit of 15 minutes at a time.  Just like with Jell-O at a picnic, it's going to start to melt.  You might get half an hour at room temperature in the winter.

I used a buttercream/mousse mixture as frosting, so this isn't a true entremet cake.  I hear you can give fondant this treatment, but it seems silly to go to the trouble of laying fondant just to cover it with something else.  It isn't going to taste any better.

1 Chocolate Cake
1/2 batch Chocolate Mousse
1/2 batch Buttercream Frosting
1 Tb cocoa powder
1 batch Mirror Glaze
Gel food coloring in black, blue, pink, and white

1.  Trim cakes flat.  Mount onto a cake circle the same size or one inch smaller than the cake with a dab of frosting.
2.  Whip together mousse, remaining frosting, and cocoa powder.  Use it to fill and frost the cake layers, getting the finished product as smooth as you can.  Freeze for at least 8 hours.  You can do this days in advance.
3.  Get a hot scraper or offset spatula and smooth out any remaining dings in the frosting.  Because of the mousse, this was much easier than usual.  I even used my fingers to get a few spots the spatula was having trouble with.  Put it back in the freezer while you make the glaze.

4.  Set up your pouring station while the glaze is doing its 5-minute thing.  Line a rimmed baking sheet or roasting pan with plastic wrap for easier cleanup.  Set up some kind of lift for the cake that is smaller than the cake circle.  It can be a smaller cake pan or a wide-mouthed mug.  It needs to be high enough for you to reach under it to lift the glazed cake, so about 4 to 6 inches.
5.  Color about half of the glaze black, then two more bowls blue and pink.  Once they're poured over the black, they won't be this bright.
6.  When the glazes hit 90º, get the cake out of the freezer and set it on the drip riser.  Immediately pour the black on the top and around the sides.  I went just until all surfaces were covered, then kept the rest for touch-ups.  Start pouring the colors.  I poured a little blue, a little pink, then combined the two without stirring and poured them together.  Lastly, I finished with drizzles of the remaining black.
7.  Give it a minute to set, then go around the bottom with an offset spatula to remove the drips.  Flick  some white food coloring on the cake using a new paintbrush to be the stars.
8.  Carefully lift the cake and set on a larger plate or cake board for easy transport and less mess.  Refrigerate immediately, and for at least 2 hours before serving.

9.  Look into the pan at the mess you just made.  Unless you have some cake pops laying around that need to be glazed, or another small cake, this is just going in the trash.  This is why I wished I'd made half a batch.  There will always be some waste with this method, but this was a lot.

Makes 1 cake, up to 10" diameter

Difficulty rating :-0

Saturday, July 28, 2018

Mirror Glaze

I had a vague idea of what I wanted my next cake to look like and randomly Googled some terms I thought I had invented.  A whole world of mirror glaze opened up before me.

Mirror glaze is basically gelatinized white chocolate ganache.  You color it, get it to a precise temperature, and pour it over a frozen cake, where the gelatin sets almost immediately in a unique swirl.

You're supposed to use this glaze on an entremet cake, which is a project.  You fill a cake mold partway with mousse, set the cake on it, fill in the sides with more mousse, and freeze the whole shebang.  Once it's unmolded and trimmed even, you glaze it.  You can also do this with a buttercream-frosted cake or a pre-baked cheesecake that hasn't cracked.  Just make sure the icing is as perfect as you can get it and the cake is frozen for at least 8 hours.  Otherwise, all your frosting is going to melt right off.

All of the recipes I researched weren't exactly snobby with the "use real white chocolate" mantra so much as stressing the importance of there being actual cocoa butter in the glaze.  Most "white chips" are palm kernel oil.  I presume it has a different melting point than cocoa butter and won't firm up correctly when the gelatin does.  I got lucky and went to Smart&Final the day Ghirardelli bars were on sale for $2.49 for 4 oz.  If I'd known how much glaze this made, I could have made a half-recipe for the 6" cake and saved a bit.  This cake project is picking at my grocery budget bit by bit.

This recipe is from Southern Fatty.  It worked the way I wanted it to, so that's what I'm posting.  Because this concept is almost a chemistry project, recipes aren't going to vary that much.  The one thing everyone agrees on is that the glaze must be between 86º and 90º F when you pour it, or the mousse/icing will melt before the glaze sets.  Any cooler, and it won't pour smoothly.  Also, pull the cake out of the freezer less than a minute before you start pouring.  Moisture starts to bead up on the surface of the cake almost immediately, which will also cause the glaze to slide off.

2 packets plain gelatin powder, softened in 1/3 C cold water
1/3 C + 1-1/2 Tb water
200g (about 1 C) sugar
2/3 C corn syrup
1/2 C sweetened condensed milk
200g chopped white chocolate (2 4-oz Ghirardelli bars minus 2 squares)

1.  In a medium saucepan over medium heat, bring second water, sugar, and corn syrup to a low boil. Stir to make sure everything is dissolved.  Don't go for a full rolling boil, or you'll start to make candy.

2.  Remove mixture from heat and stir in gelatin until dissolved.  Add condensed milk and pour over white chocolate.  Allow to sit for 5 minutes.
3.  Using an immersion blender, whiz the mixture until smooth.  Don't have one?  Neither do I.  What I did was soften the chocolate in the microwave before pouring the hot mixture over it, then stir for quite a while until I figured that was as good as it was going to get.  (See photo at top of post.)

4.  Run mixture through a strainer to catch any unmelted chocolate.  This was easier to clean than I expected it to be.  Between the gelatin, condensed milk, and white chocolate, the glaze is going to smell like feet.  The smell goes away when it's on the cake.
5.  Portion out glaze into bowls and color with gel or powders.  The recipe again suggested an immersion blender, but I had no trouble getting even colors with spoons.  Check temperature every few minutes by stirring with the thermometer.  When it gets down to 90º, get out the cake and start pouring.

Makes 3 C glaze, enough for a 10" cake

Difficulty rating  π

Thursday, July 26, 2018

Chocolate Mousse

This is the only recipe I copied out of my textbook Professional Baking before giving it to Techie Smurf.  (My edition is long out of print.  Did I really pay that much for it?!). I used this mousse as the filling for his wedding cake, then beat the leftovers into the frosting to make it creamier.

Being from a professional textbook, most of the ingredients are in weights.  I clearly scaled this down and changed the eggs from weight to apiece.  I may have even done the math from metric.  Brave me.  I do like that this recipe uses a whole egg instead of only the whites.  Bobby Flay's recipe looks at least as good as this one, but I didn't want to end up uneven on the yolk side.

Yes, this uses raw egg whites, but you do cook the yolks.  Freshness is the key.  You can't use pasteurized egg whites from a carton because they won't whip, but you could use meringue powder if you're worried about immunocompromised guests.  Adjust sugar as necessary.

I'm cleaning up the amounts a little, but you're going to need a food scale.  Nothing except the egg is an even package size.

6-2/3 oz bittersweet chocolate
2 Tb + 2 tsp water
3 eggs, separated and room temperature
1 Tb water + 2 tsp vanilla
1-1/3 oz sugar (weight)
2/3 C chilled heavy cream

1.  In a large saucepan, melt chocolate and water together over medium-low heat.  Stir frequently until smooth.
2.  Beat egg yolks into chocolate and stir constantly until mixture thickens slightly, signaling that the eggs are cooked.  This will take at least 5 minutes.  Stir in water and vanilla.  Set aside to cool slightly, but it should still be fluid.

3.  Whip egg whites and sugar into a sturdy meringue.  Fold into the chocolate.  (Why you used a comically huge saucepan for a cup of chocolate.)  It's ok if there are still some lumps, because you're going to mix it again in a bit.
4.  Whip the cream to soft peaks.  Fold into the chocolate mixture until no obvious lumps remain.

5.  Pour into serving bowl, individual ramekins, or whatever you're going to store it in.  Don't worry if it seems too thin now; it will firm up after an hour or two in the fridge, once the chocolate hardens.  Chill before serving.

6.  Top with dollops of whipped cream and chocolate shavings before serving.  Or, use as cake or pastry filling.  It can be run through a pastry bag with a delicate hand so you don't deflate the egg whites.  Just keep the designs chilled so they hold shape.  You can add it to softened chocolate buttercream icing to give it a smoother texture and to make it easier to pipe.

Makes about 4 cups, 8 to 10 individual servings

Difficulty rating  :)

Tuesday, July 24, 2018

Chocolate Cake

This is the recipe from the back of Swan's Down cake flour.  Aside from making it scaled to 2/3 for a 6" cake, I left it intact.

I really wish 6" cakes were more popular.  They're dinner-party sized.  Way back when, someone decided that a 2-layer 8" cake should be the standard.  Now that height is a trend, a 3 or 4 layer 8" cake feeds an army and half of each slice goes uneaten.  Reducing it by one egg and 2" of diameter still gets you two slightly thicker layers.

My cakes domed and cracked, even with the baking strips.  More snacks when they were trimmed, but I was hoping for better height in my layers.  I sliced the thicker one into two anyway.  This would be a benefit if you're making cupcakes.  It's only annoying if you want a flat cake.  I'm guessing it's because there's baking soda instead of baking powder in the recipe, but I don't feel like fixing this recipe today.  I have at least three more cakes to recipe test by the middle of September.

I did make one accidental substitution.  I wasn't paying attention and bought sugar-free chocolate instead of unsweetened.  To make up for this, I measured the sugar in this cake level and not packed.  It's really good chocolate and melts well.  I usually taste the difference with artificial sweeteners, but I'd buy this again.

3 oz unsweetened chocolate, melted
1/2 C (1 stick) unsalted butter
2-1/4 C light brown sugar, packed
3 eggs
1-1/2 tsp vanilla
2 tsp baking soda
1/2 tsp salt
2-1/4 C cake flour, sifted before measuring
1 C sour cream
1 C boiling water

1.  Preheat oven to 350º.  Grease two 9" round pans (or 2 8" round by 3" deep pans) with shortening.  Line with wax paper and grease again.  Fit with damp cake baking strips if available.

2.  Cream butter until smooth.  Add brown sugar and eggs.  Beat until light and fluffy.  Beat in vanilla and chocolate, then baking soda and salt.
3.  Add flour alternately with sour cream, beating until smooth.  At this point, you have a thick batter. Pour in the boiling water and stir until you get a very thin batter.  Pour into prepared pans.
4.  Bake about 30 minutes, until it passes the toothpick test.  I ended up adding 12 more minutes, but my cakes were thicker than the original recipe intended.  Cool in pans for 10 minutes.  This is a delicate cake.  Turn out and remove the wax paper.  Cool completely before frosting (or freezing to ice on a less scalding hot day).

Makes one 2-layer cake, about 16-20 servings

Difficulty rating  :)

Sunday, July 22, 2018

Summer Gourding

This summer has not been entirely about cake.  I do have other hobbies, including gardening.  The heat wave right after 4th of July did wonders for the pickling cucumbers, watermelon, and butternut squash.  I lost the celery, though.  It couldn't take three days of 100º.

Continued warm and humid weather is exactly what the summer garden needed.  It felt like only days before the cucumbers went from blossoms to big fat pieces that had to be canned.  I made a quart of Grandma's Dill pickles, but sliced them into spears first.  They were less intimidating that way.
Before I knew it, itsy tiny butternut squash girl buds were forming.  The watermelon had been blooming for a while, but only started putting out girls the same week the butternut did.  Allergy time, but it's worth it.
I'm going to have a huge crop of fennel seed this year.  I let two go this time, and they're huge.  You can't tell from the photo, but one of them is almost as tall as I am.  It looks more like a small tree than a vegetable.

I'm really going to enjoy this harvest season.  Variety is so much more fun than a lot of one thing.  I even seeded some new carrots, so they'll be ready when it's time to pull out all these vines.

Friday, July 20, 2018

Marbled Fondant Cake

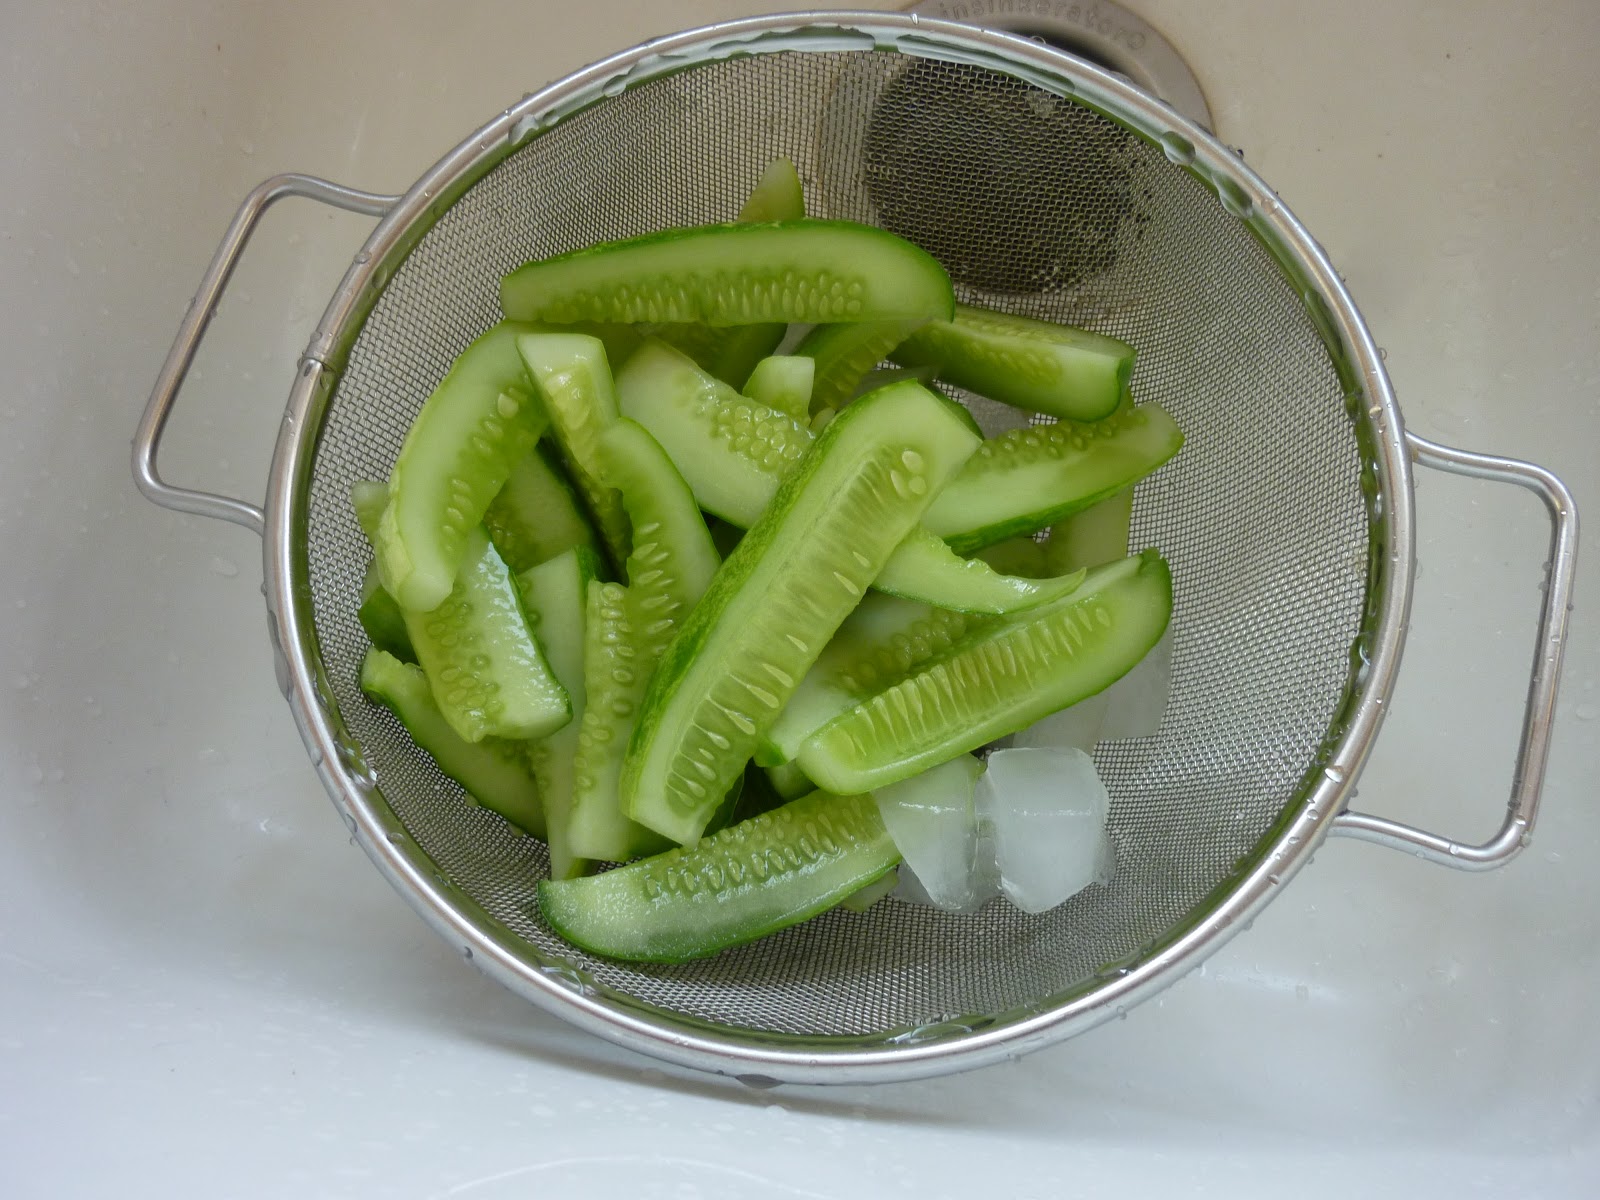
Today's decorating technique is marbled fondant.  Ridiculously easy and gorgeous.  What better way to coat a marble cake!

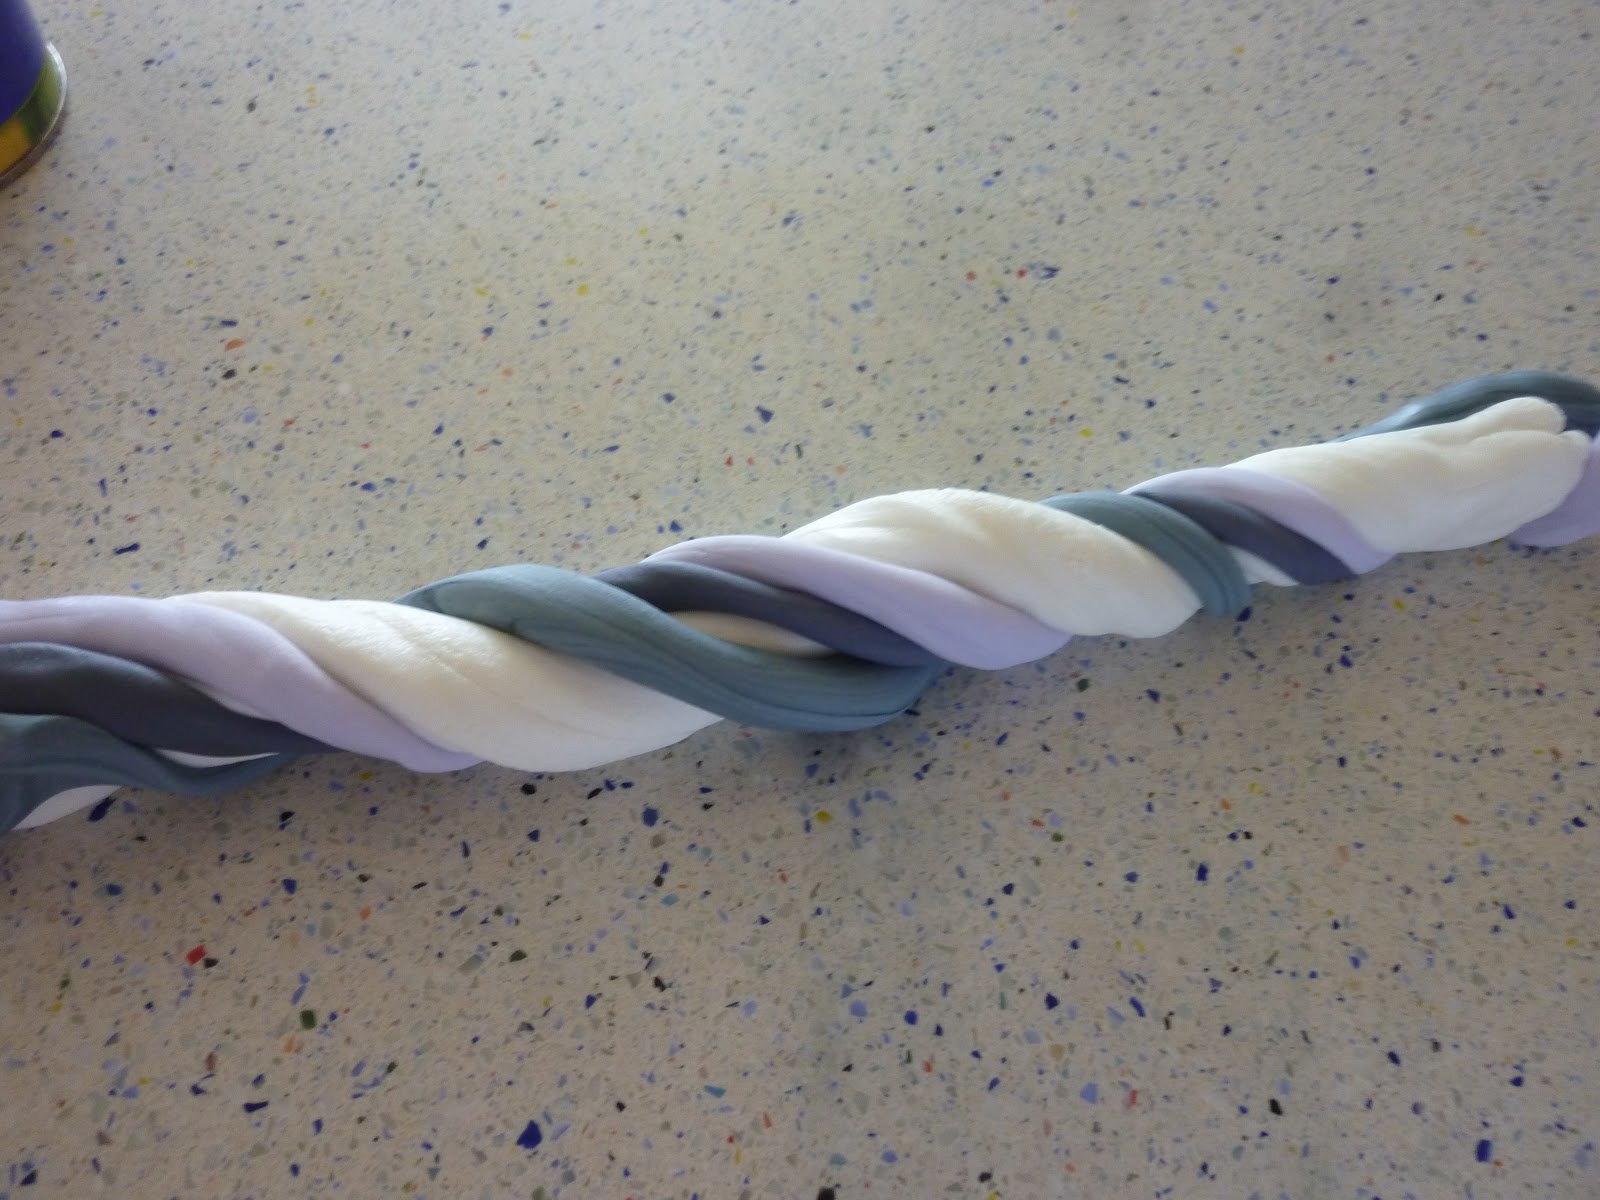
If you've ever seen taffy being made, marbled fondant is a lot like that.  You make ropes of the colors you want to incorporate.  In this case, half of it was white, with some grey, pink that I added black to until it turned dark grey, and leftover lavender from the Princess Cake.  You twist them together, fold it over, twist again, and repeat as much as you want.  When you roll it out, you get streaks and blobs, with a little showing through from the back.  No two roll-outs will ever be identical.  If you're making multiple tiers, make all you need of one color at a time, then split it up for the different twists.
I felt like the effect looked like a design out of the 1980s.  Maybe because of the colors, which were very much in fashion around 1982, right before neon took over.  I had a lot of grey and pink clothes.  I'd probably twist the fondant a lot more if I did this again, or use less of the accent colors and pick one to dominate 75%.

I also practiced chocolate curls, since Cousin Smurf expressed an interest in having them on or around her cake.  I actually found pre-made mini curls at the cake supply shop, but she wants something that looks handmade.  Well, if she wants that, they're going to look like crap.  There was maybe a ten second stretch on each swipe that I could get the curls I wanted.  And various chocolates hardened differently.  The white barely needed a refrigerated tile, while the Nestlé's wanted a frozen one.  The sugar-free chips (not unsweetened) hardened into a leathery sheet, which I could roll by hand.  I'm going to try to talk her out of that.
This is my last fondant cake for a while, but I do have enough left for one more 6" at some point.  Cousin Smurf wants buttercream, so I have only one more cake scheduled that doesn't use it.  Up until the next cake have been to show her other options.  Then I'm going to be focusing on recipes and techniques I'll actually be using when I go to Virginia.  At least, until she changes her mind.

I'm going to be trying a meringue buttercream in the near future, but not if it's getting covered in fondant.  We're going basic on this one and drizzling the filling with more melted chocolate.  I've been watching Man About Cake on YouTube.  I don't like his decorating style, but the techniques are things I can use.  He did this on his marble cake.

Marble Cake, sliced in at least 2 tiers
1 oz unsweetened chocolate, melted
1 batch buttercream frosting
*1 lb prepared white fondant
gel coloring (not water-based drops)
corn starch for dusting board
1 oz each white and dark chocolate for making curls

1.  Trim cakes flat.  Place bottom one normal-way up in center of cake circle, "cemented" by a dab of icing.  Spread a layer of icing to be the filling.  Drizzle with melted chocolate.  It gives a really cool crunch and extra zap of chocolate, because it isn't a good idea to use chocolate buttercream with a light-colored fondant.
2.  Center the trimmed top layer upside-down over the bottom.  This is a pastry chef trick to get the flattest top possible.  Spoon a generous amount of icing on top.  Coat the top, then work it down the sides and into all the nooks and crannies.  This is your "crumb coat".  It's purpose is to keep the crumbs on the cake and not in the top coat.  It's your primer.  That's why it's ok to see bits of cake peeking through, where evening it out leaves bare patches.  Once the icing is as smooth as you can get it, freeze the cake for at least 2 hours.  Days is fine.
I can fix this later
3.  Once you put on the fondant, you can't freeze the cake again.  Keep this in mind for your timing.  You can only refrigerate it, which means it will go stale in a few days.
4.  Dust a flat, texture-free work surface with corn starch.  Divide fondant into however many colors you want to use, and in whatever size you plan to distribute the colors.  Use gel food coloring so you don't disrupt the moisture content of the fondant with water-based colors.  Knead the gel color into the fondant until you get the color you want.  It's ok to have streaks, since you're marbleizing anyway.
5.  Form your different colors of fondant into ropes the same length.  Grab them into a single rope and twist several times.  Fold rope in half and twist again.  Repeat until you have the degree of color distribution you want.  Pay attention that you don't over-mix into one peculiar color.
6.  Place the twist on your work surface and press down with the roller.  Roll until you get a circle-ish at least 4 inches wider than your cake.  More, if you made a really tall cake.  They're in fashion right now.  Personally, I prefer no more than 3 layers.  Any taller, and even a small slice is daunting.

7.  Get the cake out of the freezer.  Heat an offset spatula and use it to smooth the buttercream even more, until it's as smooth as you can get it.  Drape the fondant over the cake, and center before you start to work it down the sides.
8.  Gently coax the fondant where you want it to go.  It's going to take a few minutes.  Too fast, and you'll tear it.  Once it's smooth all the way to the base of the cake, trim off the excess.

9.  The cake is done at this point, or you can decorate further.  I did the curls, secured at the bottom with a thin layer of icing.  To do those, melt chocolate, spread onto a clean tile that you had in the freezer for at least 15 minutes, and push against it with a bench scraper at a low angle.  The joy of this is that any product you hate can be re-melted and tried again.  Then I dusted the top of the cake with edible silver dust and topped with the best of the dark chocolate curls, plus white chocolate fails.

Makes one 8" cake, about 12 servings

Difficulty rating :-0

Wednesday, July 18, 2018

Marble Cake

I'm getting all cocky now, tweaking a recipe out of a cookbook the first time I make it.  It wasn't a hard decision.  The recipe tells you the cake is going to be cracked, so there's obviously something wrong with it.  I subbed in half cake flour to reduce the gluten content and used whole milk instead of evaporated for water:milk solids ratio.

There was a lot of math in this one.  1/3 cake in a 6" pan when I didn't want to make a 9", argh.  Then I made it again, using margarine instead of butter and a regular aluminum pan instead of aluminum springform.  The butter one is on the left, margarine on the right.  The butter cake was more dense, but they both ended up the same height after being trimmed flat.  They both also developed the bubbles on top that you can see in the top photo, which were trimmed off for layering.  If you're not going to cut, fill, and frost, they'll be visible.
Neither of the cakes domed as much as I was expecting, though the margarine one domed more.  I'm attributing this to the cake pan band.  The photo in the Bible had a significant dome, which you would expect from a 9" diameter cake.  The outside is bound to bake much faster than the middle without something to even out the heat.  The original recipe has you dusting the top with powdered sugar and serving it coffee-cake style, so that was never something the author cared about.  Or maybe that was their solution to a recipe they couldn't fix.

2 ounces unsweetened chocolate
1-1/4 C sugar
1/4 C water
1 tsp vanilla
1/2 C butter (one stick), softened
1 C AP flour
1 C Cake flour
3/4 C whole milk
3 eggs
2 tsp baking powder
1/2 tsp salt
1/2 tsp baking soda

1.  Grease a 9" springform pan, line with wax paper, and grease again.  Preheat oven to 350º.

2.  Over very low heat, melt chocolate with water and 1/4 C sugar.  This can be done in short bursts in the microwave or on the stove.  Stir in vanilla and set aside to cool a bit while you make the cake batter.

3.  In a mixing bowl, combine both flours, baking powder, salt, and baking soda.  Add butter, eggs, and milk.  Beat at low speed until combined, scraping bowl.  Beat on high for 5 minutes, scraping the bowl occasionally.

4.  Remove 2-1/2 C batter.  This is your white cake.  Beat chocolate mixture into the remaining batter.

5.  Spoon alternate amounts of batter into cake pan.  At some point, I gave up and just started scraping it out of the bowls.  With a knife or toothpick, draw lines down the batter to form the feather pattern.
6.  Bake 55 to 60 minutes, until toothpick comes out clean and it's just starting to look browned.  If you didn't use a cake band, the top will be cracked.

7.  Cool in pan for 10 minutes on a rack.  Remove sides of pan and cool for 5 more minutes before trying to remove bottom and wax paper.  The two different flavors sometimes try to come apart from each other when you peel it.

8.  Once completely cooled, cake can be frozen.  To serve, either trim and frost or sprinkle with powdered sugar and serve "naked".

Serves 12

Difficulty rating  :)

Monday, July 16, 2018

Tea Party 2018

I introduced the crew at work to a proper High Tea.  Also, because I found out late that I had the day off and pulled this year's tea together in a week.

Mostly, I had nervous energy because Princess had to have radioiodine therapy for hyperthyroidism.  She had several benign tumors on her thyroid.  Giving her two pills a day was not an option, especially once she started to feel better and could fight me.  In the cost-benefit analysis over the year or two I expect her to live (she turns 19 in August), $1,000 for the probable cure balanced out against the cost of her meds, prescription food, frequent doctor visits, and my visits to urgent care whenever she bit or scratched me too hard.  Anyway, I had to take a few days off work because they couldn't supply a return date until the procedure was done, and the tea gave me something to do.  Turns out, my appointment to pick her up was three hours before the party!  It meant I couldn't procrastinate, which is a good thing.  I had everything baked and ready to assemble before I got her, and put on the finishing touches after.

Besides, I'm still bitter about not getting a day off last year to have a tea party!

First Course
California Roll Sandwiches
Deviled Eggs
Tuna Salad Sandwiches
White Bean Hummus on Endive
Tomato-Chive mini-Quiches

Second Course
Scones
Double Cream
Homemade Jams

Third Course
Charlotte Royale
Chocolate Almond Palmiers
Fresh Fruit

Drinks
Hot Tea Assortment
Lemonade
Basil Iced Tea (Black tea and basil brewed together, then chilled)

Saturday, July 14, 2018

Chocolate Almond Palmiers

I've never made palmiers before, but I needed a dairy-free dessert for the tea.  I had a sheet of puff pastry in the freezer, and these are notoriously much easier than they look on the plate.

Palmiers are named because they are supposed to resemble a pig's ears.   That's if you do the rolled-up version.  I like the folded one that looks more like a fanned palm leaf.  There's less chance of an exposed arm of the roll burning before the spiral bakes.

I'm growing fond of rolling stuff out directly on the kitchen counter.  It's some kind of amalgam stone, so as long as I clean it before and after, it's like having a marble work surface.  Some things work better on the wood board, like kneading bread or dealing with sticky things.  Fondant, pie crust, and puff pastry do very well on the stone.

1 sheet puff pastry, thawed according to package directions
1/3 C sugar
*2 Tb cocoa powder
*1/2 C sliced almonds

1.  Preheat oven to 425º and line two baking sheets with parchment or a silpat.

2.  Combine sugar and cocoa powder into chocolate sugar.  Place the almonds in a ziplock and smash into small pieces, but not as fine as almond meal.

3.  Sprinkle half of the chocolate sugar on a work surface.  Lay puff pastry on the sugar and sprinkle the rest on top.  Roll out pastry sheet into a 13"x13" square, smashing the sugar into it in the process.  Sprinkle the top with almonds.
4.  Fold in two sides halfway to the middle.  Then fold over again until they meet in the middle.  Fold those halves again into a single "book".  It's six layers.

5.  Using a very sharp knife, make crosswise slices less than 1/2" thick.  Place slices flat on the baking sheets, 12 to a pan.  Leave a lot of space between because they're going to spread out a lot.  If there's any chocolate sugar left on the board, use it to dust the tops of the slices.

6.  Bake for 6-7 minutes, until tops get crispy.  Flip the cookies and bake the other side for 5 minutes. Since they're chocolate, you can't go by color.  By the time they look done, they're burnt.  Remove to a rack until cooled and crisp.  Store in an airtight container or in the freezer.

Makes about 18

Difficulty rating π

Thursday, July 12, 2018

Charlotte Royale

Here's another cake I found on YouTube.  It's time-consuming and has many components, like the Swedish Princess Cake, but isn't as hard as it looks.  And you don't have to frost it.  It was never a contender for the wedding cake.  I used it to test the consistency of the White Chocolate Mousse.  Then I added gelatin (suggested by YouTube) to keep the cake from imploding.

As described in the Jelly Roll post, there are variations on this cake.  You can make a mocha roll for the outside and fill it with ice cream.  The most traditional seemed to be raspberry jam in the cake and raspberry cheesecake filling.  I used the gelatin-stabilized white chocolate mousse infused with strawberry-lavender syrup, and mixed berry jam in the cake.

The bowl part had me stumped.  All of my bowls have either a flat bottom or a dent in them.  Because a perfectly round bowl will roll everywhere.  Even the stand mixer bowl has the concave dent so you can rest it on a counter.  I finally realized my strainer is perfectly round and has a built-in stand, so I lined it very well with plastic wrap, much better than I would have a bowl.  I did not want to have to wash gelatin mousse out of the mesh.

I recipe Jelly Roll
1 recipe White Chocolate Mousse
2 envelopes unflavored gelatin
*4 oz strawberry syrup
8 oz fresh strawberries
Powdered sugar for garnish

1.  Dissolve gelatin in 1/2 C cold water and allow to bloom.  Warm the strawberry syrup until it just starts to boil.  Remove from heat and stir in gelatin.  Allow to cool on the counter while you prep the cake.

2.  Line an 8" diameter bowl with plastic wrap.  Slice the jelly roll into 1/2" thick slices.
3.  Starting in the middle, arrange slices as tightly as you can, all the way to the top of the bowl.  When you get to the top ring, you'll have to cut some of the slices into creative wedges.  Any holes you leave will be filled with mousse.  It isn't a tragedy, but you want to minimize the leaks.  One advantage of using the strainer was I could hold it up to the light to look for holes.  Hopefully, you'll have several slices left at this point.  If not, take off half a layer.
4.  Slice or quarter the strawberries.  Separately, beat the prepared mousse to break it up if it has chilled too firm.  Beat in the strawberry gelatin mixture until smooth.  Pour into the middle of the cake, then drop in the strawberry slices and allow them to sink in.
5.  Top with remaining cake slices.  Refrigerate until set, at least 4 hours.  For longer storage, or if the cake will be left at room temperature longer than 4 hours, freeze until solid.  The mousse is almost an ice cream recipe, so it's fine.  Remove from freezer about 2 hours before serving and invert onto serving platter.  Remove plastic wrap and sprinkle with powdered sugar.


Serves 10-14

Difficulty rating  :)

Monday, July 9, 2018

White Chocolate Mousse

I had a remarkably difficult time finding a recipe for this I liked.  Actually, I never did, so this is a variation on pastry cream.

We're going to start here with explaining that white chocolate is not chocolate.  It's what's left when you take all the chocolate out of a cocoa bean.  And it's usually drowned out by so much vanilla that you don't even taste the cocoa butter.  What it does for this recipe is supply extra fat and smoothness to a base that can now be enhanced by fruit, nuts, or beating in some alcohol.  It also works as cake or pie filling.

I'm starting with the Bible's pastry cream recipe and adding melted white chocolate to it.  Actually, I got halfway through the recipe and realized I was out of white chocolate, so I subbed in yogurt chips. Can we go back to the part where I don't believe in white chocolate?

3/4 C sugar
1/4 C flour
1/4 tsp salt
1-1/2 C milk
6 egg yolks
1-1/2 tsp vanilla
1/2 C white chocolate
1-1/2 C whipping cream

1.  In a medium saucepan, stir together sugar, flour, and salt.  Add milk and stir until dry ingredients are dissolved.  Heat over medium low, stirring constantly to avoid scorching, until it boils.  This will take up to 10 minutes, but don't turn up the heat.  If the bottom of the pan scorches, you have to start over.  The mixture will get very thick as the flour cooks.
2.  Lightly beat the egg yolks.  Stir in a few spoonfuls of the hot milk to temper the eggs, then return the yolks to the saucepan.  Lower the heat to a simmer and cook until the mixture clumps off the spoon.  Do not boil it, or you're going to have a vanilla omelette.  Remove from heat and stir in vanilla and white chocolate chips.  Keep stirring until the chocolate melts.
3.  Place a piece of plastic wrap touching the mixture so it doesn't form a skin.  Refrigerate until completely cooled, about 2 hours.

4.  Beat the cream to stiff peaks, just short of butter.  I recommend the stand mixer.  Beat into cooled cream custard until uniform.  It only takes a minute to get everything mixed.  The mousse is now ready to be used.  It can be cake filling, pie filling, cream puff filling, or even a dessert on its own.  If desired, you can beat a tablespoon of liqueur into the cream before combining it with the custard.  Vanilla and white chocolate are both blank slates.

Makes about 4-1/2 cups

Difficulty rating  :)

Friday, July 6, 2018

Jelly Roll

Here was an easy way to use up a jar of last year's jam.  Again, I'm not fond of jam cakes, but it's part of my learning process.

Jelly rolls have to be made with all-purpose flour, so they don't fall apart when you roll them.  They need structure.  And there isn't any butter or shortening.  The only fat is from the egg yolks.  This means this cake isn't going to be moist.  That's what the jelly filling is for.

You can use the techniques here for any kind of rolled cake, just like you can change the fillings in a cinnamon roll once you've made the basic dough.  You can make a chocolate cake and do a mocha roll, or a Yule log, or any other kind of rolled cake.  The main difference between the way I'm making it today and most jelly roll recipes is that I'm rolling it from the long side instead of the narrow one.  The narrow one makes larger slices that are a full serving.  Going up the long side produces smaller and far more slices, which are better for tea or if there's more than one dessert.  At a potluck, you can serve twice as many this way, and guests are more likely to take a slice when there are multiple desserts.

The downside was that I had to make a full-sized cake.  It's really hard to roll a small one.  You could stack it, though.  This recipe would work for petit-fours.  The tiny cubes would hold up to cutting and frosting better than a cake-flour cake.  This batter is also very thick and could be piped into ladyfingers or Nilla-style cookies.

3/4 C flour
1 tsp baking powder
1/2 tsp salt
4 eggs, separated, at room temperature
1/2 tsp vanilla extract
2/3 C sugar
about 1/2 C powdered sugar
10 oz smooth jam or jelly of choice

1.  Grease a 15-1/2" by 10-1/2" jelly roll pan (or as close as you can get) with shortening.  Line with wax paper, then grease again.  The cake is only going to be about half an inch high, so don't worry if the paper barely goes up the sides.

2.  Preheat oven to 375º.  In a small bowl, combine flour, baking powder, and salt.  Set aside.
3.  In another small bowl, beat egg whites until soft peaks form.  Slowly add 1/3 C sugar and beat to firm peaks.
4.  In a larger bowl, beat egg yolks until pale and fluffy.  Add 1/3 C sugar and beat until lemon-colored and falls in ribbons.  Beat in vanilla.

5.  Fold flour into egg yolks until it barely starts to combine.  Add the egg whites and fold everything together until uniform.  Don't stir hard or beat the batter.  You'll deflate the egg whites and create too many gluten strands.
6.  Pour batter into prepared cake pan.  Spread with an offset spatula, trying not to deflate the batter too much.  Make sure it gets into the corners.  Bake for 12 to 15 minutes, until slightly golden and top of cake springs back when touched.

7.  While cake is baking, sprinkle 1/3 C powdered sugar on a clean dish towel.  Think of it as flouring a board for rolling out pie crust or cookies.  As soon as you pull the cake out of the oven, invert it onto the towel.  Be careful; I burned my arm.  Remove wax paper.
8.  Roll up cake, with the towel inside where the jam will be.  This way, the cake cools in the roll shape and does not tear later.  Place on a cooling rack until room temperature.

9.  Unroll cake.  You can leave the towel under it, since it needs a wash at this point anyway.  If the jam is too thick, thin with a bit of warm water.  Spread over the inside of the cake.  I stopped a little short of the inside, so it wouldn't be a double layer, and kept it thin at the outer edge in case anything squished forward.  The left and right sides should have jam all the way to the edges.
10.  Roll the cake back up, minus the towel.  Cut off the two outer ends and snack on the crusty edges.  If serving right away, plate and dust with powdered sugar.  If serving later, wrap in plastic so it doesn't dry out and refrigerate.  Dust with the sugar when ready to serve.

One roll is at least 12 servings the long way and 8 the short way

Difficulty rating  π