Tuesday, March 29, 2016

Carrot and Beet Slaw

For this year's Purim vegetarian meal, I raided my very productive garden and used the other half of the cabbage from St. Patrick's Day.  It was my first beets, and a way to use another carrot.  I love how awesome the carrots are coming out, but I need to get them pulled and eaten so I can plant the next round that I have starting in seed trays in the kitchen window.

I'm finding more and more recipes on The Chew.  Maybe it's because they've been around long enough to start popping up on searches.  I don't seek out their recipes, but this one happened to use ingredients I had on hand or could come up with an equivalent.  Not having to shop will always move a recipe to the top of my list.

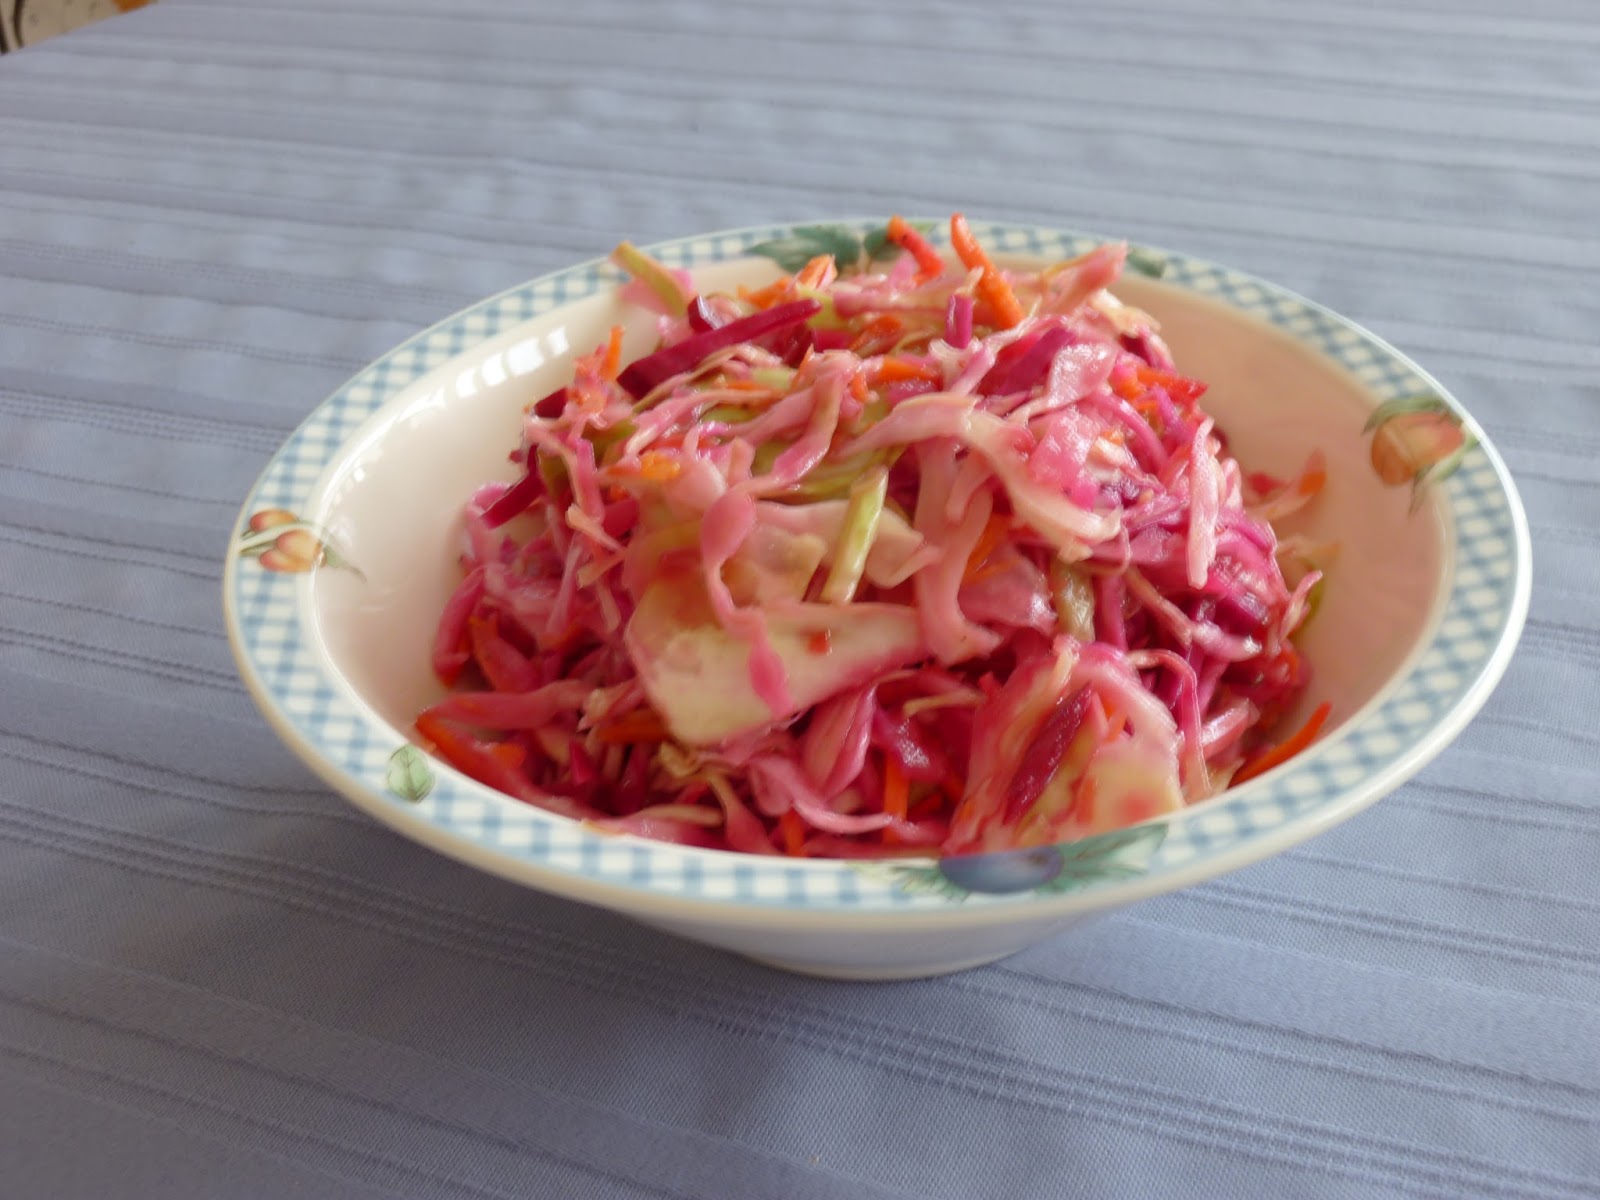
I was a bit skeptical about a slaw without dairy or mayo.  This turned out to be a lot like sunomono, and very refreshing.  The sugar comes from the beets and carrots, so you don't have to add anything other than a little honey, which is more for flavor than sweetness.  I ended up with a higher proportion of cabbage and less beets, but that worked because the beets didn't bleed all over everything until it was one uniform color.

And the V-slicer attachments made it super easy to make beautiful julienne slices with the beets and carrots, as long as I had it out for the cabbage anyway.  A box grater or the shredder on a food processor would be just as good if you don't feel like using knife skills.

*1/2 medium cabbage
*2 medium carrots
*2 beets
*zest and juice of 2 lemons
*2 Tb rice vinegar
1/4 C vegetable oil (not olive oil, because it solidifies in the fridge)
*2 tsp snipped chives or minced onion
*1 Tb honey
*1" fresh ginger, peeled and grated, or 1/2 tsp ground ginger
salt and pepper to taste
1/2 tsp chili flakes (optional)

1.  Thinly slice cabbage and discard core.  Peel carrots (peeling beets optional) and slice carrots and beets into a julienne, or matchsticks if you want more crunch.  Rinse beets in a strainer to get out some of the juice.

2.  Toss together cabbage, carrots, beets, lemon zest, and onion in a large bowl.

3.  In a separate bowl, whisk together lemon juice, vinegar, oil, honey, and ginger.  Taste and add salt, pepper, and chili flakes to taste.

4.  Pour dressing over vegetables.  Toss to coat evenly.  Refrigerate for several hours or overnight to marinate before serving.

Difficulty rating  :)

Saturday, March 26, 2016

Ranch Dressing

This idea was born of my ongoing problem of having planted too much lettuce, plus the new problem of buying a quart of buttermilk for the Irish soda bread and only using half of it.

When I was trying to figure out how to use the buttermilk, I realized that I had no idea what goes in ranch dressing.  Buttermilk, and um… green herbs of some kind.

The recipe I settled on seemed harmless enough, and rather forgiving.  I used all the chives on my lone plant and only had half as much as the recipe directed.  I subbed in some cilantro and yellow onion to make up the rest.  You could use fresh parsley if you have it.

All of the online recipes were rather snobby about using "good quality" or "real" mayonnaise.  I used my vegan mayo and couldn't tell the difference.  The buttermilk was the lower-fat option because I don't like super-thick, chunky milk.  I also used fat free Greek yogurt for sour cream, as is my usual substitution.  As a result, I'm assuming my version is much lower in fat, calories, and cholesterol than the original recipe.  Oh, and I used half as much salt.  I didn't set out to make "Lite Ranch", but that seems to be what happened.

A brief word of warning about the yield.  Unlike store-bought dressing, this batch is going to spoil in about a week.  Between the fresh dairy, fresh herbs, and lower salt content, you shouldn't make a giant batch to keep around.  This is about the largest amount you're likely to go through unless there's a party.

1/2 C Nonfat, plain Greek yogurt
*1/2 C buttermilk (or more to thin)
*1/4 C mayo
* 2 cloves garlic, minced
1/2 tsp salt
1/4 tsp pepper
*1-1/2 tsp dried dill
*1/4 C fresh chives, finely chopped
*2 tsp lemon juice
drops of tabasco or a shake of cayenne if you like spicy

1.  Place all ingredients in a bowl.  Whisk until smooth.  If thicker than you like, add buttermilk to desired consistency.

2.  Chill until ready to use.  Keeps about 1 week refrigerated.

Makes about 1-1/2 cups

Difficulty rating  π

Wednesday, March 23, 2016

Corned Beef and Cabbage Potato Gratin

This is why I made the corned beef.  This recipe aired on The Chew last month as ham, to celebrate "The Martian".  As they were putting everything together, I realized this would be perfect for St. Patrick's Day if you used corned beef.  It's a Reuben sandwich with potato instead of bread, and potatoes are an Irish flavor.

There were some differences between what was on the show and the published recipe.  I made it more like the show, including the larger pan.  I don't know who thought you could get this in an 8" square casserole.

All of the work in this is the prep.  Slicing the cabbage and the potatoes takes the most time.  I did get gorgeous potato slices off the V-slicer, but I'm assuming a food processor's slicing blade would do just as well.  It was nerve-wracking watching the show, with Daphne not looking at her hands as she sliced the potato on the V-slicer without a cut glove.  I don't care how good a cook you are, that is a dangerous piece of equipment.  But the slices are so pretty.

1/2 medium cabbage, thinly sliced
1 Tb butter
2 cloves garlic, minced
2 C chopped corned beef
2 medium russett potatoes, very thinly sliced
1 C heavy cream
1/2 tsp paprika
1/8 tsp pepper
2 C shredded Swiss cheese (about 8 oz)
salt to taste
parsley and chives for garnish

1.  Grease a 9" x 13" casserole (I used butter).  Melt butter in a large, deep skillet and add garlic and cabbage.  While that's cooking down for about 5 minutes, slice potatoes, chop corned beef, and shred cheese.

2.  Taste a bite of the corned beef and the cheese before proceeding.  Both cream and potatoes dull the sense of salt.  If the ingredients seem okay or bland, you'll need to add salt.  If your corned beef is a bit on the salty side, you can skip it.

3.  Preheat oven to 375º.  Add corned beef, pepper, and paprika to the cabbage and continue to cook until cabbage is thoroughly wilted and beef is warmed.  You don't want the cabbage giving off too much liquid when you get this thing in the oven.  Add up to 1/2 tsp of salt at this point if you think you need it.

4.  Arrange half of the potato slices on the bottom of the casserole, overlapping slightly.  Pour half of the cream on them and sprinkle with half of the cheese.  Cover with all of the cabbage mixture.  Top with the other half of the potatoes, the rest of the cream, and the remaining cheese.

5.  Cover casserole with foil and bake for 45 minutes.  This will allow the potatoes to steam.  Remove foil at that time and bake an additional 15-20 minutes to brown the cheese.  Remove from oven and sprinkle top with chopped parsley and chives as garnishes.  Allow casserole to cool for about 10 minutes before trying to serve.

Serves 4-6, depending how many sides you have.  I had half of one of my awesomely huge carrots with mine.


Difficulty rating :-0  (for the slicing)

Sunday, March 20, 2016

Corned Beef

My mom used to love St. Patrick's Day because it was an excuse for her to make corned beef and cabbage.  None of us liked it, but we had to suffer through it every year.  After I grew up and moved out, it was many years before I would even eat corned beef.

Then we made it in culinary school from scratch.  Like growing your own veggies, doing a big project like this makes you appreciate the process and the product.  While corned beef was still not my first choice, it was no longer something to avoid.

I went through several recipes before deciding that Alton Brown's had the easiest math for the size of the brisket I had bought.  The main substitution, and what I'm posting here, is using Prague Powder #1 instead of saltpeter.  Either will give the brisket that pink color, but plain pickling salt won't.  Even in L.A., I had to order it online after going to a whole lot of specialty markets.  One pound is a lifetime supply, enough to cure over 200 pounds of meat.  It's a bit nerve-wracking to receive a food product that is clearly labeled "toxic, use only as recipe directs", but technically nutmeg and rhubarb leaves also fall in the toxic category.

And yes, this is a horrendous list of ingredients that you may never use again.  I hit the spice bins at Sprouts for the odd things like Allspice and Juniper berries, plus one-offs for other recipes I had planned.  Since I got so little of each spice, she just weighed all the bags at once and I paid something like 50¢ for all of them.

Just a heads up on timing.  You need about a two-week lead time for this.  4-5 days for the Prague Powder to arrive (unless you have Prime) and a minimum of 7 days brining.  I did 7 days and there was one tiny half-bite in the middle that didn't cure.  12 more hours would have been enough.  Don't look at this recipe today and expect to have everything done tomorrow.  The actual process is beyond easy, but you have up to 10 days of inactive time.

2 quarts (8 cups) water
1 C kosher salt (2/3 if you want lower sodium)
1/2 C brown sugar
1 tsp Prague Powder #1
*1 cinnamon stick, broken (optional)
*1 tsp mustard seeds
*1 tsp whole black peppercorns
*8 whole cloves
8 whole allspice
12 whole juniper berries
*2 bay leaves, crumbled
1/2 tsp ground ginger
2 pounds ice
1 4 to 5 lb brisket, trimmed to 1/4" fat or less
2 C mirepoix (onion, carrot, and celery trimmings)

1.  In a large stockpot, place water and next 11 ingredients (down to the ginger).  Bring everything to a boil, stirring occasionally.  Boil for at least three minutes, to make sure all the salt and sugar are dissolved.  Remove from heat.  Add ice and stir to dissolve.  If brine is not yet cooled to at least 45º, place in refrigerator.

2.  Get out a casserole dish at least 2" deep.  Place brisket in a 2-gallon plastic bag in the casserole.  Add brine to fill the bag and squeeze out as much air as possible.  The brine should cover all sides of the meat.  Lay flat in the casserole and refrigerate.  Turn daily and squeeze bag to distribute brine evenly.

3.  After 10 days (minimum of 7 if you're in a rush), remove brisket from the bag and rinse thoroughly. Place in a pot just large enough to hold it.  Add the mirepoix and add water to cover by 1".  Bring to a boil over high heat, then cover and reduce to a simmer.  Cook for 2-1/2 to 3 hours, until meat is fork tender.  Remove meat from the water and discard the mirepoix.  Slice cooled brisket thinly across the grain and serve hot or cold.

Makes about 50% to 60% of original brisket weight

Difficulty rating  :)

Thursday, March 17, 2016

The Most Beautiful Carrot

After the ugly carrot debacle in the front planter, I really did not have much hope for the ones in the Pond.  I decided to pick the first one of the batch for tuna salad, since I was only making two servings and it didn't matter if it was a small and gnarly carrot.
What came out of the ground was gorgeous.  There was a little nibbling at the bottom by some kind of bug that I cut off, but the rest looked like something cast in fiberglass for a theme park decoration.  There weren't even many root fibers to peel off.  It was just better than anything I had ever seen in the market.

I'm really feeling better about my gardening ability after that.  My first round of beets is almost ready to pull.  I started some celery in the front pot, but those take three or four months.  I'm starting more beets inside so they'll be ready to transplant when the first round is done.  The basil are getting their first real leaves.  And of course, I'm finding every excuse to use the salad greens.  It's still too early to use the kale, but she's growing well.

Oh, and the carrot tasted great.

Monday, March 14, 2016

Irish Soda Bread

I'm doing a full St. Patrick's Day this year.  More on that in upcoming posts.  I'm not sure I've ever had soda bread.  If I have, I don't think I liked it, but it has been a long time and my tastes have changed.

Caraway and raisins in the same loaf may be why this is an acquired taste.  I don't know how that makes this Irish, but the soda part is because it is a quick bread and not a yeast-raised dough.  It looks like a yeast bread and isn't the high-fat, sweet-laden dough that usually defines a quick bread, hence the confusion (at least my own).  As it was baking, I realized from the aroma that these are just really big scones.

This recipe is from a children's cookbook with a few tweaks, and the method is from the Bible.  The temperature is a compromise between the two.  Both original temperatures made sense in their original recipes, but my changes prompted a slight change in oven temp and baking time.

4 C flour, divided
1 Tb baking powder
1/2 tsp baking soda
1 tsp salt
3 Tb sugar
3 Tb margarine
2 tsp caraway seeds
1 C raisins
1 egg, beaten
2 C buttermilk
1 Tb sanding or crystallized sugar (optional)

1.  Preheat oven to 375º.  Sift together 3-1/2 C flour, baking powder, baking soda, salt, and sugar.  Cut in margarine until it disappears into flakes.  Stir in caraway and raisins.

2.  Reserve 1 Tb each of beaten egg and buttermilk to make an egg wash.  Pour remainder into flour and stir until thoroughly moistened.

3.  Using remaining flour, turn dough onto a board and shape into two round balls.  Place on a greased or lined sheet pan.  Brush loaves with egg wash and sprinkle with sugar.  With a floured knife, cut a 1/4" deep cross in loaves.

4.  Bake for 1 hour.  If loaves don't sound hollow, continue in 5 minute increments.  Cool on baking sheet for 10 minutes, then transfer to wire racks to cool completely, at least 2 hours.

5.  Either serve within a couple of days or wrap in plastic and foil and freeze.

Makes 2 8" loaves

Difficulty rating  π

Friday, March 11, 2016

Stir-Fried Mesclun

It's amazing how quickly things went from "I finally have enough lettuce!" to "Holy crap, that's a lot of lettuce."  The pond looks inundated by pretty weeds, which is what I get for planting mesclun instead of something more mainstream.  The smaller ones in the front are quickly catching up.
Among other searches, I looked up cooking the leaves.  After all, you cook spinach, dandelion, and other greens.  Why not a tender variety of lettuce?  There were mixed results, but most agreed that you shouldn't cook them very long or they would get mushy.  I also found this to be the popular solution to the problem of the giant Costco packages of mesclun that never get finished in time unless there's a party.

*8 C mesclun greens (or part something else)
*1/4 C diced onion
*1 clove garlic, minced
1/4 tsp salt
1 Tb olive oil
1 Tb balsamic vinegar

1.  Wash greens thoroughly.  If they're older and slightly wilted, soak them in ice water for half an hour.  It should reinvigorate them.  Cut greens crosswise in a chiffonade.  It's ok if the pieces are a little big, just cut through the stem several times per leaf.
2.  Drizzle oil in a large skillet.  Add onion and garlic and cook on medium to soften, about 5 minutes.  If part of the greens are tougher (I used some beet greens for almost half of my mix), start cooking them first.  Once they are almost done, add the mesclun shreds.  Sprinkle salt over greens and cook until mostly wilted, 2 to 3 minutes.  Remove from heat immediately.  Drizzle with vinegar and serve hot.

Difficulty rating  π

Tuesday, March 1, 2016

Avocado Dressing

I'll admit, this is kind of a cheat.  It's almost exactly a guacamole recipe with yogurt.  It's still thick enough to be a dip, but thin enough to use as a sandwich spread.  Add a few tablespoons of milk, and you have a pourable dressing.  I put it on my black bean burgers.  A lot also ended up on the side salad, mostly dripped there off the back side of the burger.  Best of all, there is nothing in it that is bad for you.  I didn't even add salt, just spices.

The food processor was already dirty from the burgers, so I rinsed it out and used it for this.  You can do it by hand if you don't mind a few lumps.

1 large, soft avocado
*1 single-serve container fat-free plain Greek yogurt (5-ish oz)
2 Tb fresh cilantro leaves
1/4 tsp paprika
*1/4 tsp garlic powder
juice of 1 lime

1.  Scoop flesh out of avocado and discard pit.  Place all ingredients in food processor.  Run until smooth.

2.  If not using immediately, refrigerate with plastic wrap touching surface to reduce discoloration.

Makes about 1 cup

Difficulty rating  π