Tuesday, November 30, 2021

Big Batch Pie Crust

I finally did it.  I spent an hour making enough pie crust dough for five pies, including cleanup time.  Then I ran out of shortening and called it a day.

I've been watching Acre Homestead on YouTube.  She does a lot of batch cooking, as well as demonstrating various forms of preserving her backyard bounty.  Becky has far more energy than I do, but it's still nice when you can learn a few things. While I'm not going to make a year's worth of pasta in a day or freeze four pans of meal-prep lasagna, five pounds of pie dough is something I can go through during baking season.

I opted for Pie Crust #2, with a slight modification of replacing some of the water with vodka, as a versatile recipe for any size sweet pie that can also work for small tarts, including savory.  It would probably crack on a 10" freestanding tart, but the 4" should be fine.

One thing to know about making multiples of a recipe for baking is that it doesn't always work to just use a bigger bowl.  In this case, I was still planning to use the food processor, so I ran the recipe through four times, then kneaded in the big bowl until ready to wrap.  (I always have a lot of extra dough after making a pie, so I figure four batches equals five double-crusts.)  The benefit of that is any minor differences in hydration during the processing get evened out when you're tossing all of it together with the extra water.  The five discs, divided by weight, can camp out in the freezer until I feel like making a pie.  I can let one defrost on the counter for an hour or two, then roll and fill.

Another way to do this project is to pre-roll and line disposable pie tins, then freeze them until needed, like what you buy at the market in the freezer section.  I opted not to do this because I don't always make the same size of pie, and I'll still need extra dough for the top on the fruit ones.

Yes, it's a bit of work and mess.  And it takes a bit of guts to go through a pound of butter and half a bag of flour in one sitting.  However, batch prepping allows for spontaneity down the line, and I was planning to scrub my counters that day anyway.  When you think about it, you're only cleaning the food processor, wiping down the counters, and doing dishes once, not four times.  By the third time around, I didn't need to look at the recipe anymore.  It also removes the excuse of not feeling like making a crust (or cookie dough, or whatever else you're prepping).  Because, let's face it, whenever you need a treat, you don't feel like making one from scratch.


Saturday, November 27, 2021

Pecan Welsh Cakes

I wanted to make a vanilla pecan cookie, but all the recipes used a ton of butter that I didn't feel like dealing with, not to mention making five dozen off a single egg.  So I came up with these instead.

They're a fairly simple deviation from the last Welsh Cake post.  Pecans instead of currants and a generous amount of vanilla for some of the milk.  I kept the nutmeg, since it goes well with the pecans.  You could absolutely add a teaspoon of maple syrup to replace part of the milk as well.  I almost went that way, then opted for all vanilla instead.  Figured if I really wanted some maple later, I could drizzle it on top.

2 C flour
1 Tb baking powder
1/4 tsp salt
1/4 tsp nutmeg
1/4 C vegetable shortening
1/4 C margarine, chilled
2/3 C sugar
*2/3 C finely chopped pecans
1 egg, beaten
1 Tb vanilla
milk as needed
oil for frying

1.  Into a bowl, sift flour, baking powder, salt, and nutmeg.  Cut in shortening and margarine until mixture resembles oatmeal.  Stir in sugar and pecans.

2.  In a measuring cup, beat egg.  Add vanilla and enough milk to equal 1/2 C.  Pour into dry ingredients and work into a soft but not sticky dough.  Add a teaspoon more milk if necessary.

3.  On a lightly floured surface, roll dough 1/4" thick.  Use a 2-1/2" round cookie cutter to cut out the cakes.  Re-roll scraps until all of the dough is used.

4.  Heat a lightly greased griddle over medium-low heat.  Place rounds on hot skillet and cook until golden, about 3 minutes per side.  If they are getting dark before the tops are set, lower the heat.  If you can smell toasting pecans, they're overdone.  Re-oil griddle and repeat with remaining rounds. 

5.  Dust with powdered sugar and serve warm.

Makes about 2 dozen

Difficulty rating  :)

Wednesday, November 24, 2021

Apple Pie Oatmeal

I still have a lot of canned pie filling from the summer.  At some point, I'm going to do a large batch of pie dough and freeze it for spontaneous use.  All that really keeps me from making a pie a week is whether I feel like making dough.

Seizing on a bit of inspiration, I decided to make a kind of bread pudding with a half-jar of apple filling and a half-recipe of the original baked oatmeal.  That little jar was bothering me whenever I opened the closet.  So do the wide-mouth pints.  It's an aesthetic thing.

I'm also trying to use my canned goods.  I'm not afraid of them spoiling.  I check the seals regularly and nothing is over a year old yet.  You generally get 18 months before product quality starts to fade if stored properly.  The canning just got out of hand this year from playing with the new pot, and I don't know anyone who appreciates home-canned goods as a gift.  I totally get it; if you're not from a family who knows how to home can safely, it's scary to accept that it can be done.

I'm posting here a double recipe, assuming you have a whole can of filling and not just one cup.  The photos will be for my half recipe.

*2/3 C chopped walnuts
2 C rolled or instant oatmeal
*1 can apple pie filling (16 to 21 oz, depending on brand)
1/2 tsp salt
1 tsp baking powder
2 C milk
2 eggs
2 Tb butter, melted
1 tsp vanilla
Pan spray

1.  Preheat oven to 375º.  Pan spray an 8x8 or 9x9 pan, or a 9" cake pan.

2.  In a bowl, stir together walnuts, oatmeal, salt, and baking powder.  Most pie fillings include spices, but feel free to add more cinnamon, nutmeg, etc to the dry ingredients.

3.  In a separate bowl, beat the eggs.  Whisk in milk, melted butter, and vanilla.

4.  Stir wet ingredients into dry.  Stir in pie filling until evenly distributed.  You'll notice there's no sugar in this recipe, since the filling brings a lot.  Allow to sit 5 minutes, to allow the oats to start to hydrate.

5.  Pour mixture into prepared pan.  Make sure apples are evenly distributed.  Bake 45 to 50 minutes, or longer if not set in the middle.  When the top springs back when touched, remove from oven and allow to cool before slicing.


Serves 8

Difficulty rating  π

Sunday, November 21, 2021

Chicken and Corn Pie

I felt like making a pot pie, and this turned into a pantry meal.  The crust was left over from the venison pie.  Well, most of it was.  I rolled together all the pastry scraps in the freezer to make sure I had enough for a top crust.  95% sure the one labeled "buckwheat" was pastry dough and not pasta.  Close enough.

I had the chicken in the freezer.  The canned corn was originally for a lasagna, but I had too many ingredients for that and it would have overflowed the pan.  And then, I decided to use the other can of Cream of Bacon soup for the gravy part of the pie.  Add some basic onion, celery from the garden, and herbs and spices, and a pie was born.

You don't have to use a hot water crust for this.  Regular pastry is fine if it isn't going to be a standing pie, even roll-out crust from the refrigerated section.  Actually, you don't have to make it a pie at all.  It can be a stew alongside biscuits, or ladled over them...wish I'd thought of that before making this a pie.

1/2 lb pastry dough (pate brisee is a good choice)
*2 C shredded or canned chicken
1 Tb oil
1/2 C diced onion
*1 rib celery, diced
*1 can Cream of Bacon soup (or any other Cream of...)
*1 14 oz can kernel corn, drained
pepper and dried parsley to taste

1.  Heat oil in a large saucepan.  Cook onion and celery over medium heat until softened.

2.  Stir in chicken, corn, and canned soup.  Cook until heated through.  Taste and add pepper and dried parsley to taste.  Highly doubt you'll need more salt.  There's tons in the soup.

3.  While the stew is cooking, roll out the pastry dough to 1/8".  Line either an 8" pie tin or a 6" springform and place on a baking sheet in case of leaks.  Preheat oven to 375º.

4.  Fill crust with the stew.  Roll out a top crust and place on top.  Crimp to seal and cut vents.  Make sure the crust is firmly against the filling below to reduce an air gap forming.  If desired, brush with egg wash.

5.  Bake 45-50 minutes, until the crust is baked and golden.  The filling is cooked.  You just need to bake the crust.

6.  If you made a springform, allow the pie to rest about 15 minutes before releasing.  Serve pie hot.


Serves 4-6

Difficulty rating  :)

Thursday, November 18, 2021

Winter Planting 2021

My summer garden produced two lovely pie pumpkins, one eggplant slightly larger than my fist, three pickling cucumbers, and so much regrown celery that I'm using it for mulch.  I also got a regrown leek and a full bunch of regrown green onions.

I'm hoping this winter's garden is more bountiful.  Seeing that I seem to be better at growing kitchen scraps than anything else, I started regrowing more green onions.  A sprouted garlic went in a large planter pot, surrounded by radish seeds.  My hope is that subsequent sprouted cloves will join it, because there is always green garlic by the time I finish a head.

I haven't bought dirt in a couple of years, and everything was looking low.  It took three bags to get close to where I wanted my planters to be, plus filling a few herb pots.

I went herb shopping, since they're so hard to establish.  4" pots were $6!  And they didn't look that great.  The Thai basil was already flowering, and no one had tarragon.  Fine, I bought some seeds.  Made a pot each of chives and Mexican tarragon (because it's more heat resistant than French), and two pots of cilantro because I had just bought some at the market and hated the price.

For the lettuce patch, I had the hybrid Romaine and spinach seeds from last year.  Didn't realize I was out of arugula seeds and had to go back to the garden store.  There was one eggplant taking up that space anyway.  While I was there, picked up some Italian parsley seeds, despite how hard it is to germinate parsley.  Again, I was weighing how much it costs at the market versus attempting to grow from seed.

For the Pond, I had the problem of eggplant that wasn't quite done.  I didn't want to rip out two plants that were flowering, even though neither had produced squat in six months.  I seeded around them with carrots, beets, and peas, assuming the eggplant will die before any of them are established.

That left one sizable pot with the last eggplant, the only one that had fruited.  I'm planning to use it for carrots, which can wait a few weeks because I had already seeded the Pond.  The eggplant has a little longer to prove itself.

So this is still a work in progress, but I know what I'm planting and where everything will go.  Nightshade season just refuses to end.  Won't be a problem next year, since you shouldn't plant them two years in a row in a given planter and I ended up putting at least one in all of them.  Didn't think that one through.

Monday, November 15, 2021

Pumpkin Spice Martini Jam

This offering from Jeni Gough appeared on August's JAMboree collaboration on YouTube.  (Video embedded in the blog post.)  I didn't realize you could water-bath can anything pumpkin, but the sugar, alcohol, and lemon juice in this turn the veggie into a kind of very sweet pickle.  Also, you aren't puréeing it into something dense, just mashing the cooked gourd pieces like you would strawberries or blueberries.  This isn't like the solid-pack pumpkin you buy in the pie aisle, and would make a terrible pie filling.  Might be good in a thumbprint cookie, breakfast pastry, or as cake filling.

There are two ways to achieve gel set with this jam.  You can cook it to 220ºF or use pectin.  Those options will produce different yields, as cooking to temperature tends to cook off a lot of water and all the alcohol.  Neither method is wrong.  It just depends if you want more water-based gel with the pectin or a thicker, gooier product with the candy method.  Pectin is also faster, but I tend to favor the temperature method unless something is very watery.

The big change I made from her recipe was using vermouth in place of Triple Sec or Grand Marnier.  It is supposed to be a martini, after all.  I'd never bought vermouth before, and it took a while to find it because I'm not overly familiar with the liquor aisle.  My instinct was that it would be wedged between the vodka and gin, and I wasn't disappointed.  I bought sweet vermouth instead of dry because it was for jam, and also because I prefer sweet liqueurs.

So here's an option if you bought a couple of pie pumpkins for Halloween decorations and want something fun to do with them.  You can also sub any sweet, hard-skinned squash like butternut, acorn, or even spaghetti.

*2-1/2 lbs pie pumpkin, peeled and 1" cubed (about 3-1/2 lbs whole)
4-1/2 C sugar
1-1/2 tsp cinnamon
1/2 tsp ginger
1/4 tsp cloves
1/4 tsp nutmeg
1/4 tsp kosher salt
*1/2 C lemon juice
*1/2 tsp grated orange zest (optional)
*1/4 C vodka (vanilla or whipped cream flavors if you have it)
1/4 C vermouth or Grand Marnier
1 Tb vanilla

1.  If canning, prepare for a 5 to 7 half-pint yield.  In Jeni's video, this made 5-1/2 jars.  I got 7-1/2.  It all has to do with how much you boil it down.

2.  Peel, seed, and dice pumpkin.  This took me nearly an hour, and was by far the hardest part of the whole project.  Tried almost every cutting utensil in the drawer.  Managed to do it without bleeding.  I've never tried to peel a raw pumpkin before.  I've done butternut, which is a huge pain in the butt and I now spend extra to get it already done.  At least it kills the time while the canner is coming up to temp.  The end product was almost exactly 2-1/2 pounds and I didn't have to do any canning math, whew.

3.  Place diced pumpkin in a large pot and fill with water to cover.  Bring to a boil over high heat.  Lower heat to medium-low, cover, and simmer until fork-tender, about 20 minutes.  Stir occasionally to check for doneness.  Drain well.

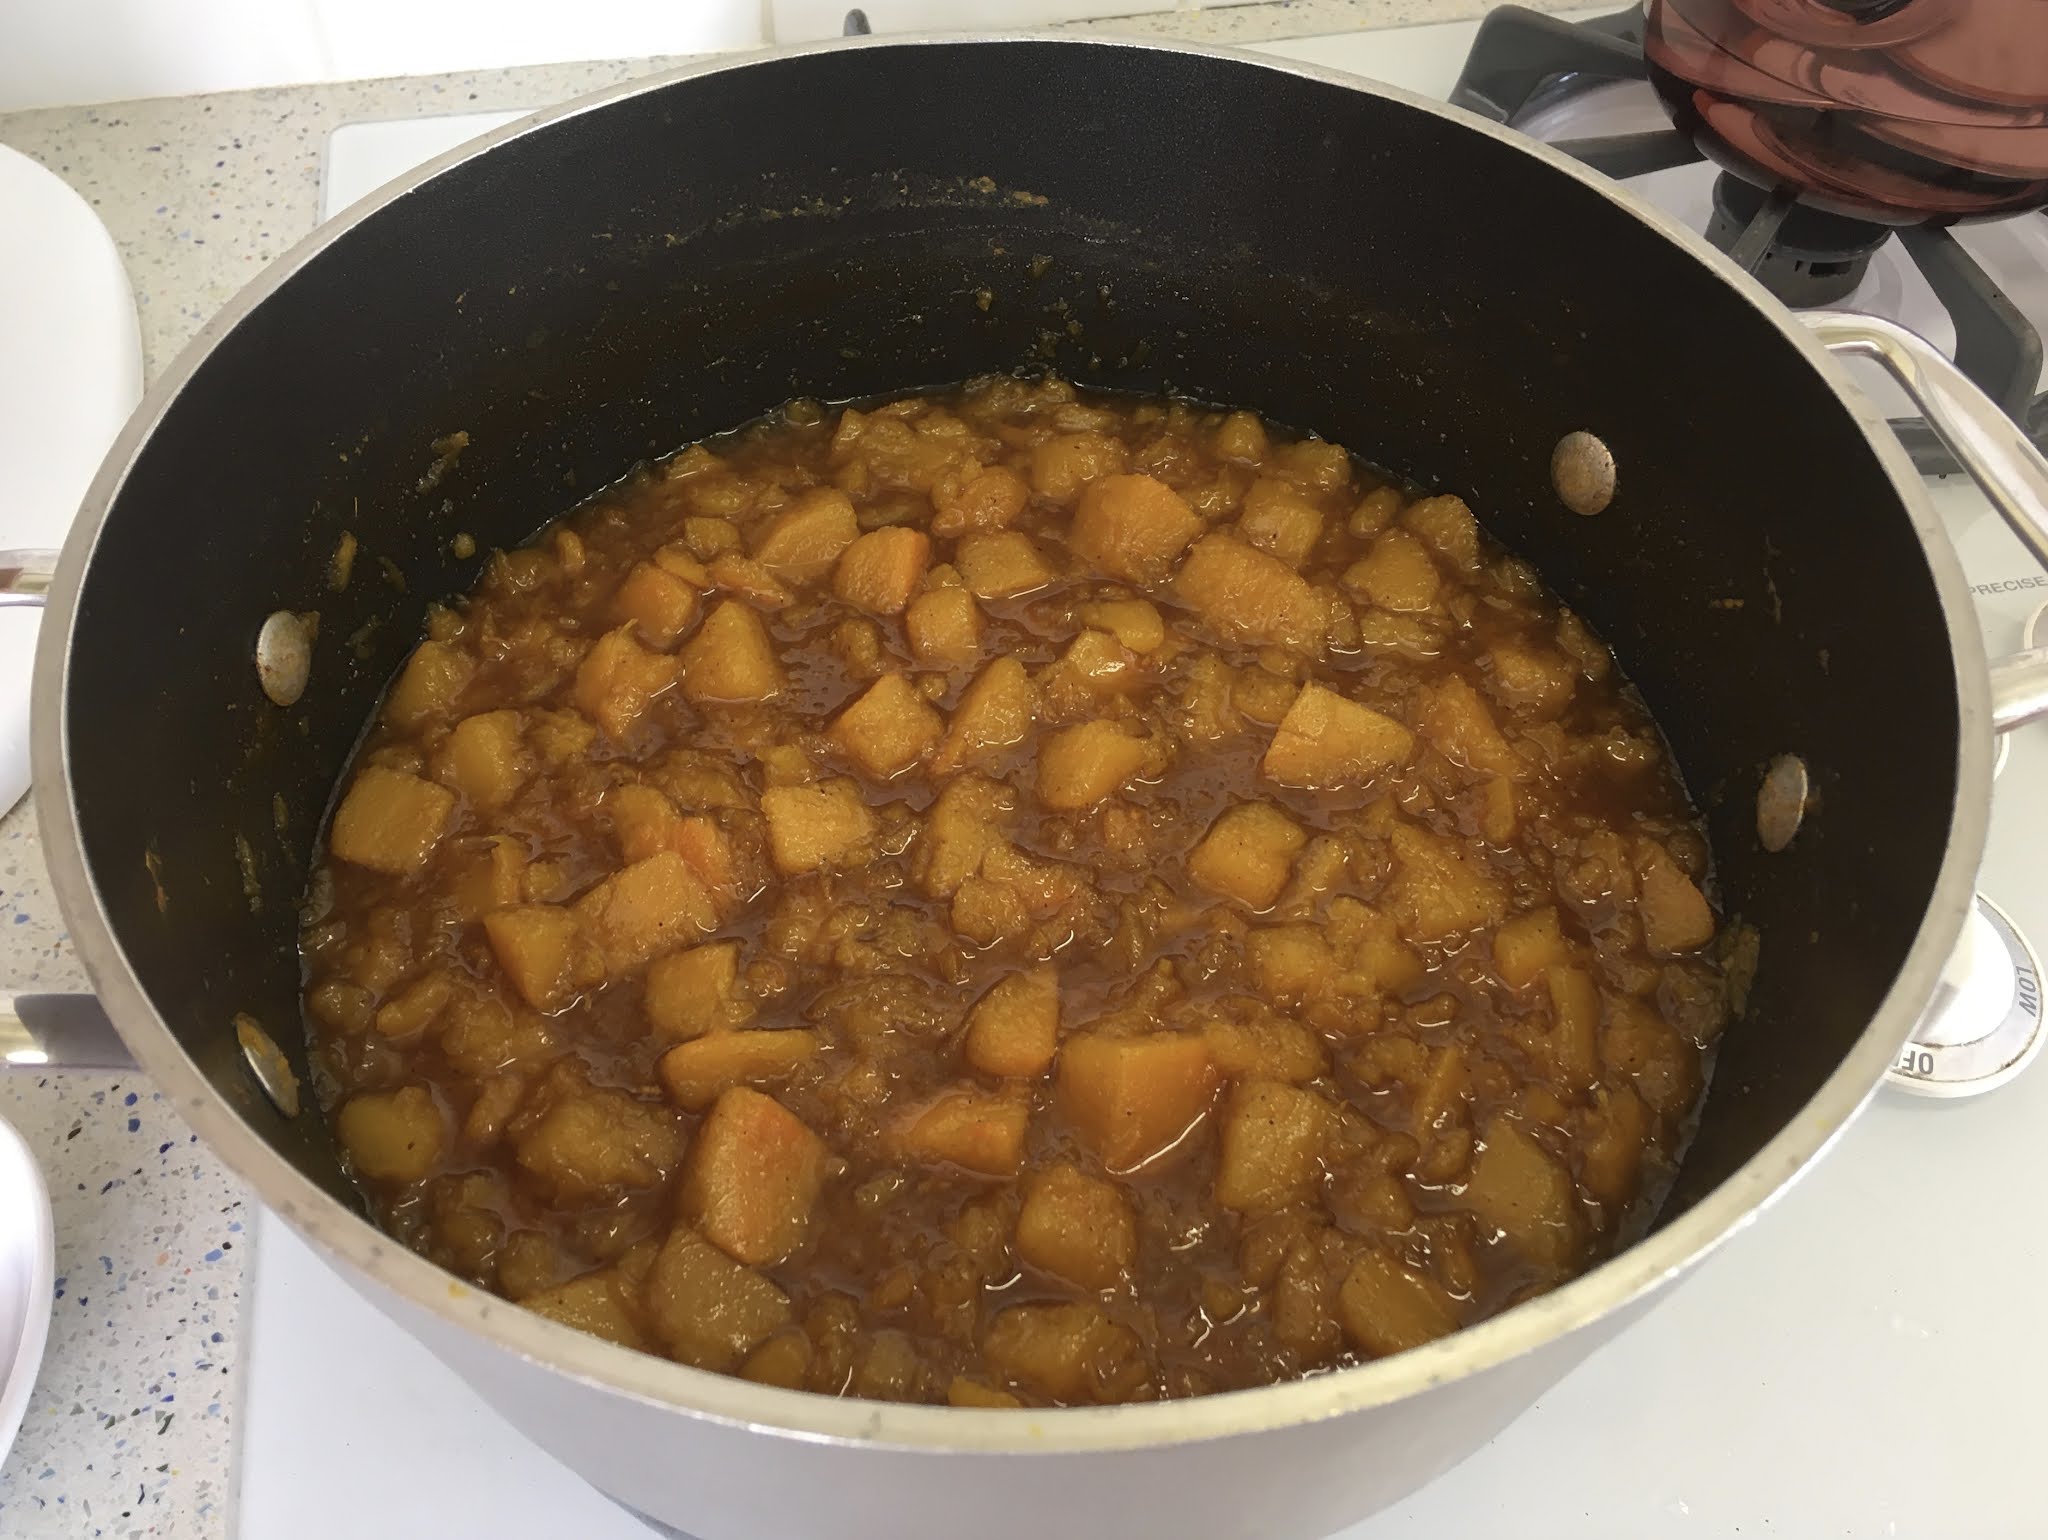
4.  Return pumpkin pieces to the pot.  Coarsely mash with a potato masher.  Do not purée if you plan to process can.  You can even leave half of the chunks more or less intact for texture.

5.  Add sugar, spices, lemon juice, and both alcohols to the pot.  Stir to combine.  Return to a boil over medium-high heat and cook to 220º, stirring frequently, or when mixture thickens when dropped from a spoon.  Add orange zest, if using, in the last 5 minutes.  Remove from heat and stir in vanilla.

6.  For canning, fill to 1/4" headspace.  Debubble jars, as you would a chutney.  Center lids, screw on bands finger-tight, and place in the water bath with water to cover by at least 1".  Once canner returns to a boil, process for 15 minutes.  Turn off heat, remove lid, and let jars sit 5 minutes before removing.

7.  Allow jars to cool 12 hours.  Remove bands, test seals, wash jars, and store.  Or refrigerate and use within 2 weeks or freeze for up to 3 months.

Makes 2-3 pints

Difficulty rating  :-0 (Just for preparing the pumpkin.  Rest is π.)

Friday, November 12, 2021

Quinoa Fritters

I just got this idea as something new to do with quinoa and googled it.  Yeah, it's a thing.

Really, all fritters are is leftovers held together with eggs and breadcrumbs then fried.  I went to the special effort of making these from scratch, but that is not necessary.  You can make these out of pretty much any odds and ends in the crisper and leftover quinoa.

This is the first time I've bought green onions since spring.  I used the last one out of the scrap garden and had to buy another bunch.  These will get replanted as well.  Not bad, making a dollar's worth of onions last six months.  The celery is doing so well that I've had to trim it back several times and turn those stalks into mulch.  Better than wasting them entirely.  Almost makes up for getting a single eggplant out of six plants this summer.

*1 C dry quinoa
*4 eggs
4 green onions, finely chopped
*1/4 C breadcrumbs or matzoh meal (optional, but it helps hold things together)
*1 C shredded mozzarella
*1/4 C chopped cilantro
*1 clove garlic, minced
salt and pepper to taste
oil for frying

1.  Cook quinoa according to package directions.  In some cases, this will involve soaking and/or rinsing the quinoa.  Don't skip this step, or it could upset your stomach.  Many foods have minor toxins that can be neutralized by proper washing and cooking, so don't freak out.  Drain the cooked quinoa.  This step can be done a day ahead.

2.  In a bowl, whisk the eggs.  Whisk in onions, breadcrumbs, cheese, cilantro, garlic, salt, and pepper.  Fold in cooked quinoa.  Allow mixture to sit while you prepare the sauce.  (see below)

3.  Heat 1/4" of oil in a large skillet over medium-high heat.  Drop mounds of quinoa about 3 Tb into hot oil.  All the recipes I read agreed that small fritters cooked most evenly and didn't fall apart.  1/4 cup should be the largest attempted.

4.  Cook fritters in oil until a medium brown, about 4 minutes.  Flip and cook the other side until it matches.  Drain on paper towels.  Add more oil to the pan when it starts to get dry and allow it to come up to temperature before adding more mixture, or the fritters will turn greasy.

Yogurt Sauce

*1/2 C yogurt (regular or Greek)
1/2 cucumber, peeled and grated
*1/2 tsp lemon zest
*1/4 tsp dill weed
salt and white pepper to taste


1.  Whisk all ingredients together, then taste and add more salt and pepper as needed.  If too salty, add a little lemon juice to cut it.

2.  Serve hot fritters with a generous amount of yogurt sauce

Makes about 24

Difficulty rating  :)

Tuesday, November 9, 2021

Pumpkin Curry

I was looking at shelf-stable meals in the Indian section of the market, for days I really didn't want to cook.  They all had jalapeños as the third or fourth ingredient, which is too much for my system.  I was especially bummed about a butternut squash curry that looked very good.  I went down the aisle to grab a can of butternut to make it myself, then remembered the pumpkin sitting on my counter.  Pretty much the same taste.

I'm using roasted fresh pumpkin here for a nutty taste, but you could just as easily open a can of solid-pack pumpkin.  Not the pie filling stuff, but the plain pumpkin purée.  You will get a more concentrated pumpkin flavor that way and a smoother texture to your curry.  I wanted it slightly chunky and relied on the lentils for the mushy part of the sauce.

This is a bit of a pantry clearing meal, as are most soups, stews, and curries.  I used half a package of tomatoes instead of tomato paste, the rest of an onion, the last bit of a jar of chopped garlic, and the end of a bag of rice.  Plus, of course, the home-grown pie pumpkin.  The only thing bought new was the cilantro, and replacing the coconut milk as a pantry staple on the following grocery day.

*1 pie pumpkin (1 to 1-1/2 lbs) or one 15 oz can purée
1 Tb olive or coconut oil
1/2 tsp paprika
1/2 tsp cumin
1/2 tsp turmeric
1 tsp curry powder, or to taste
salt and pepper to taste
*1 C diced onion
*1 C diced tomatoes
*1 clove garlic, minced
1/2 tsp grated ginger
1 C dry red lentils
1 can coconut milk (lite ok)
1/4 C chopped cilantro, plus more for garnish
*Jasmine or basmati rice for serving

1.  Preheat oven to 375º.  Cut pumpkin in half stem to blossom end.  Scoop out seeds and strings.  Save seeds for pepitas if desired.  Place cut-side down on a lined baking sheet and roast for 45 minutes to 1 hour, until easily pierced with a fork.  Allow to cool at least 10 minutes, then scoop flesh off the skin.

2.  Heat oil in a large skillet.  Add paprika, cumin, turmeric, and curry powder and cook into a fragrant paste.  Add diced onion and tomatoes and cook over medium-low until they are softened and the tomatoes have broken down. Add garlic and ginger and cook until fragrant.

3.  While that is going on, rinse lentils well.  Add water to cover by 1 inch and simmer for 12-15 minutes, until they start to split.  This is also a good time to start cooking your rice.

4.  Add coconut milk and pumpkin to the onion mixture.  Drain any standing water from the lentils and add them to the curry.  Stir to combine.  Taste and add salt and pepper as needed.  Stir in chopped cilantro and return to a simmer.  Cook another 5 minutes, then serve over the rice.


Difficulty rating  :)

Saturday, November 6, 2021

Candied Citrus Peel for Baking

I made a huge mistake last year and didn't refill my supply of glacé fruits.  You know, those little tubs of candied fruits for fruitcake and other holiday goodies.  When it came time to make the mincemeat, I didn't have any glacé peel.

Yes, I could order some from Amazon.  The brand that's usually in the market costs a bit more online, but wasn't outrageous when you consider that it simply isn't available in stores in October.  Some of the reviews mentioned cracked containers, which is understandable when something plastic is shipped in a pouch.  It's only a problem when that something leaks corn syrup.

So I went online to find recipes for a small amount of candied peel.  I only needed half a cup.  After reading a few recipes, I realized the process isn't that different from making marmalade.  You're just only using the peel and letting it dry afterwards.  I came close to draining off the jam from the peels in my last jar of 3-citrus marmalade, then just decided to buy an orange and a lemon and made a fresh batch.

I settled on starting with the recipe from Epicurious, but changed the amount of syrup you cook it in so there's no waste.  Also, scaled it down to one orange and one lemon, to get mixed citrus.

Meanwhile, candied fruits should be in the market any day now.  I'm going to make sure I have enough to get through next October this time and save myself an hour.

1 orange
1 lemon
3/4 C sugar, divided
water

1.  Cut the top and bottom off both fruits and discard.  Set upright on the cutting board and cut of the peel and pith in segments (the melon method for skinning fruit).  We don't need the inside of the fruit for this recipe.  Eat the orange, juice the lemon, whatever.  I put them through the food processor for the ground orange and lemon in the mincemeat recipe.

2.  Cut the peels into thin strips.  If desired, cut those strips into smaller pieces.  I made 1/4" x 1/2" confetti because that was how I wanted to use them.  You can always do long strips and cut smaller pieces from the finished product.

3.  Place the peels in a generous amount of water and bring to a boil.  Cook 15 minutes to soften and remove some of the bitterness.  Drain and rinse well.

4.  Put the pot back on the stove.  Stir together 1/2 C water and 1/2 C of the sugar.  Bring to a boil and dissolve into a simple syrup.  Add the peels and return to a low boil.  Cook about 45 minutes, until peels are completely cooked, look like candy, and the syrup has pretty much disappeared.

5.  Scatter remaining 1/4 C of sugar on a rimmed baking sheet or another shallow pan like a pie pan.  Transfer candied peels to the sugar and toss to coat.  Separate pieces so they don't stick together.  You can either transfer to a wire rack to dry at room temperature for 2 days or place them in a container and refrigerate.  It depends on what moisture content you want and your intended use for the peels.


Makes about 1-1/2 Cups

Difficulty rating  π

Wednesday, November 3, 2021

Niçoise-ish Pasta Salad

I don't know why I bought a large can of tuna.  It was probably on sale.  I don't make tuna casserole or anything else you would need it for.  So I had to come up with something.

My mom used to like Salade Niçoise.  She didn't order it when we were in Nice, come to think of it.  There are several things in it I don't like, and it's a whole lot of work to assemble so many ingredients.  I decided to trim the ingredient list and open a jar of pickled artichokes to serve as both an ingredient and the base of the salad dressing.  I then arranged everything on top of some gemelli pasta that had been on clearance, instead of lettuce.  I bought it figuring it would be good for a pasta salad.  Just means I didn't have bread on the side, as I would have for a regular main course salad.


The best deal I found on the olives was a 4-pack of travel sized cups.  The rest were either stuffed with something I didn't want or really expensive.  How hard is it to make a basic olive canned in an unseasoned brine?  I know, supply chain shortages; I'm usually more flexible than this.  I was eyeing the black olives when I saw these.  Not as interesting for a fancy salad, but I was getting frustrated.  Had not realized until then how picky I am about my olives.

8oz gemelli pasta (or similar salad-friendly pasta)
4 oz haricots verts or whole green beans
1 C cherry or grape tomatoes, halved
*8 oz marinated artichoke hearts, drained, liquid reserved
4 oz niçoise or kalamata olives
*1 12 oz or 2 5-1/2 oz cans tuna in water, drained
*2 tsp Dijon or grainy mustard
Olive oil as needed
salt, pepper, dried oregano to taste

1.  Boil a large pot of water and cook pasta to package directions.  I actually weighed out the dry pasta instead of measuring by volume just to be a cooking nerd.  And now I have exactly half a box for another day.  When done, drain and rinse.

2.  While that is going on, prepare remaining ingredients.  Trim the ends of the beans and blanch in simmering water 5 minutes, until bright green.  Drain and chill.  Add mustard to artichoke brine and enough olive oil to equal 1/3 cup of dressing.  Taste dressing and add salt, pepper, or oregano as needed until you like it.  Drain tuna.  Cut tomatoes in half.

3.  Add half of dressing to the pasta and toss well.  Chill all ingredients until room temperature or cooler, at least 1 hour.

4.  To plate salads, start with the pasta.  Top with organized portions of beans, tomatoes, olives, artichokes, and tuna.  Drizzle with remaining dressing and serve.

Difficulty rating  π