Showing posts with label Fruit. Show all posts

Sunday, August 16, 2026

Watermelon and Cactus Pear Salad

This was my first experience tasting prickly pear (cactus fruit).  They were four for a dollar, and I thought they would make a good dessert.  Small watermelons were $1.50, so that was happening no matter what.

What surprised me was that they taste a lot like watermelon.  Once I got the hang of peeling them, the salad came together quickly.  I could have added more fruits for a color variety, but it was already overflowing the bowl.

4 prickly pear (cactus fruit), redder is sweeter
1/2 "personal" sized watermelon, about 4 cups diced
2 Tb lime or lemon juice
pinch of salt
Tajin or other savory/sweet seasoning, optional

1.  To peel the prickly pear, cut off top and bottom to reveal the deep red interior.  Cut lengthwise into the skin about 1/8".  When you peel with your fingers, both the greenish outer peel and red inner peel will come off easily, leaving the red core.  The seeds inside are edible, but crunchy.  Cut into large dice.

2.  For the watermelon, peel and dice.  I do it by cutting off the top and bottom, cutting it in half, and putting the large, flat part down.  Slice the rind off the fruit, then dice.

3.  In a large bowl, toss both fruits with lime juice, salt, and any seasonings you choose.  Chill until ready to serve.

Serves about 6

Difficulty rating  π

Monday, March 16, 2026

Dried-Fig Pastry Filling

One of the pantry items I'm trying to use up is a bag of dried figs that aren't as good as the brand I usually buy.  Probably why they were half price.  I've never made hamantaschen with fig filling before.  Sounded like something I would enjoy.

The recipes I researched all looked a lot like the one I used for the fig cookie bars, so I fussed with a double batch of that.  It killed off half the bag of figs in a few minutes.

It's going to look like there isn't enough sugar in this for a jam.  Figs are excessively sweet, especially dried ones.  The orange juice and nutmeg are in here to cut that sweetness a bit and bring a floral touch.  You can't taste the nutmeg.  If you can, you overdid it.

Quick note that this is not a canning recipe.  There isn't enough acid and it is far too dense.  You can freeze it for longer storage.

*8 oz dried figs
1/2 C water, more if figs are especially dry
*1 Tb honey
*2 Tb orange juice
dash nutmeg

1.  Remove any stems from the figs and chop into small pieces.  Place in a saucepan with  water, honey, orange juice, and nutmeg.

2.  Bring to a boil, then lower the heat to a simmer.  Cook until the water is absorbed, about 20 minutes.

3.  Purée the mixture, either in a good blender or food processor.  If desired, add more water for a thinner texture.

4.  Use immediately, or store in the refrigerator for up to a week.  Freeze for longer storage.

Difficulty rating  π

Thursday, February 5, 2026

Tu b'Shevat Seder

I wasn't able to go to my temple's community Tu b'Shevat seder, so I decided to do my own on the actual holiday.  It's a kabbalistic way to celebrate the birthday of trees, and not a formal observance like a Passover seder.  It's basically a snack plate during a wine tasting.

You're supposed to serve the four "seasons" with wine or grape juice.  Still doing a Pantry Challenge, so I made lemonade for the white and added cranberry juice to it for the red.  If I had thought of it before the Challenge started, I would have had those saved in the pantry.

For a family, it's common to put out a platter of fresh fruits.  For just me, I got out dried.  I only needed a few bites in each category.  It's acknowledging the symbolism of the day that's important.  And yes, it's set up on a deviled egg platter.

The first glass of wine is a white, and the fruits are those with inedible casing: Nuts, coconut, bananas, pomegranate, melons

Next, a bit of red is added to the white and the fruits have inedible cores: Apricots or other stone fruits, dates, olives

The third cup adds more red and celebrates wholly edible fruits: Berries, figs, seedless grapes, chocolate

The last cup is all red and represents the tree itself: maple syrup (with challah for dipping)

As an aside, after blowing out my knee last year doing Passover cleaning and never finishing the list, I've decided to give myself two months to do it this year.  I just won't start any of the kitchen or dining room projects until two weeks before.  The point of the cleaning is to rid the house of chometz, and I don't take food out of those two rooms, just to make the process easier.

Saturday, December 13, 2025

Apple-Scrap Jelly

I'm finally dealing with the apple cores and peels from canning day, plus the cores from all the apples I've eaten since then.

I've never made any kind of jelly, so it was an interesting process.  First, you make the juice by boiling the scraps with some water.  Then, after straining out the solids, you boil the juice with pectin and sugar.  That's the whole thing.  If you use store-bought juice, it's way less effort, but the whole point of this exercise was to make something out of garbage.

The recipe I'm using is from the UC Extension master canner site, which I didn't know was a thing.  The course isn't available locally, which is super annoying.

I did make a couple of tiny changes.  I added a touch of lemon juice for contrast.  Adding additional acid is never a problem for water bath canning.  It makes it even safer.  I decreased the sugar content slightly.  With pectin, you can get away with that and still have a set.  And I made the last little jar and a half into mint jelly by adding peppermint extract and a touch of green water-based food coloring, so I could tell it apart.  Maybe a little too much food coloring, but the jelly was rosy from the red apple peels and I didn't want it to look brown.  What I am posting is the tested and approved recipe.

*about 4 lbs apple cores and peels or 4-1/2 C apple juice
5 C sugar
*1 box (3 Tb) powdered pectin

1.  If canning, prepare water bath canner for a 5-6 cup yield.  Sterilize jars by boiling for 10 minutes, or increase end processing time to 10 minutes to compensate.  Recipe only has times for half-pint or 4 oz jelly jars.  Do not make in pint or larger jars.

2.  To make the apple juice, put apple scraps and 4 C water in a large pot.  Bring to a boil for one minute, then lower heat to a simmer.  Cook 15 minutes, stirring occasionally.

3.  Run the contents of the pot through a jelly bag.  I don't have one, and used a cloth produce bag.  You could also line a fine mesh strainer with cheesecloth.  The goal is to get all the particles out.  You should have about 4-1/2 C of juice.

4.  Pour the juice back into the pot and stir in the pectin.  Bring to a boil over high heat for one minute, stirring constantly.

5.  Stir in the sugar to dissolve.  Bring to a hard boil that cannot be stirred down for one minute.  The mixture should feel thickened from the pectin, and you will see some cling to the sides.  Remove from heat.

6.  If canning, ladle hot jelly into hot jars.  Wipe the rims clean, place warmed lids on, and screw bands down finger tight.  Process 5 minutes for sterilized jars or 10 minutes for washed.  For not canning, portion into clean, non-reactive containers and refrigerate or freeze.

Makes 5-6 cups

Difficulty rating  :)

Monday, December 1, 2025

Apples in Syrup (Canning)

There was a sale on five pound bags of apples.  I brought home one Granny Smith and one Pink Lady.  Realizing that was more than I could eat or bake with before they turned, I decided to can some of them.

Apples can be preserved in more ways than I realized.  What I decided to do was hot-pack fruit in syrup, to use in baking, with yogurt or oatmeal, or mash it into applesauce.  Every source I trust had instructions for it, and the nchfp even had pressure-canning directions.  I went with water bath instead so I wouldn't have to pre-sterilize the jars.  You only have to do that for times under 10 minutes, and these would have been 8 in a pressure canner.

I used wide mouth jars because I thought it would be easier to fill them, but the apples get so soft that it isn't an issue.  If you're cutting wedges or slices instead of quarters, a regular mouth jar is big enough.

If you aren't into canning, just use the apples after the cooking part.  You likely won't be making anywhere near as much as I did.  You can also do them as poached halves, maybe adding some white wine to the syrup.

For quantities here, I'm using the Ball book.  They give them for canner loads.  I did slightly less, and ended up with 7 jars instead of 8.  It's a lot of apples to peel.

10 to 12 lbs apples, stemmed, peeled, cored, and quartered or sliced
6 cups hot syrup, sweetness as desired

1.  Set up canner for an 8 pint or 4 quart yield.  Get the water started, because it's going to boil around the time you finish preparing the apples.  Set up a large bowl of water with an acid in it such as ascorbic acid or lemon juice.  This will prevent browning.  Set yourself up with a podcast or movie, because it's going to take at least an hour to prepare the apples.

2.  Wash the apples in hot water to remove the waxy coating every orchard puts on them after harvesting.  As you finish peeling, coring, and slicing the apples, toss them in the acidic water.  I kept the cores and peels to make apple jelly later.  Not today.

3.  Once all the apples are prepared, set up a large stock pot with 6 cups of water and how much sugar you want in your syrup.  I did a very light one of only a cup of sugar, in case I turn them into applesauce.  I can add more sugar if I make a cobbler or pie.  Bring to a boil until all the sugar is dissolved.

4.  Drain the apple slices and add to the syrup pot.  Return to a boil, stirring often.  Boil the apples for 5 minutes.  Hot pack replaces the air in the fruit with syrup through boiling and allows you to pack more fruit into each jar.

5.  Ladle hot apples into hot jars to 1/2" headspace.  Add cooking syrup, debubble, and adjust headspace.  Wipe rims, center lids, and screw on bands finger-tight.  Process 20 minutes for both pints and quarts.

Difficulty rating  :-0

Monday, July 28, 2025

Plums in Syrup

I didn't learn my lesson from the cherries and bought plums the next week.  Only five pounds this time, and way fewer pits to remove.  The recipe on NCHFP is easy to follow and doesn't require any additional acid.

If you're not into canning, this is still a recipe for you.  Everything up to the putting it in jars point can be done if you're keeping them in the fridge or using them immediately.  Think of it as poached pears, but with plums and not having to peel anything.

Frankly, it works better if you just poach them.  I didn't expect them to disintegrate, but it does explain why you can't buy canned plums.  While disappointing, I quickly realized that what I was using them for did not require firm plum pieces.  Mostly, they're going in yogurt or the popsicle mold.  I have a vague idea of stirring them into gelatin or vanilla pudding.  Maybe spooned over ice cream.  I didn't feel like opening a new jar of cranberry sauce and had some with the last of the leftover turkey from Passover.  There was some pivoting of expectations, and I probably won't can halves again, but the jars won't go to waste.

6 pounds ripe plums (makes 4 pint jars)
1/2 C sugar, or less for a lighter syrup
2 C water

1.  Wash fruit well.  Cut plums in half.  Remove stems and pits.  If canning, prepare jars, lids, and water bath canner for four pints.  It's going to take longer for the water to get to a boil than anything else.

2.  In a large saucepan, stir together water and sugar.  Bring to a boil, then reduce the heat to medium.  Place plums in a single layer in the water and boil 2 minutes.  If necessary, do this in batches and remove the cooked ones to a separate bowl.  When all pieces have been boiled, return all of them to the hot syrup, turn off the heat, and allow to sit 20 minutes.  If not canning, allow to sit only 5 minutes, call it a day, and refrigerate.  You're done!

3.  For canning, fill hot jars with hot plums and syrup to 1/2" headspace.  De-bubble and adjust headspace if necessary.  Wipe rims, center lids, and screw down rings finger tight.  Process 20 minutes for pints and 25 minutes for quarts.

Makes about 4 pint jars

Difficulty rating  :)

Thursday, August 8, 2024

Brandied Cherries

There was a pretty good sale on cherries, and I just ordered a ridiculous number of canning lids.  What I need to get are more jars.

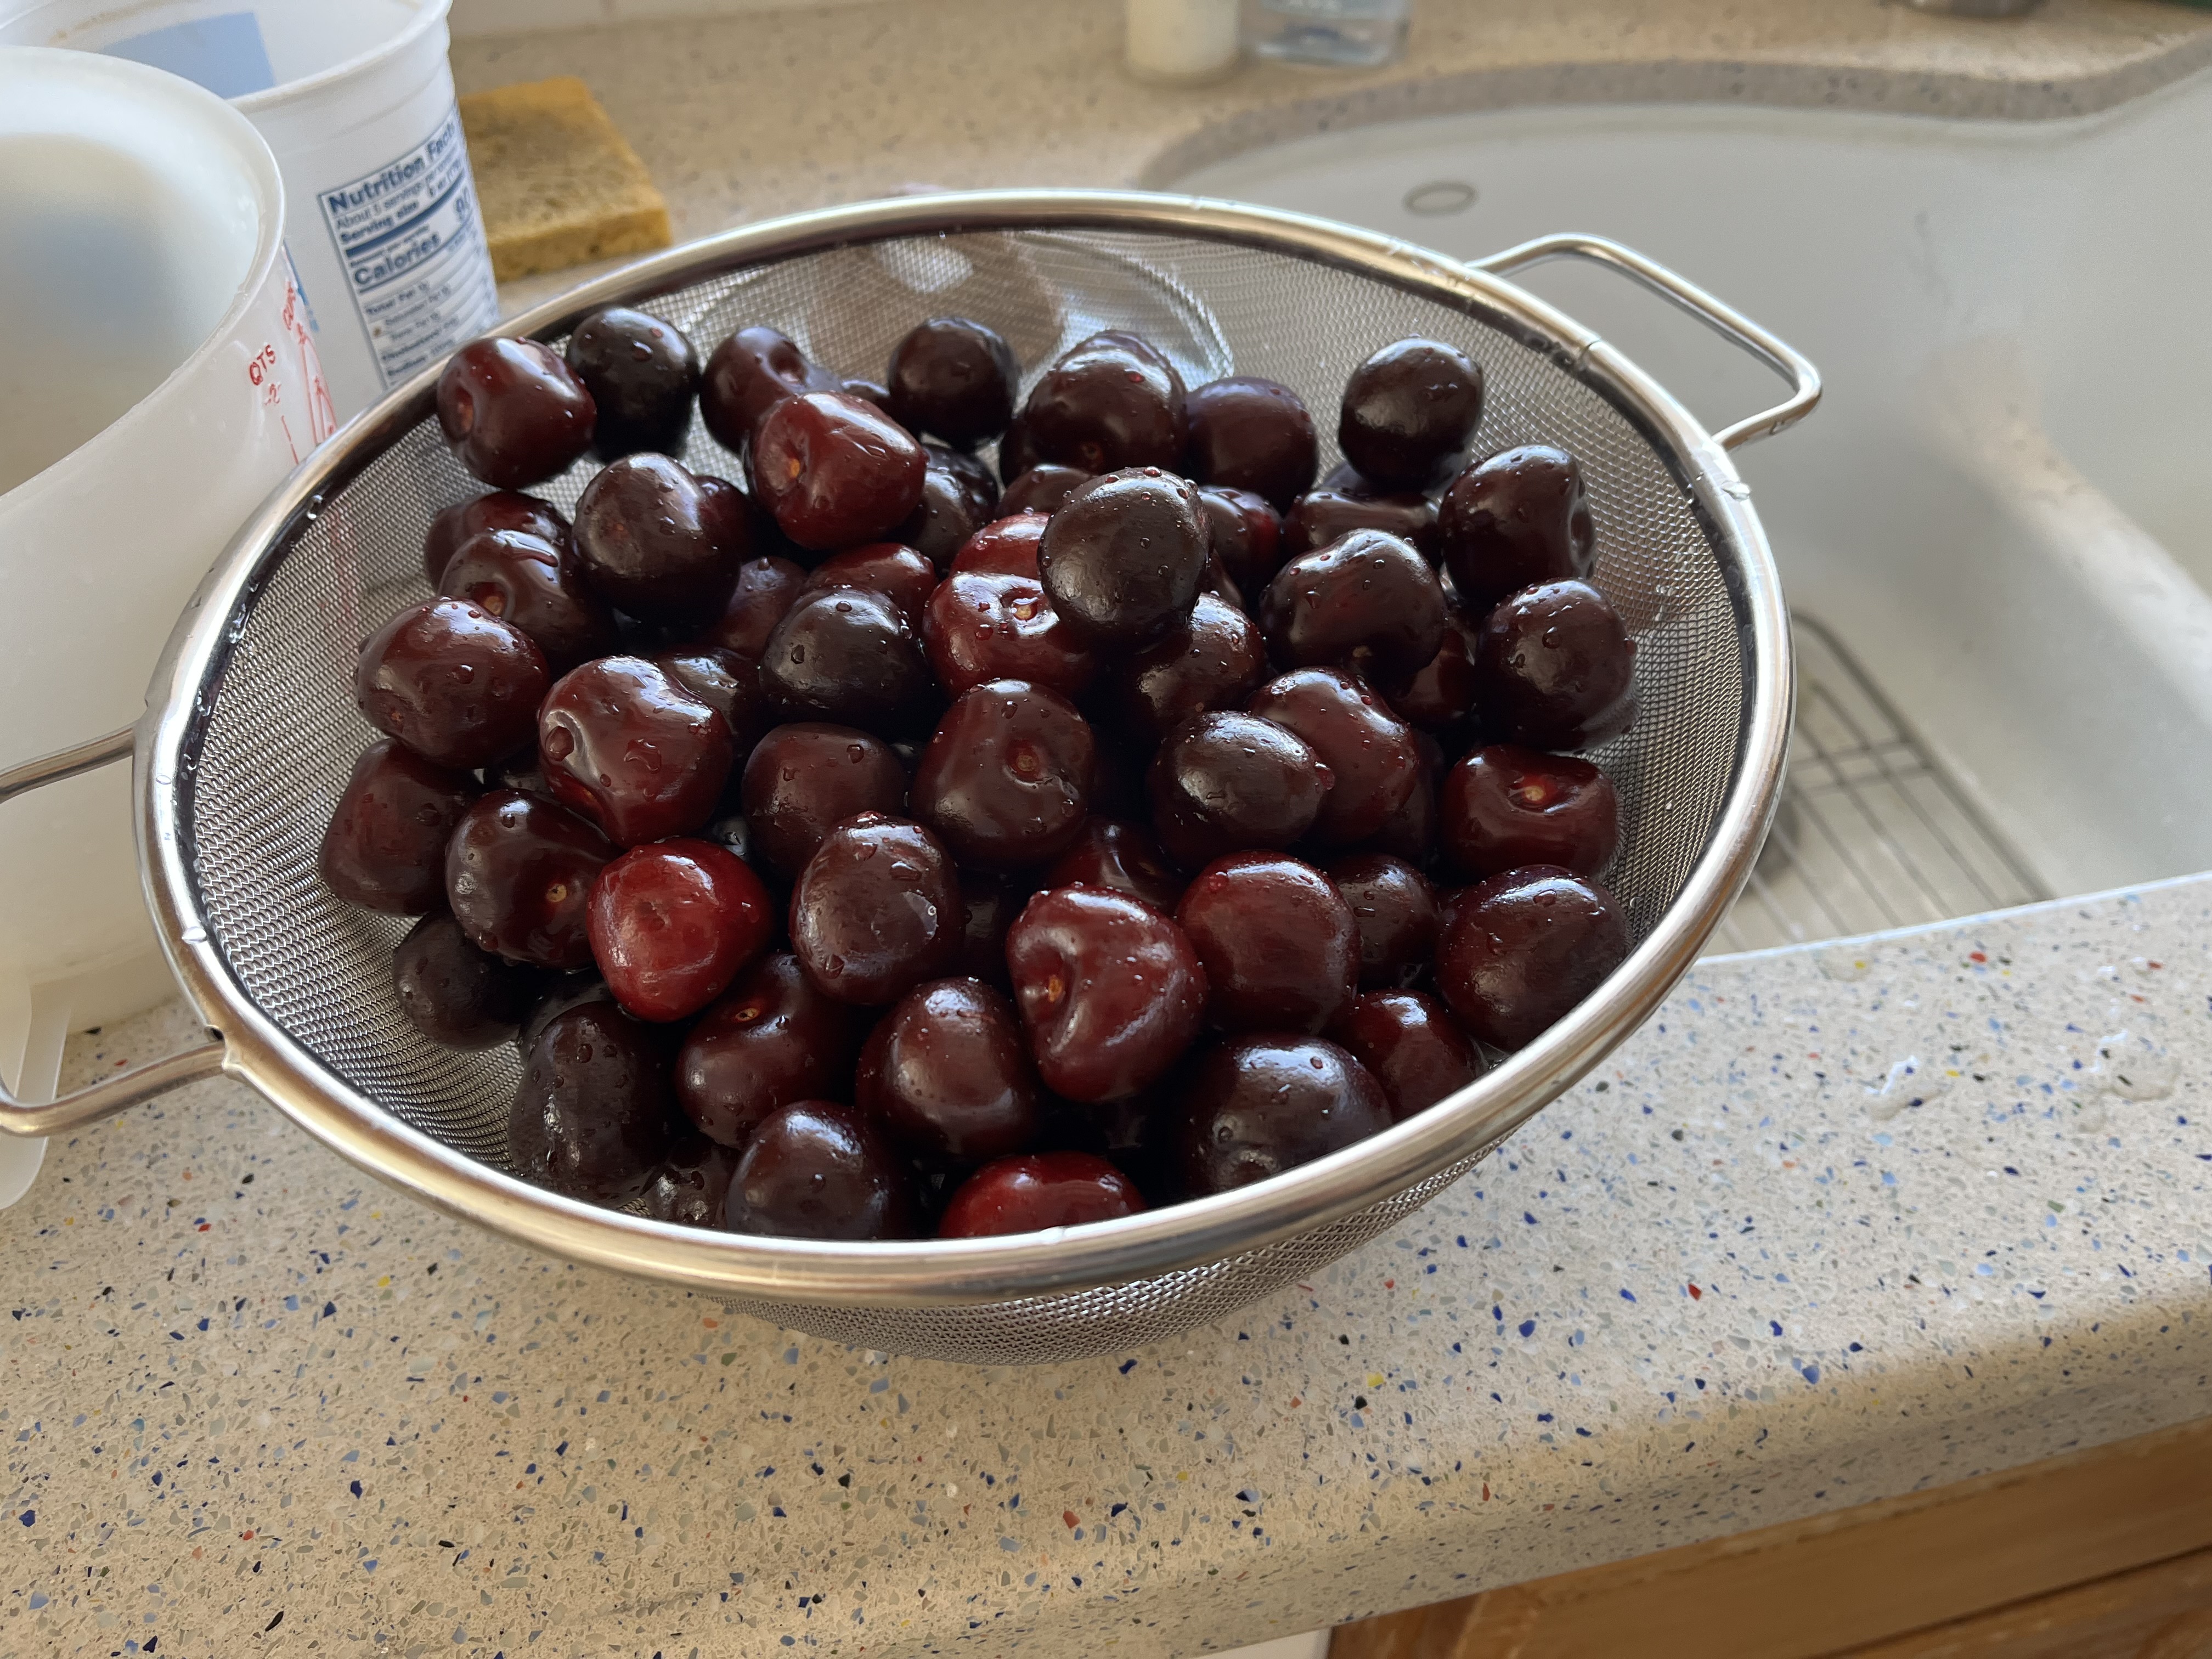
Brandied cherries, or any spirited fruit, are way overpriced.  You tend to find them at niche markets with charcuterie items.  They're just fruit poached in syrup with enough alcohol to taste.  If you're making it fresh to serve that day, it takes less than half an hour, and most of that time is waiting for water to boil.

While I did process can these, it's a water bath recipe, so it doesn't have to be canned to achieve the desired effect.  There will be regular stovetop directions.

The recipe I found said you can make these whole, which is good because these were huge cherries that didn't fit in my pitter.  There is nothing wrong with pitting them first, but they should be treated with lemon or a crushed aspirin in water to preserve color.  What I didn't realize was that when a cherry is cooked the flesh naturally separates from the pit.  As long as you know it's in there, it's very easy to eat the fruit and tactfully spit out the pit.

I'm giving sample quantities, about as much as you would need for a dinner or cocktail party.  Does anyone do those anymore?  You can scale it to what you need.

1 quart (about 1 to 1-1/2 lb) red cherries
1 C water
1/4 C sugar, or less if the cherries are very sweet
*2 Tb brandy

1.  If canning, prepare water bath canner, jars, and lids for your expected quantity.  These can be done as pints or quarts.  For non-canning, you only need a non-reactive final container like glass or ceramic.

2.  Remove stems from cherries, pit if desired, and wash thoroughly.  If pitted, soak in a water with either lemon juice or a crushed aspirin to preserve the color.  Drain.  For whole, pricking the bottoms with a sterilized pin will reduce splitting.  It's also a lot of work when you bought five pounds of cherries, so I skipped it.

3.  Stir together water and sugar in a large saucepan.  Bring to a boil over medium heat.  Add the cherries and return to a strong boil.  Stir to make sure all cherries have touched the boiling syrup, then remove from heat.  The cherries will be par-cooked and softening.

4a, non-canning: Allow mixture to stop boiling, then stir in brandy.  Allow to steep as mixture cools.  Once room temperature, transfer to a non-reactive container and store in the fridge for up to three weeks.

4b, canning: Ladle 1/2 C of syrup into the bottoms of the jars.  Fill with cherries to 1/2" headspace.  Add 1 Tb brandy to each pint, then fill with syrup to 1/2".  Debubble and adjust headspace as necessary.  If you run out of syrup, add boiling water for the last little bit.  Wipe rims, center lids, and screw bands down finger-tight.  Process 15 minutes for pints and 20 minutes for quarts.  After 24 hours, check seals, clean jars, and store.  Despite quite a bit of siphoning, all of my jars sealed.  I was surprised.  I wiped a lot of syrup off the rims and really didn't expect all of them to seal, even before they went in the canner.  The syrup level in two of them is below the one-inch mark, so I'll use those first.  The rest should be good for at least a year.

Makes 1 quart

Difficulty rating  :)

Saturday, August 5, 2023

Boysenberry Harvest 2023

I never know what I'm doing when I try to grow produce.  I plant something that I'm reasonably sure can survive in my climate, generally over-water it, and am thrilled when something edible happens.

In all the years I've had the boysenberry bramble, I think this has been its most productive year.  I only trim it back every other year, and this was one that I let it grow.  I might have used blueberry fertilizer on it after the blueberry bushes died.  But really, I'm attributing this harvest to getting double the average annual rainfall this winter.

The bush was gorgeous when it bloomed, and the vast majority of the blossoms became fruit.  I went out every couple of days with one hand covered in a suede glove to protect it from thorns and harvested at least a dozen berries.  They went in the fridge in a blackberry clamshell I had saved for this purpose.

Once a week, or when the box was full, I washed, dried, and froze the berries.  Minus one or two that I tested for product quality.  This is the step I have missed in the past, when I would just throw a few in yogurt before they could spoil.  You can definitely save up berries in the freezer.  Think of the huge array of frozen fruit at the market.

The snails and birds did take their share, mostly around the front edge.  All those thorns prevented worse damage, as they are designed to do.  I came out of a berry-picking session bleeding more than once.  I have no clue what these berries will eventually become, but I now have over three quarts of boysenberries to enjoy.

Saturday, April 1, 2023

Freezing Avocados

I don't love avocados.  I go through so few that I generally buy one bag of frozen chunks a year.  But those IQF avos have gotten expensive for something I rarely use.

Sprouts had avocados for 50¢ each.  I didn't need any, but thought I might in the near future, so I started reading up on how to freeze them.

The general wisdom is that a previously frozen avocado will not have the texture of a fresh one.  I already knew that from previous purchases.  I also don't like the texture of a fresh avocado, so no problem there.  I prefer them mashed up and mixed with other stuff.  That's the kind of thing we're making here.

Method 1: Whole avocado.  I didn't do this, but supposedly you can wrap them in plastic, place in a freezer bag, and toss them in.  Once defrosted, the skins pretty much slip right off and you just have to remove the pit.

Method 2: Halves.  This is along the lines of the Wholly Guacamole halves you can find in some stores.  Split, remove pit, and scoop from skin if desired.  Coat exposed parts with a thin layer of lemon juice to preserve color.  Vacuum seal and freeze.

Method 3: Slices and chunks.  What I did.  Halve, remove pit, and scoop out of skin.  Slice into desired pieces and toss in lemon or lime juice to preserve color.  Freeze on a sheet pan, then place in a baggie to store.  If you have it, vacuum seal for added protection and time before discoloring starts.

Method 4: Mashed.  Add a liberal amount of lemon or lime juice and mash the avocado chunks.  You can also freeze prepared guacamole.  Place in a baggie, squeeze out the air, and freeze flat.  If you would like specific portion sizes, like for smoothies, freeze in ice cube trays and pop out before storing in the baggie.

All of these methods will produce a similar texture once defrosted, so it's really up to you whether you want to put in the effort before or after the freezing.  I opted for before, but not so completely mashed as to remove the option of serving it diced.

For about ten minutes of work before the freezer and five after, I have a quart of diced avocado and only spent $2.  I am calling that a win.

Difficulty rating  π


Tuesday, March 14, 2023

Snack Prepping: Orange Slices

I can't take credit for this one.  Leisa at Sutton's Daze did a video.  I had been wondering how to preserve the last of this year's Valencia oranges.  Like Phil, I'm not a fan of peeling oranges, which is why they tend to linger on the tree.  I drink OJ daily, so it isn't an aversion to the fruit itself.

I'm going a step farther than the video did by also preserving the orange zest to use in baking through the year.  Since I don't own a dehydrator, I'm using the convection setting on the oven.  I don't go through much, so I just shred the prettiest areas, a couple of tablespoons.

"Peeling" lasted about five seconds before I got out a knife and cut the peels off.  Eleven oranges. Took long enough that way.  I don't want to know how bad it would have been if I had peeled them properly.

1.  Line a baking sheet with wax paper or parchment.

2.  Peel oranges or cut the rinds off them, then divide into segments.  That part got messy, and I probably ate an orange worth of torn pieces.  Arrange wedges on the baking sheet.

3.  Freeze tray until oranges are solid, about 2 hours.  Working quickly, fill snack baggies with them.  I only have sandwich baggies, and put about a snack-sized amount in each.  Put baggies back in the freezer. If desired, put the little baggies inside a gallon one, both for extra protection from freezer burn and so they don't get lost.

4.  To serve, defrost in the fridge for a few hours or pop into a lunch box to defrost on the way.

Difficulty rating  :) (for peeling)

Friday, February 3, 2023

Freezing Lemons


It's citrus season.  My tree is not very healthy, but it's putting out more lemons than I can use.  I'm still working on the last of the preserved lemons from last year.

What I didn't realize is how much lemons cost in the market these days.  I asked at work if anyone wanted some, and two people jumped at the offer.  So I figured I should find another way to preserve my harvest, preferably one with less salt involved.

It turns out you can freeze citrus.  There are multiple ways to do it, and ways to use them once they are frozen.  You can put them in whole and grate off the amount you need while it's still a solid sphere, seeds and all.  You can wedge or slice them prior to freezing.  You can juice them and freeze the juice in ice trays to drop into whatever recipe needs a bit of lemon juice.  And while dehydrated or freeze-dried zest is best for using in recipes if you don't have fresh, frozen works too.

I chose to quarter a few and freeze the smallest one whole.  I set them on the toaster oven's broiler pan that had been lined with wax paper.  I froze them flat like that for two hours, then transferred them to a freezer baggie for storage.  The next time I want a squeeze of fresh lemon and don't have any ready on the tree, I can pull one out a couple of hours before and have my lemon wedge.  That won't be for a while, since the 18 lemons I could reach without a ladder barely made a dent.

Thursday, December 29, 2022

Fruit Cocktail in Syrup

I decided it was finally time to do some canning and got out my list.  I've wanted to do fruit cocktail all year.  There were some good deals and I picked up several pounds of assorted fruit.

Ok, this might not have been cheaper than buying cans, but I got to choose what went in it.  I remember the joy some years ago when I realized anyone can buy maraschino cherries.  They aren't at some secret bartender shop and aren't all that expensive if you get the store brand.  They turned the syrup and most of the fruit pink, but I don't care.  I got to put in plenty of grapes and less of the pears and peaches.  I like canned peaches on their own, but not as much in fruit cocktail.  And I made the pieces a lot bigger.

Because I was canning, I had to go through the Ball book and make adjustments.  Ball only lists individual fruits in syrup.  When you mix, you have to follow the guidelines for the pickiest item you're putting in the jar.  Therefore, I had to do these as hot-pack and for 20 minutes of processing time.

Waiting for water to boil is the most time-consuming part of canning.  I should probably get a more narrow pot for smaller canning sessions.  Even the gallon for blanching the fruits took forever.  Of the six hours I spent that day on four canning recipes, two of those hours were easily just waiting for water to boil.

Obviously, you can scale this down if you aren't having a party or canning.  You can use the basic method, simmer the fruits directly in the simple syrup instead of water, and refrigerate for up to a week.

9-10 C assorted fruit like peaches, pears, plums, grapes, mango, pineapple
1 lemon
1 10 oz jar maraschino cherries
6 C water
3 C sugar

1.  If canning, prepare canner and jars for a 5 pint yield.  Because in the weird world of headspace, 9 cups of product equals 10 cups canned.

2.  Set up a large bowl of water and cut the lemon in half.  Squeeze juice into the water and drop the rest of the lemon into it.  This will prevent any browning as you prepare the fruit.

3.  Peel and seed any fruits that require it, then chop into pieces of desired size.  I was surprised how easy it was to peel pears, since I don't peel things often.  The peaches were frozen, so I just chopped those in half and tossed them in the bowl.  For grapes, remove the stems.  The pineapple didn't really need the lemon juice treatment, but I chucked it in the bowl so I could judge proportions.  I ended up with about equal amounts of everything except a little less peaches.

4.  Bring about a gallon of water to a boil in a large pot.  Maybe this should have been part of step 1.  Drain the fruit and discard the lemon.  Pour fruit into boiling water.  It's going to stop boiling from the cold fruit and you're going to have to wait a while for it to come back up to temp.  So while that's happening, stir together 6 C water and the sugar in another saucepan and bring that up to a low boil to be the simple syrup.  I added about 1/4 C amaretto to my syrup for the hell of it.  It boils off and you're left with the faint almondy taste.

5.  And since your fruit probably still isn't boiling, much less the canner, go ahead and drain the cherries.  I chose to cut mine in half because there's a teeny chance one might have a pit in it.

6.  Simmer the fruit 5 minutes.  This is more important for canning, but it does improve the texture of stone fruit to poach it.  And as part of the canning process, it means you won't have as much shrinkage in the jar compared to raw pack.

7.  Drain fruit, stir in the cherries, and get the hot jars ready.  Ladle 1/2 C of syrup in the bottom of each jar, then fill to a generous 1/2" headspace with fruit.  Add more syrup to the 1/2" mark.  It won't cover the fruit because fruit floats.  Wipe jar rims well, center lids, and screw on bands fingertip-tight.  That extra half-pint jar was pineapple jam that didn't seal the first time, so I was reprocessing it.

8.  Process jars in boiling canner 20 minutes for pints and 25 minutes for quarts.  Remove lid and let rest 5 minutes before removing from canner.  I must have been using some awesome vintage lids, because they sealed before I even took out the jars.  Cool at least 12 hours, remove bands and wash jars, and store in a cool, dry place for up to a year.

9.  For non-canning, you can skip simmering in water if you wish and simmer in the simple syrup instead. Cool to room temperature and store in the fridge for up to a week.

Difficulty rating  :)

Tuesday, April 26, 2022

DIY Trail Mix

Hmm, I don't have a label for "snacks" or "nuts".  So we're calling this Tea Time.  I tend to eat trail mix as an afternoon snack.

Sprouts has at least a dozen trail mix blends, generally priced below $8/lb, to fit nearly every diet and lifestyle.  Except mine, because I can't have hard nuts.  The only one that doesn't have whole almonds or another hard nut is all fruit.  I need a little protein if I reach for a bowl.

The original trail mix is affectionately called GORP by hikers: Good Old Raisins and Peanuts.  It's roasted and salted split peanuts, raisins, and often M&Ms.  It does what trail mix is supposed to do: be a shelf-stable, portable snack that gives you protein, a little fat, a little salt, and some sugar when you don't have time for a proper meal.

As I was picking through the bins, looking for the ingredients I wanted for my own mix, I realized that I was putting together something that would be less than $5/lb.  The most expensive ingredient was the cashews, which were on sale for $5.99.  Everything else came in under the average price of a bin trail mix.

Ok, yes, there are cheaper places to shop.  Sprouts isn't Whole Foods expensive, but you do pay for the clean and/or organic sourcing.  I'm sure Costco trail mix is much cheaper.  But if I crack a tooth on it, am I really saving any money?

The mix I'm showing here is to demonstrate the basic proportions I prefer.  I like half sweet, which includes any dried fruit and candy.  The coconut is fat, maybe 10%, and the rest is nuts for protein.  This batch was for Passover, which influenced my choices.  I added sunflower seeds to the leftovers afterwards, plus a little more dried fruit to compensate the sweetness.


*1/2 C chopped pecans
1/2 C roasted cashews
1/4 C raisins
1/4 C dried apricots, diced
1/4 C white chocolate chips
2 Tb unsweetened coconut flakes

1.  Add all ingredients to a bowl.  Stir to distribute evenly.

2.  Transfer to an airtight container.  Store away from light.  Keeps about 2 months.


Makes about 1 pint, 6-8 servings

Difficulty rating  π

Sunday, April 17, 2022

Preserved Lemons

Part of that stocking up haul was a case of six half-gallon jars.  The original intent was to store beans or rice when I could only find a 2 lb bag, which is too much for a quart jar.  Then the lady at the hardware store mentioned making pickles in them.  I still have one jar of sauerkraut left, and don't plan to make kimchi this year, but I could pickle something else.

I've considered making preserved lemons before, but I didn't have a jar I wanted to dedicate to them.  Popular in Moroccan and other North African cuisines, they're a step up from lemon zest for savory dishes.  They're also hard to find and stupid pricey compared to the cost of the ingredients.  The process is easy, and I have pickling salt.

You don't actually need pickling/canning salt to make these.  What you do need is a salt without iodine, chlorine, or anti-caking agents.  Most recommend Diamond Crystal Kosher salt.  I do have that, but I bought the canning salt last year when I had high hopes of canning home-grown pickles that never materialized.  Might as well use it.

So two ingredients, lemons (preferably organic) and salt.  There's a small chance you'll need lemon juice if your lemons don't produce enough.

Now for the big question...why?  What would you use these for?  How do you use them in recipes?  Ok, that's three questions.  You don't just drop a whole one of these into a soup or whatever.  Generally, you chop them up to add to soups, tagines, stews, salads, or dips.  It's when you want something salty and lemony.  They can even be added to drinks, including lemonade.  And you do rinse off the brine before using, or even soak them in water the night before for less saltiness.  I started this batch early enough to use some in various recipes during Passover.

*Lemons
*Diamond Crystal or Pickling salt
*extra lemon juice if needed

1.  Prepare your container.  Glass is best because it is both non-reactive with acid and won't absorb flavors, like plastic does.  Wash thoroughly with soap and hot water.  If the container is too big to be put in a pot of boiling water for 8 minutes, run it through the dishwasher.  You want to eliminate all competing bacteria and yeasts.  Wash the lid well with hot soapy water, but you don't have to sterilize it.

2.  Wash your lemons.  Yes, even if they're organic.  You don't know where they've been since they left the tree.  And if you're getting them out of your own back yard, birds and bugs have probably been all over them.

3.  Trim the lemons.  Cut off the stem and blossom ends, just the hard outer rind part.  Stand up a lemon and cut into quarters, leaving the bottom half inch or so uncut.  The lemon should open like a flower.  Repeat with all lemons.

4.  Fill the lemons with salt.  Using a spoon, pour a generous amount of salt into the cut sections.  Place the lemon in the prepared jar and move onto the next.

5.  Fill the jar.  After about three lemons, sprinkle a layer of salt on top, then continue with another layer of lemons until they are all salted.

6.  Press down on the lemons with some kind of sanitized dowel or masher.  I used this wooden tool I have to press pie dough into muffin cups.  Get the lemons to release their juice until it comes up to the level of the rinds.  If necessary, wait half an hour and go at it again, once the salt has had a chance to soften the fruit a little.  If you can't get the natural juice to cover the peels, add some, either bottled or from additional lemons.

7.  Put a lid on the jar and store it at room temperature, away from sunlight, with something underneath to catch any possible ferment overflow.  Check on the jar every day at the beginning, just to make sure there isn't any mold, low levels of juice, or lemon-splosions.  Mine kept floating, so I had to push them down and stir a bit.  If too much lemon juice evaporates, add a little more bottled juice and tighten the lid better.  Allow to ferment 4-6 weeks, then store in the refrigerator up to 6 months.  You know they're ready when the rinds have changed their texture into sort of a firm jelly with a tangy taste.  If unsure, cut off a bit, rinse, and taste.  When you like them, they're done.

8.  To use, rinse lemon thoroughly.  Either place whole into soups or chop the rind finely for nearly any other use.  You can stick large pieces in a roasting chicken, scatter strips on roasting vegetables, grind it into a purée for use in dips, and just about any other use when you would normally add lemon zest.  The brine can be reused, or used itself as an ingredient.

Difficulty rating  π