Tuesday, February 6, 2018

Chocolate Honeycomb

A friend gave me a chocolate cookbook for Chanukah.  I read through it recently, and was largely disappointed, until I got to the last page.  What they called "Hokey Pokey" is often called honeycomb or sponge candy.  Honeycomb isn't my favorite candy, but I was surprised by how easy the recipe was.  I always thought it was something that had to be made by machine.  Considering they sell it at Sprouts for $8 a pound, I thought there was a lot more to it.

This is really a science experiment.  Think baking soda volcanoes, but with sugar.  And while it's fun for kids to watch the reaction, I recommend keeping them back from the hot sugar in case it bubbles over.

The one thing I didn't like about this recipe is that it went by cooking times instead of temperature.  This is candy, which really should be cooked to a specific sugar set.  When I did find a proper recipe, it said 300º, which is hard-crack.  Without the baking soda, this is basically a lollipop.

A quick word about clean-up.  Yes, there is going to be hard candy stuck to your pot and spoon.  Don't freak out.  Sugar is one of the most water-soluble compounds that exists.  All you need to do is soak the pot and walk away.  When you come back, you'll have a clean pot and sugar water.

5 Tb sugar
*2 Tb corn syrup
1 tsp baking soda
*1 cup dark or milk chocolate, chopped

1.  Line a rimmed pan with parchment, Silpat, or butter liberally.  The recipe said 8x8, but it didn't nearly fill that.  It will if you double the recipe.
2.  Stir together sugar and corn syrup over medium-low heat until the sugar dissolves and it comes to a boil, stirring constantly so you don't scorch the sugar.  Continue at a low boil, stirring frequently, until a candy thermometer reaches 300º.  This will take about 5 minutes, if you don't have one.

3.  Remove sugar from heat and stir in baking soda.  The sugar will bubble and foam.  You have about 20 seconds to pour it into the prepared pan before the reaction runs its course and the bubbles start to deflate.  Do not spread the candy in the pan; the bubbles will deflate.  You'll also notice the color change from clear to a caramel yellow.  The more you stir it, the darker it gets.
4.  Walk away.  Don't touch it.  Just let it cool to room temperature.  Once cooled, remove it from the pan and break it apart into bite-sized pieces.  I recommend protective eyewear.  Some even ended up in my hair.
5.  Melt chocolate, either over a double boiler or in the microwave.  Coat pieces thoroughly, since this will prolong the shelf life.  Set on wax paper or Silpat.  Allow chocolate to harden, then store in an airtight container.  Candy should be eaten within 3-4 days.

Makes about half a pound (forgot to weigh it before snacking)

Difficulty rating :)

Saturday, February 3, 2018

Recipe Variations

Sorry I haven't been posting much, but I've been making reruns.  I did a veal and eggplant parmigiana, but with ground beef.  Then I made an herbed chickpea pancake using Mexican flavorings because I had a lot of cilantro and avocados were cheap.

There was a little pasta sauce and mozzarella left, so I made a vegetarian pizza, which should probably have its own label category by now.

Sorry my meals haven't been more blog-worthy, but the grocery ads haven't been all that inspiring.  I could have made something Big Game themed, but that was why I had pizza.  It simply wasn't a new version.  Everything else I've been having has been vegetarian and/or insanely healthy and not much worth writing about.  You can only post so many versions of broiled vegetables before someone starts to notice.

Wednesday, January 31, 2018

Pickled Radishes

The easy way to avoid this over-abundance of radishes would be to stop planting new ones.  I do keep using the greens in place of spinach, since that is under-performing.  Then I get stuck with the radish itself.  I decided to process-can them this time, so I could have smaller jars and not the quart that I ended up with in the fermented batch.  Also, so I can eat them at my leisure, instead of now, now, now.

I picked this recipe out of foodpreserving.org for its simplicity and because most kitchens have these ingredients on hand.  The only part I didn't like was that it went by number of radishes instead of volume or weight.  Supermarket radishes are generally the same size, so that's fine if you're buying them.  It's probably two bunches.

I ended up with 1-1/2 C of wedge radishes, so I cut the original recipe in quarters.  The slices I made last time never went on sandwiches, and wedges are easier to eat as a side condiment.  Think cucumber pickle spears versus slices.

*1 bunch radishes (8-12)
*1/4 C apple cider vinegar
2 Tb sugar
2 Tb water
1 tsp kosher salt
*1/4 tsp mustard seed
*1/4 tsp coriander seed
*1/2 tsp black peppercorns
1 small clove garlic, sliced

1.  Trim off root and stem ends of radishes and clean very well.  Cut in slices or wedges and measure by volume to see how many jars you need.  You will need a 1/2" headspace in each jar, which makes a big difference if you use 4 oz jelly jars as opposed to a single pint.  Wash jars and boil for 10 minutes to sterilize.  Really, boiling a couple of gallons of water is the most time-consuming part of this whole recipe.  You can leave the radish pieces and garlic slices on the cutting board while everything else is being prepped.
2.  In a small saucepan, combine the vinegar, water, sugar, and salt.  Bring to a low boil for 5 minutes and stir frequently to dissolve granules.  Also put your lids in warm water to soften the sealing compound.  Do not boil the lids.

3.  When the jars are ready, pack the radish pieces to 1/2" of rim.  They will shrink up a bit as they cook, so don't worry if it's slightly higher than 1/2".  Top with garlic and spices, evenly distributing if you use multiple jars.  Pour hot brine over the radishes until they start to float, leaving 1/2" headspace.  Shake or poke to get rid of bubbles and add more brine if necessary.  If you run out of brine, top with a bit of vinegar.  Wipe rims clean, center lids, and screw on bands fingertip-tight.
4.  Place jars in boiling water bath.  When water returns to a boil, set the timer for 15 minutes.  After it dings, turn off the heat and let the jars sit for 5 minutes before removing from the pot, to reduce the chance of siphoning.  Remove jars and set on a towel to cool.  You should get a "ping" within 2 minutes.

5.  Once jars are room temperature, test the seals.  Any jars with failed seals should be refrigerated and used within 2 weeks.  Successful seals will keep the pickles fresh, if stored out of direct light, for 6 months.  Wipe jars clean and store without the rims.  Allow to mellow in the pantry for 2 weeks before opening.

Makes about 1-1/2 cups

Difficulty rating π

Thursday, January 25, 2018

White Chocolate Wasabi Cookies

I've been getting snacky lately.  Not keeping snacks in the house helps a lot, but there are several drive-thrus on the way home.  I knew that a batch of regular chocolate chip cookies would barely make it until they cooled, so I decided to make something that was still tasty, but would leave my willpower intact.  Not a huge fan of white chocolate.  It's not chocolate!

I went looking for a recipe online, since white chocolate and wasabi is actually a thing, and all I found was a frozen cookie dough you can buy to bake these at home.  Not helpful.  I've never made the Bible's chocolate chip cookie recipe because I just use Tollhouse, but it looked perfectly adaptable.  Sub in wasabi powder, white chocolate chips, and chopped macadamias for the vanilla, chocolate chips, and chopped walnuts.  This recipe has the same amount of sugar as Nestlé's, but instead of equal parts light brown and granulated, it skews on the brown side.  That changes the moisture content, which is fine because it's a tiny bit heavier on the flour.  Basically, they don't spread out as much as Tollhouse, but have a similar texture.

1-1/4 C flour
1/2 C packed light brown sugar
1/2 C butter, softened
1/4 C granulated sugar
1 egg
*1 Tablespoon wasabi powder
1/2 tsp baking soda
1/2 tsp salt
*1 C white chocolate chips
1/2 C chopped macadamia nuts

1.  Cream together butter and both sugars until light.  Beat in egg until smooth.

2.  Sift together flour, wasabi powder, baking soda, and salt.  Add mixture to creamed ingredients and beat until smooth.  Stir in chips and nuts.
3.  Preheat oven to 375º.  Grease or line two baking sheets.  Drop cookie dough in tablespoons two inches apart on sheets.  Bake 10-12 minutes, until lightly browned.  Allow to cool on sheets for a few minutes before transferring to a rack.  Once cooled, cookies may be kept in a sealed box at room temperature for several days or in the freezer for a month.

Makes about 2 dozen

Difficulty rating  π

Monday, January 22, 2018

Black Bean Soup

This may have been what I was really after when I made the tortilla soup.  I love the black bean slurry I get at my local Cuban restaurant.  It's supposed to be a side, not soup, but that's how I eat it.

Minus garnishes, this recipe is vegan and gluten free.  You use the beans themselves to thicken it, rather than flour.  I chose to put avocado and corn tortillas on mine for garnish, so it was still vegan and GF, but you could easily add crumbled cheese, leftover chicken, or flour tortilla chips.  (I finally found out what made me sick, and it was the one cheese I hadn't thrown out after the incident.  Food poisoning, round two, and another dairy-free couple of days.)

I'm not forcing a specific diet on anyone, just offering a healthy option for Soup Month.  Plus, I'm going on a cruise in a few weeks (yay!) and am kind of pre-dieting.  Once I'm eating healthy on a regular basis, I'm less likely to make poor choices when I'm on vacation.  Good eating habits can be as addictive as poor ones.

*1 quart unsalted vegetable stock
*1 C dried black beans
1 Tb olive oil
1 diced red onion, divided
*2 cloves garlic
1 tsp cumin
1 tsp chili powder
*1 bay leaf
*1/2 tsp dried oregano
*1 Tb tequila (optional)
1/2 C chopped fresh cilantro
1 jalapeño pepper, minced (optional)
kosher salt and pepper to taste
juice of 1 lime
additional garnish options: avocado, sour cream, cotija cheese, pre-cooked chicken or pork, white rice, *tortilla chips or strips, *more cilantro, *the rest of the red onion, lime slices, etc.

1.  Pre-soak the beans for at least 4 hours, drain and rinse.  You can save time (about 6 hours) by using canned beans, but then they won't be cooked in the broth and it's going to result in a different product.

2.  Heat oil in a soup pot over medium-high.  Sauté the onion, reserving 1/4 C for garnish, and garlic until softened.  Add cumin, oregano, bay leaf, and chili powder and cook another minute until fragrant.  Deglaze with tequila, if using.
3.  Add vegetable stock, beans, 1/2 tsp kosher salt, and jalapeño (if using).  Bring to a boil.  Lower heat to a simmer, cover, and cook until beans are very tender, 1-1/2 to 2 hours.
4.  Fish out the bay leaf.  Using an immersion blender, regular blender, or even a potato masher, purée half of the soup.  This is your thickener.  If you want a more brothy soup, purée less.  For something closer to mashed beans, do most of it.

5.  Check for seasoning and add salt and pepper as necessary.  Also add the cilantro.  Return to a simmer and cook until thickened and the cilantro is heated, about 10 minutes.  Stir in lime juice and serve, garnished with the reserved red onion and whatever else you like.

Difficulty rating  :)

Friday, January 19, 2018

Mustard Orange Chicken

I started to think about things I want to can this year, then saw how much jam is left in the pantry.  Kind of overdid it last year, then never threw a tea party.  I did finish off the mustards, fruit in syrup, and pickle-y things.

One of the things left was orange marmalade and some rind-free jelly from the batch.  After using half of the jar of jelly in yogurt, I decided to baste some chicken with it.  Then I thought it would be interesting to stir some grainy mustard into the jam first.  Ta-da.  Think sweet and sour with a mustard tang.

1 lb boneless chicken breast
*1/2 C orange jelly or marmalade
*2 Tb grainy or honey mustard
1 Tb oil

1.  Preheat oven to 350º.  Combine jelly, mustard, and oil into a smooth dressing.
2.  In a roasting pan slightly larger than the chicken, pour the sauce and swirl to distribute.  Place chicken in pan, and turn to coat all sides evenly.

3.  Roast until thermometer reaches 160º in the thickest part of the chicken, about 45 minutes.  Let rest for five minutes, then slice into servings.  Pour pan sauce over chicken, and frankly everything on the plate.  It's really good on veggies and rice.

Note: I did it this way because I bought a boneless, skinless breast.  If you have some skin-on, bone-in chicken, you can put it on a rack in a roasting pan and brush with the glaze every ten minutes as it cooks.

Difficulty rating π

Tuesday, January 16, 2018

Arugula and Walnut Pesto

I'm coming to the party a bit late with the realization that "pesto" doesn't have to be made out of basil.  The list of components is: herb, nut, hard cheese, oil, something garlicky.  Traditionally that translates into basil, pine nuts, parmesan, olive oil, and fresh garlic.  It doesn't have to.

Now that I'm caught up on the radishes, the arugula is a bit overgrown.  Not only that, but this batch is especially spicy.  I'm not considering it a mere lettuce anymore.  It's a full-fledged herb.

I was able to make up a four-serving dinner for a whopping $3 of fresh veggies by using items on hand, including what went into this pesto.  Broiled veggies over quinoa, tossed with some freshly made pesto, was a meatless Monday.  For vegan, replace the cheese with nutritional yeast.

A similar recipe I found used walnut oil.  While that makes sense, the bottle I found at the market was $11 for 8 ounces.  The truffle oil seemed a bargain at $18 after that.  If you happen to have some, or grocery budget to spare, go for it.

*1/4 C toasted walnuts
*1/4 C grated parmesan cheese
*2 cloves garlic
*2 C packed arugula leaves (remove stem if not "baby" arugula)
*1/4 C olive or walnut oil, or to desired consistency
salt as needed

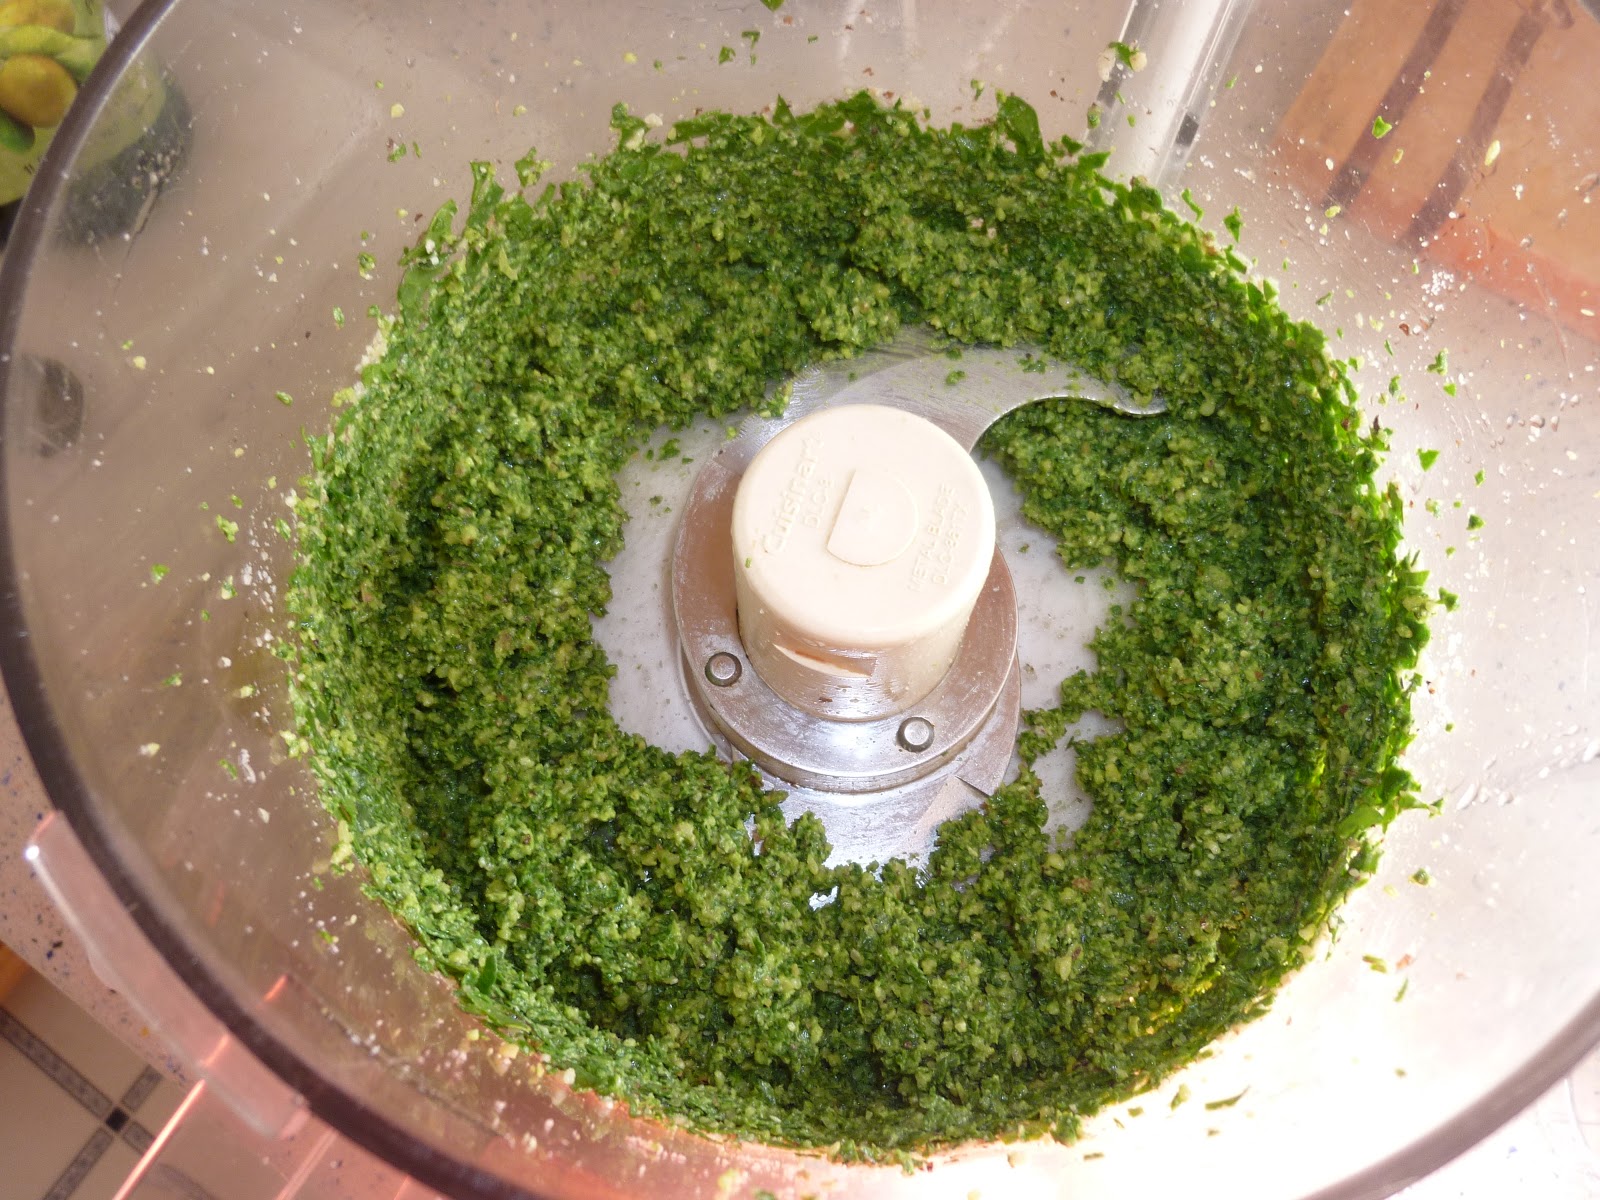
1.  Place walnuts, parmesan, and garlic in food processor.  Pulse until it resembles breadcrumbs.
2.  Add arugula and process into a paste.
3.  With the processor running, drizzle in oil.  Check consistency and for salt.  Add more oil and/or salt and process to distribute.
4.  Store in the fridge or freezer until needed.  The olive oil will solidify, but will turn liquid again when the pesto is warmed.  Don't be concerned if the sauce turns into a rock in the fridge.

5.  Use within 1 week in the fridge, one month in the freezer.

Makes about 1 cup

Difficulty rating π

Saturday, January 13, 2018

Crazy Mac'n'Cheese

The last thing I put back in my diet after recovering from food poisoning was dairy.  I always planned to do this dish with the remaining scraps after the cheese platter.  It merely got delayed a week.

The "crazy" part of this is using several distinctive cheeses together.  Bleu cheese and smoked gouda are each strong.  If you're going to mix cheeses, you need to balance them until you get what you want.  This had more gouda than bleu cheese, and the brie and mascarpone mellowed them out.  If cheddar is more your thing, make it a significant portion of the mix.

The onion and radish in the sauce are introduced to make the cheese a little less all-encompassing.  Even the biggest cheese lover can admit that straight cheese can be overwhelming.

The apple is there because I wasn't quite ready for raw veggies yet, but could manage fruits.  I actually ended up stacking the apple with pieces of farfalle in a single bite.  It was good.

*2 C farfalle or elbow macaroni
*1/2 lb assorted cheeses, some soft and others hard
2 Tb olive oil
*1/2 C diced green onion
*1 C diced radish (or red onion)
1 Tb flour
salt and pepper to taste
*1 C milk, more to taste

1.  Start a pot of water boiling for the pasta

2.  Put all the cheeses together in the food processor.  If you don't have a cream cheese, put in at least 1/4 C Greek yogurt or sour cream.  Pulse into a chunky paste.  It's all going to melt later.  I'm just getting you out of having to grate anything.
3.  In a large skillet, heat oil over medium heat.  Add radishes and onions and cook until soft and fragrant, about 5 minutes.  By now your pot should be boiling and you can start cooking the pasta.
4.  Add flour and toss until the veggies are pasty.  Add milk slowly and allow to thicken.  Add cheese and stir into cream base.  Once it melts, you can decide if you want to thin out the sauce with more milk.  Taste and add salt and pepper as needed.
5.  Drain finished pasta and add to skillet.  Stir to coat and return to a simmer.  Serve hot.

Difficulty rating  :)

Wednesday, January 10, 2018

Chinese-Style Fried Rice

I got food poisoning on New Year's.  When it was time to start eating a few bites again, I picked up some Chinese food for its digestibility.  I forgot that I had stopped taking antihistamines.  There must have been chili flakes in the sauce, because I broke out in hives.

Instead of blaming all Chinese food for my pepper allergy, I decided to make my own fried rice.  I needed the Sunset Oriental Cook Book to get me started.  Seriously, I've never made fried rice in my life?  It's just leftovers and soy sauce.

1 C dry rice
2 Tb oil
1 egg, beaten
1/2 C thinly chopped green onion
*1 C frozen peas & carrots, thawed
1 Tb soy sauce

1.  Cook rice according to package directions, leaving it on the dry side.

2.  In a 10" skillet, heat oil.  Pour in beaten egg and swirl it around so it cooks very thin.  When almost done, break it up into little scrambled bits.  Add the onion, peas, and carrots and cook until thoroughly heated.
3.  Add in the rice and soy sauce and mix everything together.  Taste and decide if you want to add any salt, pepper, or other spice like ginger or cayenne.  You can also add chopped bits of meat or other vegetables.  This is rice being a carrier for whatever is left in the fridge.

Difficulty rating  π

Sunday, January 7, 2018

Tomato and Rainbow Carrot Soup

Here's one for people on a New Year's diet.  It's also a vegan main dish, for anyone trying to cut down their meat intake.  A little swirl of cream to finish, and it's still vegetarian.

It's taking me a while to finish the groceries I bought for Christmas.  That's what happens when people don't RSVP before you go grocery shopping, then can't come.  If I'd bought less, everyone would have shown up and brought friends.  That's just how the world works.  Not complaining about five days of prime rib leftovers, but the veggies were going to go bad if I didn't do something.

As long as I was using up stuff from the fridge, I took a look at my pantry staples.  I forgot I had garbanzo bean flour.  Turns out, it's a wonderful thickener for vegan soup and brings protein and iron to the dish.  Just what everyone wants with this week's weather.

I was going to make sticks out of the dark red carrot with a yellow middle to use as garnish, then started taking pictures and forgot until everything was puréed.  Garnish, garnish, garnish, or a bowl of soup looks boring.  I guess I could have thrown a little rosemary on top.

*1/2 C garbanzo bean flour
*1 pint grape tomatoes
*1 lb rainbow carrots
*1/2 C diced red onion
2 Tb olive oil
2+ C water or vegetable stock
*1 tsp dried rosemary
salt and pepper to taste

1.  Combine garbanzo bean flour and 1/2 C water.  Let sit for 2 hours to hydrate.

2.  Split tomatoes.  Peel carrots and cut into chunks.
3.  In a large saucepan or soup pot, heat oil over medium.  Add onion and sauté until tender, stirring occasionally.

4.  Add water, tomatoes, carrots, rosemary, and a bit of salt and pepper.  Bring to a low boil.  Reduce heat, cover, and simmer until carrots are tender and tomatoes have kind of melted, about 30 minutes.

5.  Stir in garbanzo flour slurry.  Either whiz the pot with an immersion blender or purée in batches in a regular blender.  Return to heat and bring back up to a low boil.  Cook for 5 minutes, to allow the flour to thicken the soup, then decide if you need to add more broth to thin it to your liking.  Taste, then add more seasoning as necessary.  Serve hot.

Difficulty rating :)