Tuesday, July 30, 2024

Pesto Tilapia

I did mention making half a gallon of pesto, right?  It's my new ketchup.  Which isn't a bad thing.  But sheesh, it takes up a lot of room in the freezer.

I don't think I've made fish for dinner since I started taking fish oil supplements earlier this year.  That is so not the point of taking them.  They're a staple in the Mediterranean Diet, and really easy to prepare in so many ways.  I just tend to gravitate toward chicken when I think of a non-mammal meat, not fish.

The point of this dish was to have something to go with a cold soup and greens.  My kale seems to be the most productive thing in this summer's garden.  No idea what I did, but I'm harvesting what chops up to a quart every few weeks.  I ignored it for a month, and ended up with a gallon bag in addition to the six cups I cooked up that night.  Anything I'm not using goes in the freezer or to my boss, who is the only one in her family willing to eat kale.  I expect them to start bolting any day now, so all the freezer baggies will come in handy until I can get a new round going in a couple of months.  It's already almost time to start my celery and lettuces for the fall!  Doesn't feel like it.

This recipe utilizes my favorite way to bake fish, which is essentially to steam it in the oven.  While still flaky, it's also juicy and doesn't get that weird fish crust.

4 tilapia filets
1 Tb lemon juice
1 Tb oil
*1/2 C pesto

1.  Preheat oven to 350º.  Line roasting dish with parchment paper or foil.

2.  Arrange tilapia in a single layer.  Sprinkle with lemon juice and oil.  Spread pesto evenly over tops of filets.

3.  Seal pan shut with foil.  Bake until center of fish is 145º, opaque, and flaky, about 45 minutes (depending on thickness).  Start checking around 30 minutes.  Serve hot.


Difficulty rating  π

Saturday, July 27, 2024

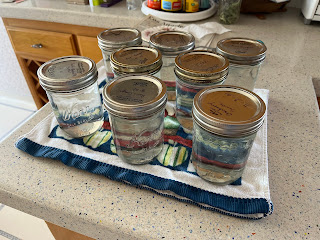
Canning Asparagus

Most people start their pressure canning journey with broth, maybe beans, or raw-pack meat if they're feeling adventurous.  I went for the one item a lot of people warn against canning because you might not like it, asparagus.  I actually love canned asparagus, but it's so different from freshly steamed or roasted that it's like a whole different vegetable.  You should not go into this experience without trying store-bought canned asparagus first.

I went with this for a few reasons.  First, it was probably the last good sale of the year.  Second, I don't have any in the pantry, and I do have some of the other items on my to-can list.  And third, it's just hot-pack produce, which is how I prefer to do my fruits, and I'm used to that procedure.

Once I got the four pounds of asparagus opened and in the sink to wash, I was disappointed.  This was not the greatest quality asparagus.  Most of the ones in the store were too thin to can, so this is what I was stuck with if I didn't want to wait nine months to do this project.  An appalling amount ended up in the compost bucket, including whole spears that were unusable.  I had hoped to get six pints out of the purchase, and heated up eight jars, but only ended up with 5.  Still, five cans at the market cost considerably more than the $10 I spent, including lids, so it's a deal.

I'm not going to post a recipe, since it's the procedure in the Presto manual, Ball Book, NCHFP website, and every reliable and up-to-date canning source.  Basically, you blanch the prepared stems, put them in jars with 1" headspace, fill with cooking liquid or boiling water, add salt if desired, and do all the good stuff related to lids before putting it in the canner.  Process at the right pressure for your elevation 30 minutes for pints and I forget what for quarts because that is way more canned asparagus than I will ever need at once.

The jar with only stems and no tips - the one I expected to use for cream of asparagus soup - didn't seal.  I could tell right away because the pieces weren't floating like in the other 4 jars.  It probably siphoned slightly, based on the smell, and particles prevented the seal.  It happens.

This brings up the good point that you should always have a plan when you're canning for what you'll do with any failed seals.  I had some of the unsealed jar in my vegetable medley the next couple of nights, and the rest over the course of the week.  It gave me a chance to try it before putting away all the jars, which was a plus.  It tastes like canned asparagus, and that was the goal.  I could have put in a little more salt.  The recommended amount is 1/2 tsp and I used 1/8.  Maybe I'll try 1/4 next time.  It was close.

So, what do I think about pressure canning?  It does take half a day to process a load of something, but now I'm set for months.  I rotate my ingredients, not using much of any item in a given month, so I might not open the next jar until after summer.  Hot pack did take far less time than the raw pack method I practiced with, because the boiling time is cut drastically.  The canner will get used, but mainly when there's a good deal on something I use enough to make 8-9 pints of it.  And that was my justification for this purchase in the first place.

Wednesday, July 24, 2024

Green Onion Pesto

All right, that's it, these onions are never making seeds.  I left a couple, just in case, and pulled all the ones with really good green leaves.

I've been trying to discipline myself this summer to get a lot of hanging projects done.  Each week I'm tackling at least one project in four categories: gardening, preserving, mending, and deep cleaning.  Gardening has been mostly pruning back years of overgrowth.  Preserving can be store-bought or garden bounty.  Mending doesn't only refer to sewing; it can be any repair or a craft project.  Deep cleaning is any project above my weekly basics, including painting something.  Unless I don't have a mending project that week, and painting becomes that.  There were a lot of minor painting projects on the list.

I dehydrated some of the green onions, and my oven still smells like it weeks later.  I decided to make pesto. Wow, those onions were big.  I cut off the white and light green parts, and it was still a lot.  And now I have four onions to use in something.  Maybe I'll dice and freeze them as white onions.  The greens ended up making almost two quarts of pesto.  That's half a gallon.  I'm going to be putting pesto on everything.

I'm scaling this down to one grocery-store bunch.

*1 bunch green onions
*1/2 C grated or shredded Parmesan cheese
*1/4 C nut of choice (pine nuts are traditional.  I  used cashew.)
2 cloves garlic
salt to taste
Olive oil for consistency (about 1/4 C)

1.  Remove root ends from onions.  Coarsely chop.  Peel and mince garlic.

2.  Add nuts and cheese to food processor.  Pulse until well chopped, but not a paste yet.

3.  Add onions, garlic, and a pinch of salt if desired.  Run processor into a paste.

4.  Scrape down sides and put the lid back on.  While processor is running, drizzle in oil until desired consistency is reached.  Taste and adjust seasonings as needed.

5.  Use immediately, refrigerate for up to a week, or freeze.

Makes about 1 cup

Difficulty rating  π

Sunday, July 21, 2024

Almond and Cherry Layer Cake

I haven't made a cake in ages, probably since the whole high blood sugar thing.  That seems to be under control, so I'm going for it.

Before Purim, the only hamantaschen filling I could find was cherry, so I bought a can.  Later, I found the prune in the fifth store I tried.  It has been sitting in the pantry since, waiting for me to figure out how to use it.  I've been on a kind of Pantry Challenge, trying to find ways to use items I bought without a specific purpose.  This one used the filling, some almond flour, and the KLP almond milk I never opened.  Really, the only thing in it that I would have to replace was the eggs.  I even had enough leftover frosting in the freezer to do a naked cake look.

I'm basing this recipe off my Lavender Cake, with a few changes for the almond flavor.  The amaretto in the filling is optional, but does enhance the almond in the cake.  I made a 1/3 recipe in a 6" pan, and it didn't rise as much as I was expecting.  I think because I was trying sugar substitute.  It just doesn't dissolve properly.  It's a learning curve.  I have over half the can of filling left, and might try again.  Besides, I really liked the cake.

3/4 C sugar
3/4 C margarine
3 eggs, room temperature
*2/3 C milk or almond milk
*1-1/2 C cake flour
*1/4 C almond flour
2 Tb baking powder
1/4 tsp salt
*1/2 tsp almond extract
*1/2 C cherry pastry filling
*1 Tb amaretto (optional)
frosting, powdered sugar, or fondant for top
sliced almonds and fresh or maraschino cherries for garnish

1.  Grease two 8" round cake pans.  Line the bottoms with wax paper or parchment and grease again for guaranteed removal.  Preheat oven to 350º.  If using, start soaking cake pan strips.

2.  Cream together margarine and sugar.  Beat in eggs one at a time, then milk.

3.  Sift together cake flour, almond flour, baking powder, and salt.  Stir into wet mixture, then beat until smooth, about one minute.  Beat in almond extract to finish the batter.

4.  Divide batter evenly between pans, preferably using a scale.  Bake until lightly browned and a  toothpick inserted in the middle is clean, about 30 minutes.  Allow to cool in pan 5 minutes, then turn out onto a rack and pull off the paper from the bottoms.  Allow cakes to cool to room temperature before topping.  It's easier to freeze them once cooled and finish another day.

5.  To make filling, stir together cherry filling and amaretto, if using.  If you can't find filling without chunks of fruit, either use jam or scrape the goo off the cherries in traditional pie filling.

6.  Place bottom layer of cake on serving platter.  Level the top if necessary, then spread the filling to the edges.  Top with other cake.  If frosting, chill in the fridge 10 minutes so things don't slide around as much.  For powdered sugar or fondant topping, no need to wait.  Decorate and serve.

Makes one 8" cake, about 8-10 servings

Difficulty rating  :)

Thursday, July 18, 2024

Whole Wheat Noodles

I was going to make a whole elaborate pasta and veggie thing, then this happened:

It isn't broken, but it hurts a lot.  Of all the stupidly hazardous things I do on an average day, I hurt it on the nightstand getting into bed.

So, change of plans.  I decided I could make pasta dough on one foot and opened a bunch of cans for the rest of the meal.  Well, I guess I did cut up a leek.  The finished product wasn't a whole lot different from the original vision, so I'm going to go ahead and post the pasta part of the endeavor.  I definitely would have preferred the taste and texture of fresh vegetables, but the pasta part really was pushing it.

The urgent care team didn't give me a time frame of how long it was going to take to heal.  It probably depends on how much I walk on it.  Which is all the time.  I do at least 15,000 steps a day on work days, about half that on days off, so this is kind of frustrating.  I know, I should be grateful it isn't broken and I don't have to wear a boot.

Because I'm basing this recipe on the one I use for regular pasta, it's in metric and uses the scale.  The yield is about 10 oz once dried, almost 12 oz fresh.  I didn't measure the flour by volume because I made this early before work and let it dry all day.  Before my first cup of coffee, things were running on instinct.

100g whole wheat flour, plus more for dusting
100g bread flour
1/2 tsp salt
2 eggs
1 tsp olive oil
1 Tb water

1.  Measure both flours and salt into a bowl and whisk together.  If you sub all-purpose flour instead of bread flour, you might not need the water at the end.

2.  Make a well in the middle and crack eggs into it.  Add olive oil and water.  With a fork, work liquid ingredients into the dry.  It's still going to look very crumbly.  Ditch the fork and knead with your hands a few minutes until smooth.  It's still going to be sturdy.  Wrap in plastic so it doesn't dry out.  Rest 30 minutes at room temperature, or in the fridge if you aren't going to get back to it for a while.

3.  Divide the dough ball into 3 or 4 pieces so it's easier to manage.  Flour a surface with wheat flour and roll out the dough very thinly.  I was going to do this all by hand, but foot.  I got out the pasta roller.

4.  Once dough is at desired thickness, cut into strips.  Toss with a little more flour so the slices don't stick together.  To dry, just set aside for several hours until brittle.  Dried pasta may be frozen for several weeks before cooking.

5.  When ready to cook, boil a large pot of at least two quarts of salted water.  Add pasta, stir, and return to a low boil.  Cook until desired tenderness, about 5-8 minutes, drain, and serve with topping of choice.

Difficulty rating  :)

Monday, July 15, 2024

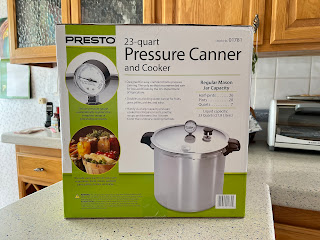
I Bought a Pressure Canner

I have been considering whether I want to start pressure canning for a couple of years.  Many of the people I follow on social media do it.  I've been doing water bath items for almost two decades, but have been scared of the botulism risk involved in low-acid pressure canning, not to mention the whole pressure cooker thing.

The boneless-skinless chicken in my freezer was part of what put me over the edge.  If I didn't have to cook it up before having it to use in lunches and casseroles, I would eat it a lot more and not let it languish in the deep freeze.  I would use canned meats far more if I could control the salt and spices in them and they didn't cost so much to replace.  I also miss having canned soups, but very few fit my current eating lifestyle and all of them have too much salt.

I also considered if it was really worth canning items as a convenience if I'm using the Crockpot more.  But I prefer chicken thighs in the slow cooker and breast in canned.  I generally don't make beans in the slow cooker unless it's a recipe that takes at least 4 hours in the oven.  Most of the time, I want skins on my potatoes, and you have to peel them before canning so I probably won't do that.  There are just a lot of differences in what I would put in a jar on the shelf and what I would come home to in the Crockpot.

It also does more than just pressure can jars.  It's a pressure cooker, if I ever want to cook up 10 lbs of pork butt for a luau or an entire brisket.  I could use it to make the broth that I will later be canning.  It's a giant stock pot and can be used as a steamer.  With the extra racks I ordered, I could make three layers of tamales and feed everyone I know.

I spent a week doing a cost/benefit analysis.  Not everything is cheaper home-canned.  There's the price of the ingredients plus 40¢ or so for the lid.  (I did combine a sale and a gift card to order lids for what ended up being 14¢ apiece for a couple of years' worth.)  Just because some things are can-able doesn't mean I like them that way, like green beans and peas.  There's the initial cost outlay for jars and equipment, some of which I already have from water bath canning.  I'm estimating a 2-year break even point, which is far sooner than I had originally expected.  A lot of that is in broth, which is basically just the cost of the lid because the rest of it is stuff you throw away, like bones and veggie trimmings.  A well-maintained canner and jars can last nearly forever, so these are one-time purchases.

What made me go for it right now was a really good sale combined with far more Amazon rewards than I realized I had from my credit card.  It wasn't free, but it was pretty close.

This blog is not going to become all about canning.  I'm not starting a new chapter.  I will share my experiences just as I would any recipe I'm trying for the first time, then move on.  I don't post every time I water-bath can, only when the recipe is interesting and not a repeat.  I only expect to can about once a month anyway.  Seriously, a 9-pint load of anything will last me quite some time, and you really shouldn't put up more than a year's worth of any one item, same as water bath canning.  I will still refer to a "can" of something as a grocery store item, as a can of tomatoes or beans is the same yield as a pint jar.

The first step was reading the manual a few times and running a load of water only up to 15 pounds of pressure to find out if the dial gauge is accurate.  It isn't part of the instructions, but it should be.  The factory 15-pound jiggler, to be used for pressure cooking, starts to rock at 14 on the dial, so I know that the gauge is one pound low.  Canning at sea level is 10-11 pounds, and I now know to err closer to 10 until I buy a 10-pound weight.  No idea why canners don't come with them.  I think ForJars is the only brand that comes with multiple weights for different elevations.

The second step was to run water-filled pint jars through it, to get used to the process and how long it takes.  Raw pack, I'm looking at about two and a half to three hours per load.  That's over half an hour to get it boiling, ten to vent, another ten-ish to get to pressure, the actual processing time, half an hour for pressure to drop, and ten with the regulator off for everything to normalize.   And you have to watch it every couple of minutes, so you’re in the kitchen pretty much the whole time.  On the other hand, I was practicing with reused lids, and they all sealed.  That's a pretty impressive rate when I'm doing everything right with actual ingredients and new lids.

Friday, July 12, 2024

Gozleme

I went down a bit of a recipe rabbit hole and bookmarked a bunch of things to make.  Up first is a Turkish street food called gozleme.  No idea how to pronounce it.  It's kind of like a calzone, or a Greek phyllo pie but with tortilla-ish dough.  I saw a vegan version at the market with pumpkin that looked good, but not $10 good.  There are both meat and vegetable fillings on most of the sites I visited.  I'm making the spinach and feta.

I got this recipe from RecipeTin Eats.  She's Australian, so both metric and Imperial measurements are given.  Her recipe serves four, but that is as a full meal.  I was having this as part of a tapas arrangement and cut it in half, to be just another thing on the plate with my hummus and veggies.  It was still kind of a lot, so I'm reducing the amount of filling.  This version will serve four as a lunch or as dinner with side dishes, or many more cut up into an appetizer.

Dough

1-1/4 C flour
3 Tb olive oil
6 Tb water
1/4 tsp salt

1.  Since this is a small batch, you probably can't make it in the stand mixer.  Stir together in a bowl until it starts to come together.  I used part whole wheat flour, which probably changed the water absorption, so your consistency may vary.  Knead in the bowl until you can get it out in one piece, then knead on a work surface until smooth, without adding additional flour.  It will surprisingly come together as a smooth, not sticky ball.  I scrubbed the counter and did it there.

2.  Cover with a towel and allow to rest 20 minutes.  You can also wrap in plastic and refrigerate for up to 3 days as a do-ahead.  While resting, make your filling.

Filling

4 oz spinach, either fresh or thawed and squeezed dry
1 clove garlic, minced
1 egg
1/4 tsp pepper
4 oz feta, crumbled

1.  Combine the spinach, garlic, egg, pepper, and feta in a bowl.  If using fresh spinach, knead it first to crush it and make it pliable.

2.  Divide dough into 4 portions by weight and roll each out into a thin rectangle on a floured surface, about the thickness of a tortilla but oblong.  Start heating a griddle or skillet over medium-high heat with a thin layer of oil, like you were making pancakes.

3.  Divide spinach evenly among the rectangles, placing it in a thin layer on half of each.  Fold the clean half over and pinch the gozlemes shut, pressing out any air pockets.

4.  Carefully transfer gozlemes to the skillet.  These should be small enough to carry without the help of a plate, unlike the giant ones in the original recipe.  Even with these smaller pieces, you'll probably have to do them in batches unless you have one of those cool, two-burner griddles.

5.  Cook about 3 minutes per side, until crispy.  Pressing down with a pancake turner will help to cook them faster and more evenly.  If doing batches, add more oil before the next one.

6.  Cut into slices and serve, with lemon wedges if desired.

Difficulty rating :-0

Tuesday, July 9, 2024

Asparagus and Red Lentil Curry

I had "bean curry" planned.  Asparagus was on sale.  Done.  Meal planning doesn't have to stifle creativity.  Knowing that I was making something to use a 50¢ can of almost-expired coconut milk merely steered things in an unexpected direction.

Curries have become a bit routine, to the point that I probably should have a separate tag for them.  I vary the spice mix to match the primary ingredients and hit the ground running.  It's like how I make American dishes, with all those familiar spices and techniques.  It's just a different flavor profile.

For the olive oil, I actually used some of my cilantro frozen in oil and skipped fresh cilantro.  Not sure it added a whole lot of flavor, but that could have been in part because the herbs are usually added at the end.  It probably just cooked out.

1 Tb olive oil
1 small onion, diced
*1/2 tsp celery salt
1/2 tsp coriander seed, crushed
1/2 tsp cumin seed
1 tsp paprika
2 tsp curry powder
*3 cloves garlic, minced
*1 tsp grated ginger
*2 Tb tomato paste
1 15 oz can diced tomatoes (no salt if possible)
*1 15 oz can light coconut milk
3/4 C red lentils
1 lb asparagus
2 Tb lemon juice
rice for serving

1.  Heat oil in a large skillet or soup pot over medium-high heat.  Add onion and cook until lightly browned, about 5 minutes, stirring frequently.

2.  While the onion is cooking, rinse lentils well.  Prep asparagus by snapping a few inches from the base. Wherever it breaks is the natural place where the tough parts can be discarded.  If desired, cut spears into smaller pieces.

3.  Add spices, garlic, ginger, and tomato paste to the onions and stir until fragrant.  Stir in diced tomatoes and their juice until well combined.

4.  Start your rice according to package directions in a separate saucepan.

5.  Add coconut milk to the curry pot, then stir in lentils.  Once it boils, lower heat to a simmer.  Cover and cook 10 minutes.

6.  When the lentils are mostly done, add asparagus.  Cover and continue to cook until spears are a vibrant green.  If mixture is too thick for your liking, add a bit of water.  It should be thicker than soup, more like a stew.  Stir in lemon juice.

7.  The rice should be done by now, so you can serve the curry alongside or on top of the rice.

Difficulty rating  :)

Saturday, July 6, 2024

Date Chicken

I wanted to use whole dates and date syrup in a braised chicken dish and googled the title above.  Almost every recipe that came up was either Persian or for Passover.  Some were both.  So, even though I'm making up this entire recipe based on items in my pantry and spice rack, I feel comfortable calling it an international recipe.  At some point, someone in the Middle East or North Africa has made what I'm presenting here.

I did make this on the stove, but it would work great as a slow cooker recipe.  I decided that, if I was getting a skillet dirty browning the onion with the spices, I might as well make the whole thing in it.  It's only 45 minutes of simmering, making the whole dish about one hour.  Slow cooker would be 4 hours on low or two on high.

1 Tb olive oil
1 small onion, diced
1/2 tsp each kosher salt, *ground sumac, and turmeric
*1 tsp paprika
1 cinnamon stick
*4 large chicken thighs or smaller leg quarters, skin-on
*1 can (almost 2 C) unsalted chicken or vegetable stock
*4 oz dates, pitted and split
*1 Tb date syrup
*1 Tb brandy, optional

1.  Heat oil in a 12" or 14" skillet over medium (depending on size of chicken).  Add diced onion and cook about 5 minutes, stirring frequently, until softened and starting to brown.  Add salt and spices and cook until fragrant.

2.  Lay chicken, skin side down, in the pan.  Allow to sear until skin is well browned, about 5 minutes.  Ok, yellow-browned.  Turmeric.  I knew I would be scrubbing the yellow out of the kitchen sink when I put it in the spice mix.

3.  Turn chicken over.  Add cinnamon stick, stock, dates, date syrup, and brandy (if using).  Bring to a low boil for 2 minutes to burn off the alcohol.  Turn heat down to a simmer, cover, and cook 45 minutes.

4.  Serve chicken with dates and onions from the pan and a spoonful of pan juices poured over.

Difficulty rating  π

Wednesday, July 3, 2024

I Didn't Plant This

 Sorry there have been so many gardening posts the past couple of months.  I've been making the effort to do some kind of active gardening once a week.  Half of it is what I call destructo-gardening, which the rest of the world calls pruning.  The ornamental vegetation had been ignored for a couple of years and was encroaching on everything else.  I do have a gardener, but he tends to like the look of a full bush and merely shapes whatever grows faster than the rest of the plant.

I kind of went ballistic on the hibiscus after Molly got caught on a branch and it tore off her collar.  There was also a lot of whitefly in some sections.  It will grow back in a couple of months and I got back about 18" of lawn.  I had forgotten how many pavers were under the hedge.
A week after I fertilized, turned over, and seeded the front patch for tomatoes, something sprouted.  It wasn't a tomato.  It's some kind of gourd.  Once it had a couple of leaves, I dowloaded a plant identifier app.  It says it's a pumpkin, but that doesn't really help at this stage.  Hard-skinned squashes will also come up as a pumpkin, and I've planted both in that patch at some time in the past year.  I'm going to have to wait for the first female flower to figure out what it is.

Meanwhile, I did intentionally plant pumpkin elsewhere.  I'm trying more container gardening, and put a few seeds in a bowl planter where I can trail the vines down an under-landscaped area of the driveway.  Watermelon are in another bowl nearby.  The tomatoes did come up, and I'm attempting cauliflower in the empty corner of that bed.

For the backyard, the Dollar Tree planters aren't as successful as I was hoping, but I don't think it's the pots' fault.  Many of the seeds are older.  I also could have put it in a sunnier spot.  I'm not giving up yet.  Some pole beans I put in 6" pots are doing great and will start climbing the chicken wire trellis any minute now.  I'm starting to realize that I planted a lot of beans, but I also eat a lot of them.  I doubt I'll grow the 6-8 pounds I generally eat in a year, but I'm hoping for at least making back the price of the seeds.

I put about 4" of potting bed soil and compost/manure in the Pond after pulling everything except the kale and one celery.  That is now going to be a catchall of tomato, cauliflower, more watermelon and pumpkin, and a random scattering of carrots.  The celery in the pot finally bolted, so it's going to be another cauliflower.  I don't even like cauliflower that much, but the leaves make great greens that can be grown in warmer temperatures.

We'll see if that's it for my summer garden.  The eggplant is going to be thrilled when I finally pull the green onions around it.  Waiting for one seed head, and they will all come out.  I'm probably close to harvesting garlic.  The artichokes are done budding for the year.  I'm crossing my fingers the herb bowl I started from some free seeds gives me enough fresh marjoram, dill, and basil for whatever I want to make this summer.

Meanwhile, it's going to take me weeks to get control of the neighbor's ivy that is trying to tear apart the back wall.  I found an old photo of the yard that showed it cut back to the property line, so that's what I'm working to achieve.  He's entitled to his landscaping, and I'm entitled to my brick wall not being destroyed by it.