Wednesday, March 30, 2022
Apricot and Coconut Biscotti (GF-optional)
Sunday, March 27, 2022
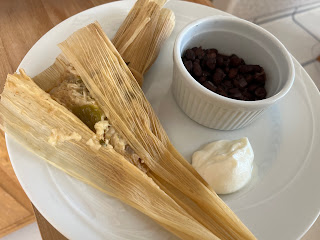
Tomatillo-Chicken Tamales
This ended up being almost entirely a pantry meal. I had to buy broth, since I promised myself I wouldn't buy any unless it was for something specific. Ta-da. It used the last jar of tomatillo salsa, so I'll have to decide if I want to can more this year. I love it, but it took ten months to use six jars. I'm not one of those people who makes the same dish at least once a month; I have blog posts to write.
The big takeaway here is not to be intimidated by the word Tamales. I've made the filling super easy. Mixing masa is a lot like making cookie dough. Once you get a rhythm going, wrapping the tamales doesn't take as long as you think it will. And then you have 90 minutes to clean up the kitchen while they're steaming.
Yes, these take about 2-1/2 hours total to make. 90 minutes of that is passive. The other hour doesn't have to be all at once. It doesn't even have to be all in the same day. Don't overwhelm yourself, and you'll do fine.
*18-20 dried corn husks
*2 C masa harina
1 tsp baking powder
1 tsp cumin
1 tsp chili powder
2 C chicken broth
1/2 C (1 stick) butter
*1 C tomatillo salsa (salsa verde)
1 10 oz can chicken (or 1-1/2 C shredded chicken)
1 C shredded mozarella or cotija cheese
1. If going "zero to tamale", start soaking the husks in boiling water. Set up your steamer pot with 2" of water and a basket. If prepping the masa and filling in advance, start soaking the husks about 45 minutes before you start wrapping.
2. For the masa, beat the butter until creamy. Stir together the masa flour, baking powder, cumin, and chili powder. Stir in chicken broth. Add that to the butter and beat again until uniform. You'll have to scrape down the sides a couple of times if using a stand mixer.3. For the filling, drain the chicken. I like to rinse it as well, to remove some of the salt. Stir together with the salsa.
4. To assemble, lay out a corn husk with the pointy end down. Spread 3 Tb of masa in the center of the top half of the husk. Spoon 1 Tb of filling on top and sprinkle with some of the cheese. Bring in the sides of the husk, then fold up the pointy end. If it won't stay put, tie with a strip of husk. Set in steamer basket.5. Repeat the process until the masa and filling are used up. Arrange tamales in steamer basket with the open ends up. Set in the pot over lightly boiling water and put on the lid. Steam for 90 minutes, until the masa batter has set.Makes 16-18 tamales
Difficulty rating :-0
Thursday, March 24, 2022
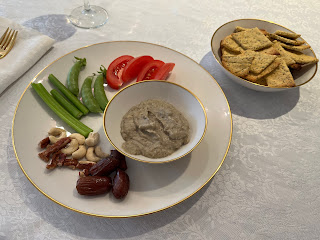
Chickpea Crackers
I've never made crackers, at least not intentionally. I've definitely never made them gluten-free. The use of chickpea flour seemed like a great accompaniment to a tahini-based dip. I settled on the recipe from Elephantastic Vegan because she gives detailed instructions and ways to fix the recipe. She's even updated it several times as it has been perfected, instead of letting a flawed recipe stand.
I was going to give these a :) rating, but they really are easy. I was just making them the day after I gashed a finger rather badly and probably should have gone to get it professionally patched up. I'm a bit accident prone. It's all about paying attention. I don't do that, never have.
Her recipe includes black sesame seeds as the garnish. I chose poppy seeds instead because I have a full jar of them. You could use flax seeds, dried herbs, or any other spice you like as an accent flavor, or even leave them plain.
In a massively unusual move for me, I'm increasing the salt content. She must have been using table salt instead of kosher. Without dip, these were kind of bland.
*1 C chickpea flour
*1 Tb sesame or other seed or dried herb
1 tsp baking powder
1 tsp kosher salt (or 1/2 tsp plus sprinkling)
1 tsp coconut oil, melted
3-4 Tb water
1. Preheat oven to 400º. In a bowl, stir together chickpea flour, seeds, baking powder, and 1/2 tsp salt.
2. Stir in melted coconut oil and 2 Tb water. The mixture will start to clump and get crumbly. Add another tablespoon and it might come together. If not, add a fourth. Knead briefly, until the dough sticks together properly without being overly sticky. Pretty sure I put in too much water, because mine was sticky.
3. Pour out dough onto a sheet of parchment paper. Cover with another sheet, and roll thin between the two. And I mean very thin. Some of my pieces were slightly over 2 mm thick, and they were quite hard. Get these as thin as you can.4. Carefully peel off top piece of parchment. Using a pizza cutter, cut shapes of desired size. Slide parchment onto a baking sheet. If desired, sprinkle tops with salt and/or spices, seeds, or herbs.5. Bake for 10-15 minutes, until firm. Allow to cool, then break into pieces along the scoring lines.Makes about 4-6 servings
Difficulty rating π
Monday, March 21, 2022
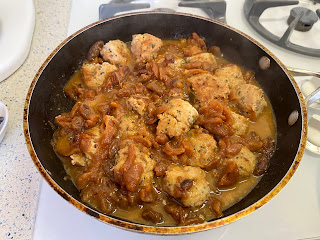
Turkey Meatballs with Apricot Chutney
I got in the mood for meatballs, which happens maybe once a year. The last time I made them was the goat cheese-stuffed ones I made while I had Covid. This time, I was kind of more in the mood for sweet-and-sour, then hit up on the idea of using a jar of Mediterranean apricot-date chutney instead.
This kind of isn't fair to people who clicked on this looking for an apricot chutney recipe, so I'm going to post a one pint version of the Ball canning recipe and allot for the increased prep time. The chutney does not have to be canned, it simply can be. And by using it fresh, you can adjust the amounts of ingredients and not worry about safety. I simply had the advantage of popping open a jar and pouring it into the casserole because I had done all the work months ago.
Chutney
10 oz dried apricots
water as needed
1/2 C lightly packed brown sugar
3/4 C chopped pitted dates
3/4 C raisins
1/3 C white wine vinegar
1/2 tsp mustard seeds (omit for Passover)
1/2 tsp salt
1/4 tsp ground ginger
1/4 tsp ground coriander
1. Combine dried apricots and water to cover for 30 minutes. Drain, chop into raisin-sized pieces and place in a non-reactive saucepan. Add 1/2 C water and remaining ingredients.
2. Bring to a boil over medium-high heat, stirring frequently. Reduce heat and boil gently, stirring often, until desired consistency is reached (about 20 minutes).
Meatballs
*1 lb ground turkey
*1/2 C cooked quinoa, rice, or matzoh meal (no rice for Passover)
*2 Tb cilantro, chopped
*1 stalk green onion, chopped
1 egg
1 Tb coconut or other oil for the pan
Difficulty rating :)
Friday, March 18, 2022
Roasted-Vegetable Couscous
This wasn't my Purim vegan meal, but it gladly could have been. Just a drizzle of the dressing over the veggies was perfect and kept the chickpeas from tasting dry. You can sub in any roasting vegetable you want. I got asparagus because it was on sale and turnips because the parsnips were huge. Then the first carrot I grabbed out of the stack was the largest I've ever seen in my life. I wasn't about to put it back, but I only bought the one.
*1/2 C miso-tahini dressing
*1 C dry couscous
*3/4 C dry chickpeas or 1 15 oz can, drained
1 lb asparagus
2 medium red onions
2 medium carrots
2 small to medium turnips
1 Tb olive oil
1/2 tsp kosher salt
1/4 tsp dried thyme
1/4 tsp dried rosemary
1. If cooking the chickpeas from dry, soak for 8-12 hours. Drain, refill saucepan, and simmer for about 2 hours. Drain again. For canned, open and rinse.
2. Preheat oven to 375º. Lining the baking sheet is optional, but it makes cleanup easier.
3. Cut up the veggies and place in a large bowl: For the asparagus, trim off the hard bottoms and cut to desired lengths. For the onions, peel and coarsely chop; I did Frenched because it looks nicer on a sheet. For carrots, peel, remove top and tip, and cut into batons of similar size to the asparagus. For the turnips, peel and also cut into sticks similar in size to the other items. Toss in the bowl with the oil.4. Spread out oiled veggies on the baking sheet. Sprinkle with the salt, thyme, and rosemary. Bake until the carrots (the hardest veggies on the tray) are easily pierced by a fork, about 20-25 minutes.5. While the veggies are roasting, cook couscous according to package directions and mix up the miso dressing.Difficulty rating :)
Tuesday, March 15, 2022
Peasant Bread
It's weird to me not to knead or shape dough. It's all done by stirring. Dump the risen sponge dough into a greased, oven-safe vessel and bake. That's it.
Being skeptical, I decided to use King Arthur Flour's recipe. And also being skeptical, I cut the recipe in half. Also, because that's a big loaf of bread. It's essentially my own bread recipe with a third less flour. It's the consistency I get in the stand mixer, before turning it out onto the pastry board to knead. I'm just choosing to do it all by hand this time, to keep with the peasant theme.
I really miss my round glass casserole dish. It cracked in a hot oven years ago. That's what I made smaller batches of cornbread in, and it would have been perfect for this. They make bread baking bowls and cloches now, but the last thing I need is another kitchen gadget. None of my salad bowls are oven-safe to 425º. So, I made this in my 3" deep 6" cake pan, the round casserole being used at the time on the beans.
I don't usually weigh my ingredients unless it's a metric recipe, but I decided to this time because I was using bread flour and the recipe, while saying that bread flour was an option, was written for A.P. The original was also for instant yeast, and I use active dry yeast, so I proofed it first. With instant, this is a one-bowl recipe. My way, it's a bowl and a measuring cup.
So how did this measure up to kneaded bread? It has its place. The texture is muffin-like, but with gluten. It has a thicker crust on top than the breads I usually make, yet no crust at all on the sides or bottom. It's very close to sourdough, and I don't really like sourdough. Staled, toasted, and run through the food processor, this would make amazing panko breadcrumbs. You can also add herbs or cheese to the dough, which I didn't because it was my first time and I wanted to follow the recipe. While you do still get the bragging rights for making a yeasted loaf, I wouldn't mind the extra five minutes to make it better by kneading.
2 C (240g) A.P. or bread flour
3/4 tsp salt
1 tsp sugar
1 tsp yeast
1 C 100ºF water
butter for greasing the pan
1. To proof the yeast, stir together sugar and yeast in the water. Allow to sit until foamy, about 5 minutes.
2. Stir together salt and flour. Stir in yeast mixture and keep stirring until thoroughly combined and a little stringy. The dough will be very sticky. Cover and set in a warm place until doubled, almost two hours. If you want to do the slow-rise version, leave the covered bowl at room temperature 4-6 hours.3. Punch down the dough, which will still be very soft and sticky. Scrape into a mound, either with forks or a bowl scraper. Generously butter a clean bowl, cake pan, or casserole that is oven-safe to 425º. Dump the batter-dough into the clean pan and allow to rise in a warm place, uncovered, while you preheat the oven to 425º, about 20 minutes. If you're doing the slow-rise version, it could take closer 45 minutes to double.4. Bake at the high temperature for 15 minutes, to get the quick rise that makes it look rustic. Lower oven to 375º and bake another 20 minutes, or until done. There isn't much sugar in this dough, so it won't get browned. You'll have to thump it.5. Turn out bread while still warm, then cool before storing. If not to be eaten within two days, I recommend slicing and freezing.Makes one small loaf, 4-6 servings
Difficulty rating :)
Saturday, March 12, 2022
Curried Baked Beans
So yes, this is going to take you close to 24 hours. Half to soak, half to bake. And about 10 minutes of it is active time, including stirring and checking water levels. The techniques involved are hundreds - if not thousands - of years old. I'm just changing up the seasonings.
If you don't want to leave your oven on all day, and happen to have a crock pot, set it on low and you're good. I bet a rice cooker would also work. I was temped to make this in a fondue pot, just as an experiment, but it was my main dish for half the week and I didn't want to risk ruining it. Maybe when I'm having beans as a side.
*3/4 C navy or great northern beans, dry
*2 Tb dried onion flakes or 1/2 C diced yellow onion
*1-1/2 tsp curry powder, or to taste
*1 tsp paprika
1/2 tsp cumin
1/2 tsp mustard powder
1/2 tsp kosher salt
2 cloves garlic, minced
1/2 tsp grated ginger
*chopped fresh cilantro and butter for serving, optional
2. In the morning, preferably before 9am, start preheating the oven to 220º F. Set three cups of water to boil. Drain and rinse soaked beans.
3. Put the beans back in the casserole. Add remaining ingredients. I used the onion flakes because they are embarrassingly old and I'm trying to get rid of them. I bought an onion to use in this, then decided to go with using up an old pantry item first. There's always a use for onions, and they keep for weeks.4. Pour boiling water into casserole, stir to distribute spices, and put on the lid. Bake 6-8 hours, until beans are completely done and mushy in that good, slow-baked way. Check on them every two hours or so: stir and add more water if necessary. When done, they will look slightly dry on top, but have a thick sauce when you stir. Serve with bread or rice, topped with fresh cilantro and/or butter if desired.Difficulty rating π
Wednesday, March 9, 2022
Pea Management and Blueberries
This is my third time growing peas, and I'm finally getting the hang of it. As usual, I figured out what I should have done all along purely by accident. I snipped off the tips of the vines to put in some tofu wraps and they responded by bushing out instead of only growing up. That's what I've always wanted them to do. So, like basil, regular trimming seems to be the key to a larger yield and not falling over from their own weight. I'm getting there. Pea shoots are now a regular part of my salads. People pay a lot in restaurants for that kind of delicacy, and I get them as garden trimmings.
Not in the title of this post, I've decided to grow tomatoes again this year. I started three pots inside six weeks ago, and they are just about ready to transplant. I normally don't bother starting things inside, but sprouts in my garden have been getting chomped this year. Some kind of bug is getting them before they are strong enough to hold their own. I had hoped they were all drowned in December when the pond flooded for a couple of days, but they must have fled for higher ground. I also started a new round of spinach, which came up beautifully.I was going to sell a long window planter in my next garage sale, but now I have other ideas for it. If I'm going to grow tomatoes, I'll need to find somewhere else to put this summer's pickling cucumbers. I'm going to plant them in the long box and run chicken wire up the now-bare wall for them to grow on. Before that, I'll use it for the new spinach. And next fall, I'll use the setup for the peas so they can grow as tall as they want, protected from the wind.
Crossing my fingers the blueberries succeed this time. I won't have a decent crop for a couple of years, but a few handfuls would be nice to start.
Sunday, March 6, 2022
Apple Hand Pies
Turns out, you don't really need a recipe. One post I found just had you opening a can of filling and a box of pie crust from the refrigerated section. I'm using that for the basic oven temp and baking time instructions.
That recipe said it would go through a jar of pie filling in 16 hand pies. I made 18, and had some left over. I used it on a small batch of apple pie oatmeal. Maybe it's just the way store-bought pie fillings are cut and packed.I'll be honest, all my pies split open. I don't think it was the recipe's fault. Pretty sure it was user error. It was at least one of the following issues, probably the first:
- I've been having problems with this batch of pie crust shrinking.
- Too much filling, and the goo prevented seals.
- Letting the crust get too warm before baking.
- The oven temperature for store-bought dough didn't work for homemade.
flour for rolling
*1 21 oz can apple pie filling
milk or egg wash
sanding sugar or cinnamon sugar for dusting
1. Preheat oven to 425º. Line two baking sheets with parchment or a Silpat.
2. Roll out crust dough or unroll packaged on a lightly floured surface. Using a 3-1/2" cookie cutter or a large glass, cut out rounds and place them on the sheets. Re-roll scraps once and cut out the rest. Any more re-rolls will leave your dough tough.
3. Place one full slice of filling in the middle of each circle. Fold up into a half-moon shape and pinch all the edges shut. Don't forget the fold corner. Cut slits in the crust for venting, or they'll definitely explode.4. If desired, brush pies with milk or egg wash, then sprinkle with sanding or cinnamon sugar.
5. Bake pies for 20 minutes, until golden brown and flakey. Cool on a wire rack and serve. These store at room temperature in a sealed container for 2 days, or can be frozen up to a month.
Difficulty rating :)
Thursday, March 3, 2022
Post-Challenge Pantry Assessment
This does not mean I'm back to my old habit of four days of food in the house. I wish, but that just isn't practical these days. I still have a whole chicken, a lamb roast, and way more bacon than I was expecting in the freezer and about 20 servings of assorted plant-based proteins in the pantry. There's still weeks of various kinds of rice and a month of oatmeal. I have four kinds of wheat-based flours and five of other grains or nuts. I have whole nuts and peanut butter as additional proteins, and a winter garden for fresh greens and herbs. And there are still several cans of meat and other ready to eat foods in case the power goes out and I don't feel like hunting for someplace that's open.
All that the two months of pantry challenge did inventory-wise was get rid of several rarely-used items and allow me to organize what's left.
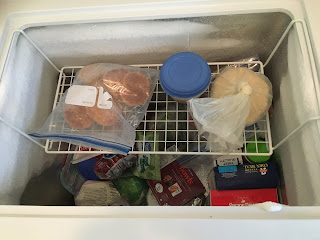
It did give me a better idea of how long things last. I put a sticker on the new container of coffee when I opened it to learn exactly how long it would take to go through one that size. I don't remember how many eggs I had at the beginning of January, but I didn't run out that first month. Ok, I did also have a pint of egg whites, but I wasn't rationing either of them. I also didn't run out of sliced bread, probably because I made an effort to eat the Chef Boyardee for lunch instead of grilled cheese.I wasn't going to do any kind of grocery haul, but recent world events changed my mind. Mostly, it was reasonably priced meat that has since been broken down into freezer baggies, including chicken thighs for what I want to make for Seder and a chuck roast for corned beef. I realized that I don't like canned vegetables for the most part and bought frozen instead. I didn't buy much in the bean/pulse/legume family, as I'm still doing quite well. I'm going to have to play Tetris with the kitchen freezer when it comes time to do the annual chest freezer defrost. And the word "haul" is relative. Cooking for one person who doesn't eat a whole lot, that was less than $80 for two months of long-term items.There was some serious sticker shock when I did start going down aisles I had not visited yet this year. Over $3 for a dozen eggs, assuming they were even in stock. Most other items were 20¢ more than I was used to. The online coupons are not as good. And oatmeal is up 30%. I'm going to have to get creative with that one. The brand I found at the 99¢ Store is passable, so I bought two pounds. One advantage of prepping and cooking for a later date is that you can postpone the effects of inflation while looking for better options. And the 99¢ Store is underrated for produce. Less variety and often smaller product, but it's still safe and delicious.
One change I might continue is meal-planning a month at a time. It allows me to take advantage of sales on items that I might be using a couple of weeks down the line. I can see how pantry items interact, and not schedule two similar meals near each other. It also keeps me from wandering the grocery aisles looking for inspiration, which leads to unnecessary purchases.
I really suspect I'll be doing some form of Pantry Challenge through May, with the one-week hiatus for Passover. It just won't be as obvious. Maybe more asterisks on ingredients than average, but there will be one item I've bought just for that recipe. I'm able to skip one freezer stock-up I had planned, since the avocado embargo with Mexico only lasted a week. I don't even use avocados that much, but had intended to freeze some in case this dragged on past Cinco de Mayo. Maybe I'll do a post then with any leftover avocados I might have bought.


