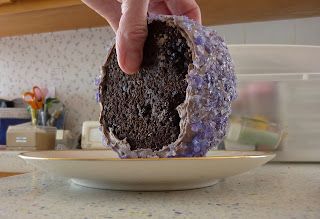
Instead of trimming all of the cakes the same size, I decided to attempt another faultline cake, this time with a different approach. It worked, so I'm posting the technique.
I admit that I didn't do the best job smoothing the frosting. I didn't level the tiers either, and it ended up taller than wide. This was going to be just for me. A 4" cake and not going back to work for almost a week? It was not going to last that long. Not when it was a double chocolate buttermilk cake.
1. Take 3 layers of cake, one preferably a tiny bit smaller than the others. Freeze at least the middle layer, but it's easier to frost if all are frozen. Crumb coat one to be the bottom and place on a cake circle.2. Frost the outer edge of the middle layer. This is where the instructions diverge from the original version. I didn't have to be as careful with a 4" cake as you would have to be for a bigger one. Before the frosting is too set, roll edge in sprinkles, sugar crystals, candies, or whatever else you want the middle to look like. I had some crushed purple candy sticks. Set middle layer on top of bottom and crumb-coat the top. I didn't want to do full filling layers because the outer frosting gets thick.3. Place the top layer on the middle and finish crumb coating. Smooth frosting and freeze to set.
4. For the final coat, frost top and bottom layers only. As you scrape off the extra, allow some frosting to work its way over the edges of the middle layer, to create the fault line. Smooth the top of the cake. Place on a serving platter and finish decorating as desired.
Servings vary by size of cake
Difficulty rating :)


No comments:
Post a Comment
I got tired of having to moderate all the spam comments and put back the verification. Sorry if it causes hassles.