
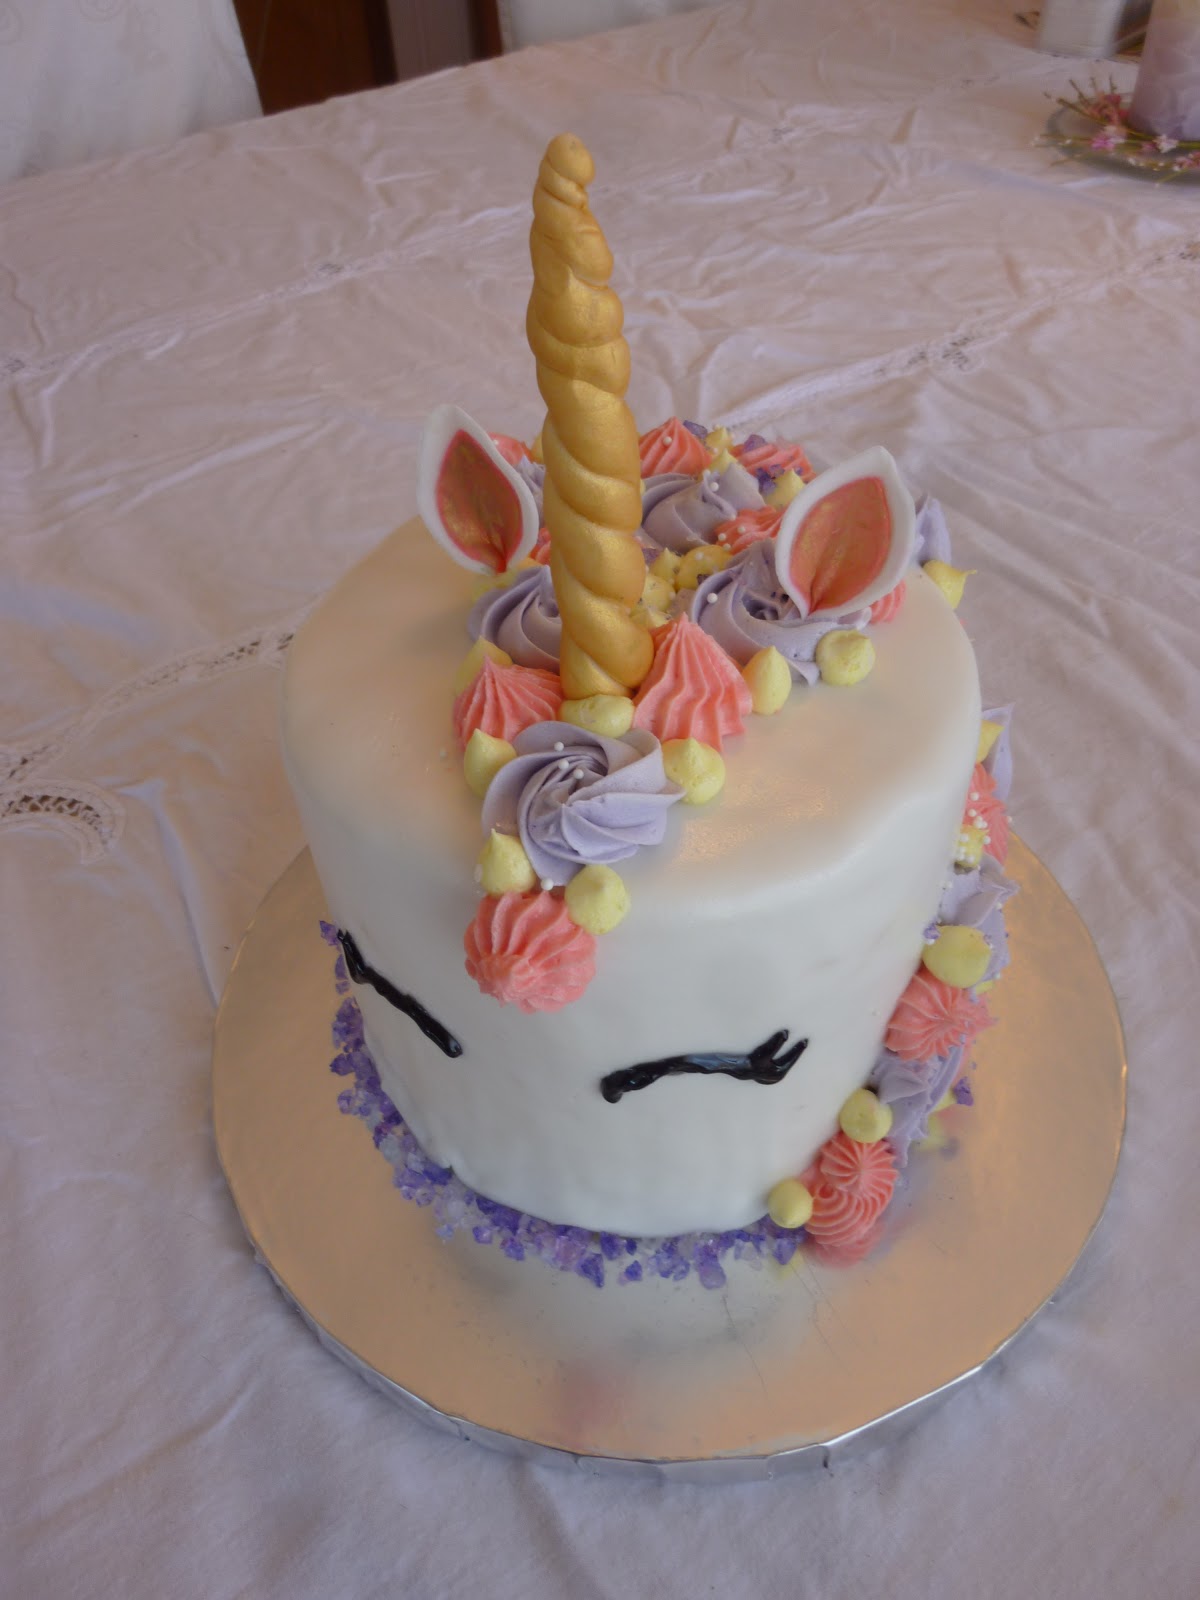
There are dozens of YouTube videos for every trendy cake, but I think this has twice as many as most. One of my co-workers said he saw one at a shop for over $100. I found one online near me that was $85 for the size I made, with a buttercream coat instead of fondant and a less intricate mane. Forget that, they're not that hard to make. They're mainly time-consuming. It takes a day for the fondant ears and horn to dry so they can be painted, but actually making them was about ten minutes. You have to make several colors of icing and get a few bags and tips dirty. Aside from that, it's just fill, crumb coat, and either top in buttercream or drape in white fondant. You don't have to know how to make buttercream flowers, although if you do they would look great. All the extra bling was leftover crushed rock candy from the geode cake and some pearl sprinkles.

Needed
3 or 4 layers of round cake. Taller looks better. With filling, my 6" diameter 3-layer cake was 5" high.
*24 oz box of white fondant (more if it's a huge cake)
gel food coloring
Spray metallic color or luster dust
sprinkles or edible glitter in coordinating colors for bling
toothpicks and a wood skewer or cake pop stick
buttercream or swiss meringue buttercream frosting
Black piping gel or a small amount of black fondant
Day 1
1. Bake cake. It will be easier to do the rest of the project if the cake is cooled, then frozen overnight.
2. Make ears and horn
 Horn: Pull off a few ounces of fondant. Roll into a rope that is very thin in the middle. Fold in half and twist into the horn, cutting off the bottom where you want it to end. Mine was about 4", and the length should be determined by the diameter and height of your cake, as should the width at the base. Impale with the skewer, which will be used to support it when placed on the cake. Place in styrofoam or a cake pop holder to dry, with about 4" of stick protruding from the bottom. It won't get dented as easily if it hardens for at least 24 hours.

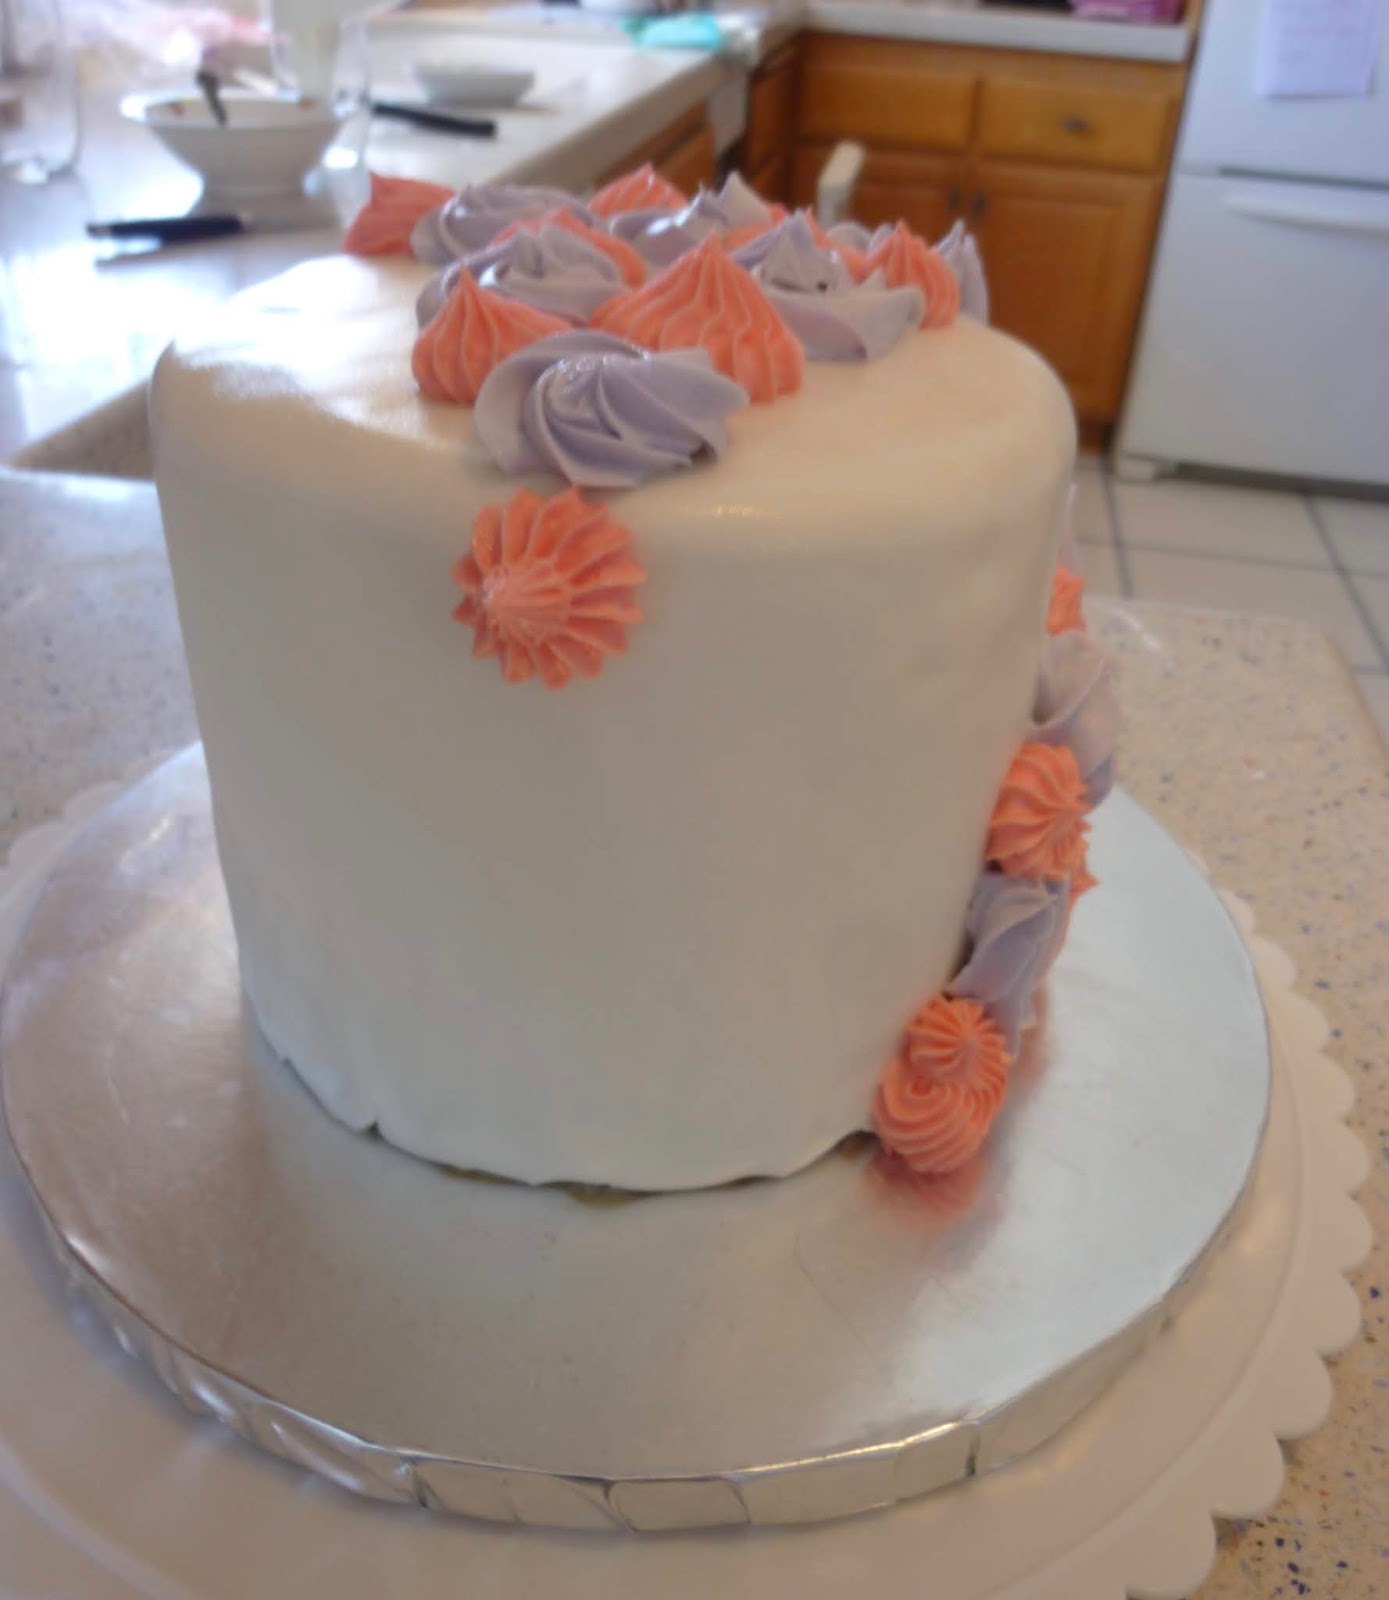
1. Trim cakes flat. Place bottom layer on a cardboard cake circle to make it easier to move later. Fill as desired, crumb coat with a white or cream cheese icing, and chill. If the cake is a color other than white, add a second coat to make sure no dark or bright colors come through. Try to do a good, smooth job, but you're coating this with fondant and a billion swirls of frosting. As long as a 1/3 wedge of it is "perfect", you can call it a job well done.
2. To finish the ears and horn, spray (or paint with a brush) horn with gold or silver metallic food color. Allow to dry for half an hour, then repeat. I got the color I wanted in two coats. If you spray over a plate, you can use some of the gold to paint a thin layer of glitter onto the inside of the ear pieces. The pink will still show through. Allow to dry while you work on the cake.

 |
| White: A blank page or canvas. So many possibilities ~ Sunday in the Park with George |
4. Make a half-batch of buttercream or SMB and divide into a bowl for each color you want to use. I intentionally did not mix mine perfectly, to get a highlighting effect. You can go either pastel or saturated. Keep in mind that bright colored frosting will not be as firm and may lose its shape in warm weather. Select tips and fill bags. I used an M1 rosette for the lavender, 4B for the pink starbursts, and plain round 12 for the yellow drops.


Difficulty rating :-0
No comments:
Post a Comment
I got tired of having to moderate all the spam comments and put back the verification. Sorry if it causes hassles.