I wasn't going to do one of these for the single reason that they don't look like a geode. I was obsessed with the real thing in the 80's, from rock collecting to art perched on crystalline fragments. A geode is a dull rock that only reveals its structure when you break it open, and then it's usually hollow in the middle. Yanking out a chunk of cake and filling it with candy does not look like a geode.
But I thought it would be a less girlie cake for a guy at work's birthday, and decided to give it a try. I'm using the Oreo cake from the previous post because the frosting looks somewhat rock-like. Figured I'd get one detail sort of right.
Most recipes I found had you put clear rock candy gems on the cake and paint them with food coloring. I cut out the middleman and bought purple and pale pink rock candy sticks at Party City, then smashed off the candy from the wood stick. Actually, I got the last package of the color I wanted
because they were slightly smashed. There are clear rock candy gems you can order on Amazon if you have a couple of days to plan ahead. They're sold by the half or full pound and also come in colors and flavors.
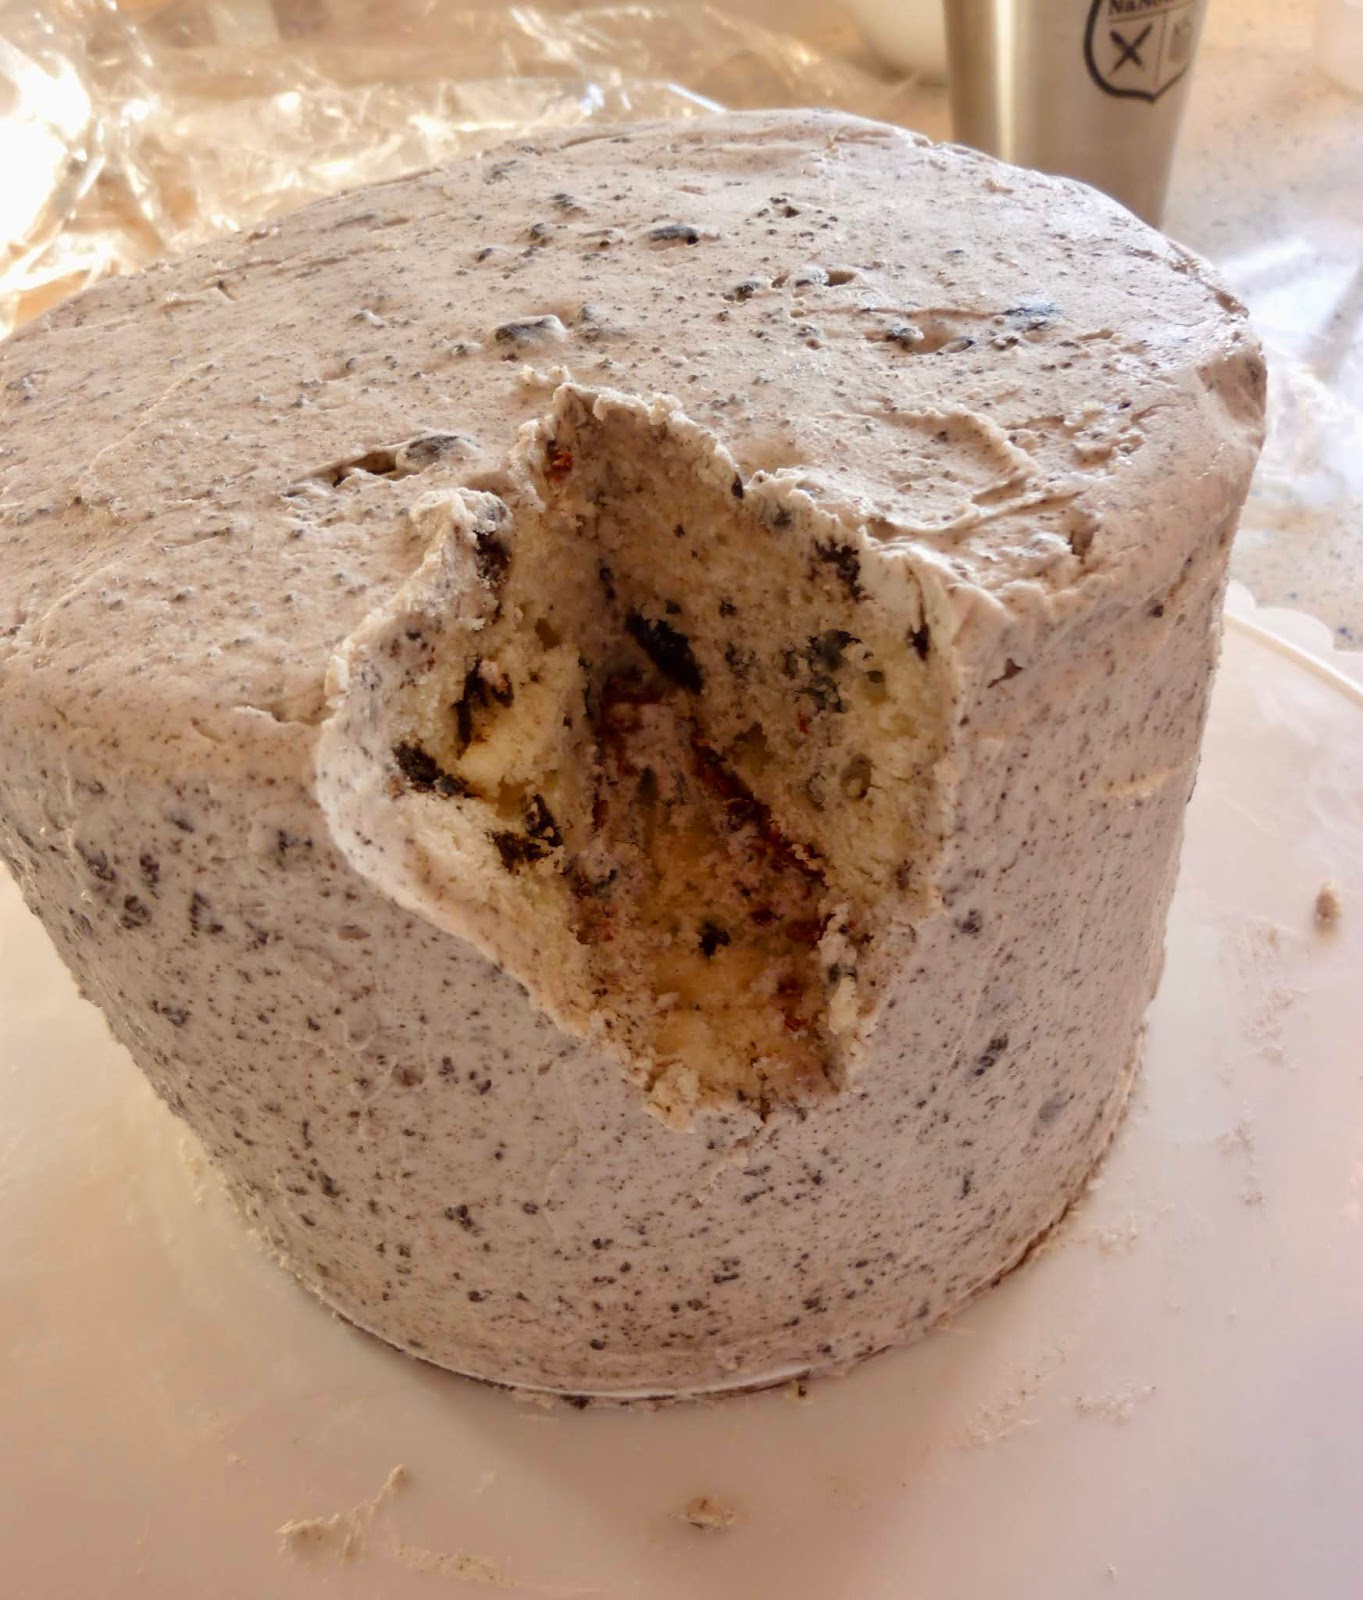
1. Bake a cake. Trim layers level (save the cake), fill, and crumb coat.
2. You can do a marbled fondant coat if you want, but I did a buttercream finish.
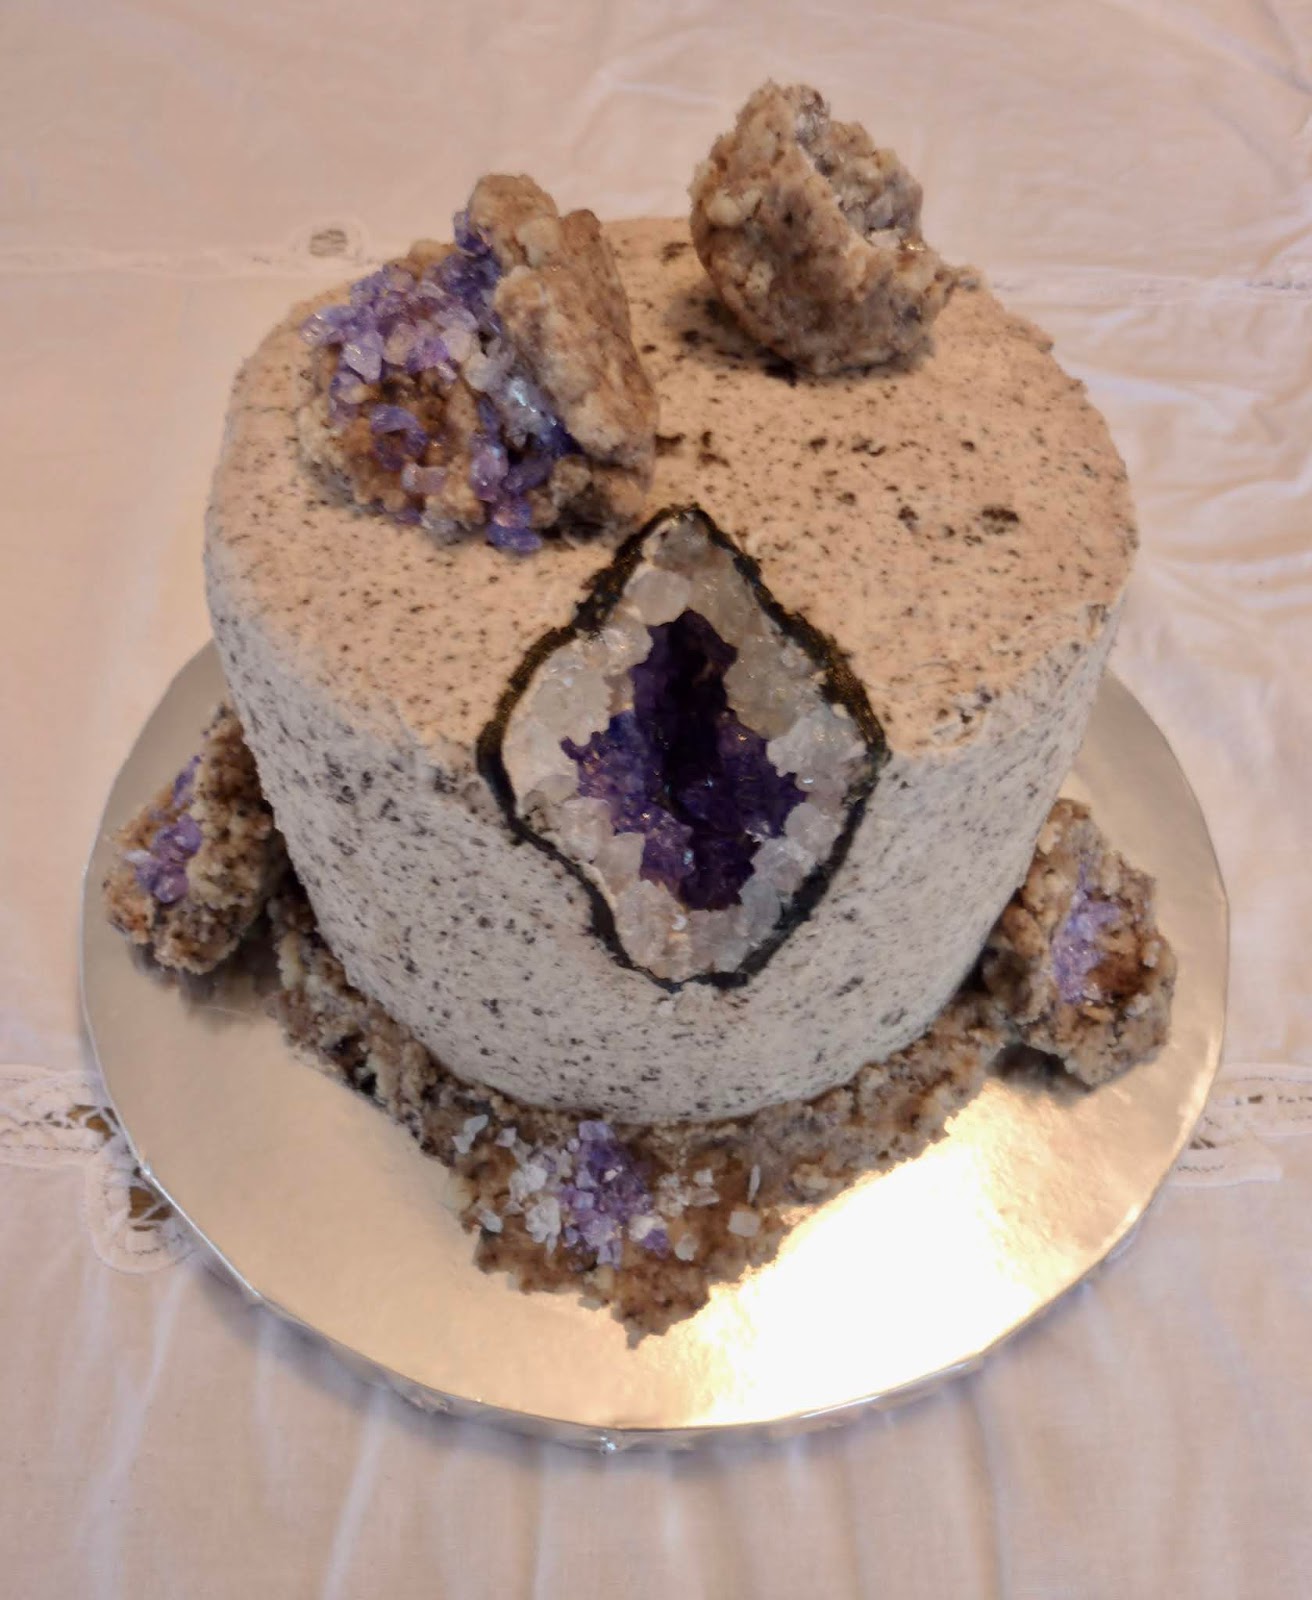
3. With a very sharp knife, mark out portions of the cake to excavate. I've seen some with huge gashes. Someone wanted a slice for themselves. I opted for one signature cutout and two smaller holes, so every view had a crystalline surprise.
4. Carve out the holes and spackle them with frosting. Save all the crumbs and their frosting. You don't need to frost perfectly, just a good crumb coat.
5. Cover holes in rock sugar candy. If using clear, you're going to be painting it with gel food coloring thinned out slightly with vodka. I'm not that talented and rimmed the outside with pink crystals after filling the middle with purple. Tweezers were necessary, and I still got frosting on me. This is going to take a while. It's why all the YouTube videos I found use time-lapse for this part.
6. This step, I completely disagree with nearly every video. They all have you put on a gold or silver rim. Geode art with a metallic rim is to cover the artist's butt so you don't sue them after cutting yourself on the sharp crystal edge. Real geode rims are much more boring. I painted the edges with black gel color thinned with a drop of vanilla extract. You usually use vodka or a clear extract to make paint, but this is black.
7. Get out all those crumbs and trimmings. Mash them in a bowl with a fork to make a dry cake pop dough that barely sticks together. Add more frosting if necessary. Form into balls of various sizes, then press into "cups" that look like tiny broken-open geodes.
8. Gather together any remaining sugar dust. Fill the cups with the crystals and shake out the excess. Use these to decorate the base and/or top. If desired, paint the edges of these mini-geodes to make them pop. I used the remaining cake pop dough to make a bottom border of "dirt", then sprinkled more crystals around to keep things interesting.
Difficulty rating :-0


No comments:
Post a Comment
I got tired of having to moderate all the spam comments and put back the verification. Sorry if it causes hassles.