Sunday, June 30, 2024

Whole Wheat Bread

For those who missed it, I'm fed up with the price of bread and have decided to make my own.  One bag of wheat flour costs the same as a loaf, and will last me at least half a year at the rate I eat sliced bread.  Yes, there are more ingredients than just the flour, but I can still make a loaf for under $1, probably closer to 50¢.

If I already have a basic whole wheat loaf on this blog, it is hidden so well even I can't find it.  So, I went back to the Bible for a starting point and altered it a touch for a single loaf and my personal tastes.

One thing to keep in mind is that whole wheat bread generally has part white flour.  Otherwise, it would be a very rustic and tough loaf.  Maybe I'll tackle whole grain bread at some point, which is usually all whole wheat flour with various grains in it to cut the density.  Wheat bran has fat in it, which shortens gluten strands and produces a more dense loaf.  It will take more liquid to make a loaf than an all white one and it will weigh more by volume.  Not a lot more, but if you weighed white and wheat loaves side by side, you would see the difference.

I chose to use bread flour here, but all-purpose would be fine if that's all you have.  It may take slightly more of it to achieve the desired texture because of the way different flours absorb moisture.

1 C 100º milk (or water for a leaner loaf)
1 Tb honey
1 Tb brown sugar
2 Tb unsalted butter
2 tsp yeast
2 C whole wheat flour
1 C bread flour
1-1/2 tsp kosher salt

1.  Stir together milk, honey, sugar, butter, and yeast and let sit until foamy, about 5 minutes.  The butter does not need to melt.

2.  In stand mixer with paddle, combine whole wheat flour and milk mixture.  Yes, I know the dough hook is more appropriate, but I have better luck with the paddle for small batches.  Beat on medium-low setting for 2 minutes.  Or, by hand in a bowl with a spoon.  You'll just end up kneading it longer.

3.  Add 1/2 C bread flour and salt.  Beat again until well combined and pulls away from sides of bowl.

4.  Transfer dough onto work surface dusted with bread flour.  Knead until smooth, 5-10 minutes.  This dough will feel denser than a white dough and won't stick to the board.  Shape into a ball.  Turn over in a lightly oiled bowl, cover, and set in a warm place to rise until doubled, about 1 hour.

5.  Punch down dough and let rest 10 minutes, while you prepare the loaf pan.  Either grease with shortening, pan spray, or line with parchment paper.  If you have a silicone one, great, you can skip that step.

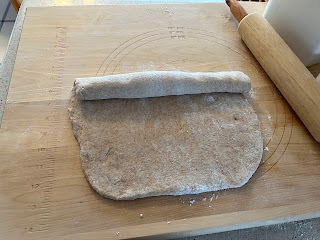
6.  Roll out dough into a 9" x 12" rectangle.  Roll up into a 9" log.  Tuck the ends under and place, seam side down, in the loaf pan.  Allow to rise again for 45 minutes, until the loaf fills the pan and is well-risen on top.

7.  Preheat oven to 400º.  If you want a butter-top loaf, brush top crust with melted butter and split down the middle.  (I don't think I'm going to split them anymore, unless I get one of those lame blades.  It tore the "skin" and made it rise unevenly.)  Bake 30-35 minutes, until golden and sounds hollow when tapped.  Remove at once to a cooling rack so the bottom doesn't get soggy.  Cool completely before slicing so the loaf holds its shape.

Makes one loaf, about 10 servings

Difficulty rating  :-0 if you aren't used to making bread, otherwise :) for the time investment

Thursday, June 27, 2024

Pan-Seared Tofu BBQ Bowl


Yes, another bowl recipe.  It works on a plate, too, but I do have the bowls.

This falls somewhere between Chinese and Korean, with Japanese sushi-style rice.  I threw all kinds of Asian-inspired ingredients into it and topped it with the Bibigo barbecue sauce.

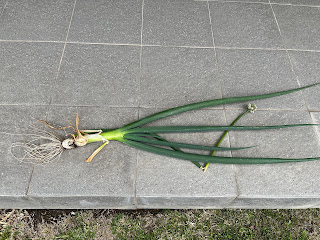
We need to talk about my green onion problem.  I let six of them go to seed, and really only looked at the blossom heads for several weeks.  When I finally traced them down to the root, I found ridiculously thick onion bases.  Like leek sized.  I pulled one for this recipe, the one that I don't think will have successful seeds.  Those are foot-square patio tiles.  Once I do get a seed head, I'm going to pull the rest and have a massive dehydration session.  And green onion pesto.  Maybe you can pickle them.  I need to do some more research.

1 small head green or napa cabbage, 1-1/2 to 2 lbs
1/2 lb carrots
*1 bunch green onions
1 C shelled edamame (frozen is fine)
Neutral oil as needed
1/2 tsp kosher salt
1 package firm tofu
1 C Calrose or other white rice
*bottled Korean BBQ sauce for serving

1.  To prep the veggies, remove core from cabbage and slice thinly.  Peel carrots and slice in rounds or diagonals about 1/2" thick.  Slice white parts of onions thinly and the greens about 1" long.

2.  Heat 1 Tb oil in a large skillet with a lid or soup pot over medium heat.  Add cabbage, onions, and salt.  Once they start to cook down, add carrots and edamame.  Stir to distribute ingredients.  Lower heat to medium-low and cover.

3.  Start making the rice according to package directions.  Drain tofu, then slice into 8 slabs.  Dry on paper towels or dish towels.  I used one dish towel for several minutes, then transferred them to a dry towel to finish.

4.  Heat about 1 to 2 Tb oil in a large skillet or griddle, enough to coat the bottom, over medium-high heat until shimmering.  Lay tofu on the griddle and allow to fry until lightly browned, at least 5 minutes per side.  Stir the vegetables every few minutes while the other items are cooking.

5.  Plate rice and vegetables first in the bowl, then top with a couple of slabs of tofu.  Drizzle with sauce and serve hot.

Difficulty rating  π (but there are a lot of dishes)

Monday, June 24, 2024

Lamb with Onion Gravy

I bought some super-cheap lamb neck slices, which are basically bone-in stew meat.  The intent was always to slow-cook them.  Then I looked at my schedule on the day I planned to cook, and realized I didn't have three hours in the afternoon to simmer them on the stove.  That turned this into a Crockpot day, but the recipe will work just as well on a back burner.

Originally, I was going to do this as a stew with barley and maybe carrots.  Then I forgot to buy the carrots.  When I got home to the lovely aroma, I decided to turn the stewing juices into gravy, and that's how we have arrived here.

The biggest effort here is chopping the onion.  You ignore it for hours, then boil the broth with cornstarch for two minutes.  So while it technically takes 3-8 hours to make, 95% of that is not active time.  And your kitchen will smell wonderful.

*1 lb lamb stew meat, shank, or neck (or 1-1/2 lb if bone-in)
*1/2 onion, diced
1 tsp salt
*1/2 tsp dried rosemary
1/2 tsp cumin
*1/4 tsp granulated garlic
1/4 tsp black pepper
*1-1/2 C unsalted vegetable or chicken stock
1 Tb cornstarch, dissolved in 1 Tb water

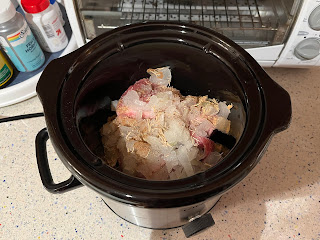
1.  Place lamb in slow cooker or large saucepan.  Top with onion and spices.  Pour over stock.  If the liquid doesn't come up at least 2/3 of the way, add a little more.

2.  For slow cooker, set on low for 6-8 hours or high for 3-4.  For stovetop, bring to a low boil, cover, and reduce heat to a simmer for 2-1/2 to 3 hours.  In both cases, meat is done when it is fall-apart tender.

3.  Remove meat from cooking vessel.  For slow cooker, transfer all juices and onion to a saucepan.  For stovetop, gravy can be made in the pot.  Stir in cornstarch slurry and bring juices to a low boil for 2-3 minutes, until thickened.

4.  Serve lamb in chunks or shredded, with brown gravy on top or as a dipping sauce.

Difficulty rating  π


Friday, June 21, 2024

Eggless Shakshuka

Ok, here's one from We Cook Vegan that I'm actually making more or less as intended.  I did use dairy milk when I made it because I was going to sprinkle cheese on top.  Otherwise, I would have gone all in.

The nice part of a shakshuka stew is that you can put anything you want into it.  Both bell and hot peppers are common, but I chose to use canned corn instead.  The sweet potato is a twist I hadn't seen before.

The egg in this is replaced with chickpea flour and cornmeal dumplings.  That isn't a ton of protein, which is why I added cheese.

Still loving the meal bowls.  I'll get over them at some point.  They are a huge asset with a recipe like this.  Served with a side of surprisingly good frozen asparagus, this was a far more filling meal than I expected.

Vegetables

1 Tb olive oil
1 small onion, diced
1 tsp paprika
1/2 tsp turmeric
*1/2 tsp cumin seed
salt to taste
*2 cloves garlic, minced
1 lb sweet potato, peeled and 1/2" diced
1 15 oz can petite diced tomatoes
*1 15 oz can kernel corn
1 C vegetable stock
1 Tb date syrup or brown sugar
*1 C chopped parsley

Dumplings

1 C chickpea flour
*1/2 C cornmeal
1 tsp baking powder
2 Tb margarine
2/3 C milk or non-dairy milk (oat or soy would mesh well)

1.  Heat a wide skillet, at least 14", over medium heat.  Add oil and onion.  Stir to coat and cook until onion is softened and starting to brown, about 5 minutes.  Add spices, salt, and garlic and cook until fragrant, another 2-3 minutes.

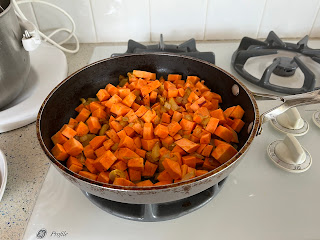
2.  Add diced sweet potato, canned tomatoes in their juice, and corn in its liquid.  Stir in stock and date syrup until everything is evenly mixed.  Bring to a low boil.  Reduce heat, cover, and keep at a low boil 15 minutes.

3.  While the stew is cooking, make the dumpling batter.  Stir together chickpea flour, cornmeal, and baking powder.  Cut in margarine until the mixture is like wet sand.  Add 1/3 C milk (or substitute) and work into a thick paste.  Add another 1/3 C and it will form a batter.  In the next 10 minutes until the stew is ready, the batter will thicken.

4.  Remove the lid and sprinkle in the chopped parsley.  Spoon mounds of batter on top of the stew.  It's ok if some of them start to sink.  I was surprised that none of them got soggy.  This recipe may work as a GF/keto corn muffin batter.  I'll have to try that sometime.  Put the lid back on and simmer another 15 minutes.  The dumplings puff up more than I expected.

5.  Serve hot, with the dumplings over a bed of stew.  You can garnish with herbs and/or feta.

Serves 4-6

Difficulty rating  :)


Tuesday, June 18, 2024

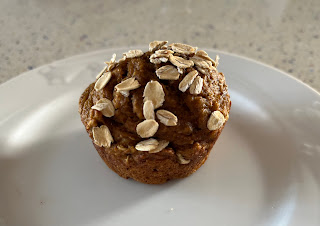
Pumpkin Oat Muffins

I have more baked goods in the freezer than I should, but I also had one baggie of pumpkin purée left from last year.  I googled pumpkin oat muffin recipes, and decided this was the one I liked best.

To make this, I did have to buy a new bag of whole wheat flour.  I have been contemplating making my own sliced wheat bread, since the price of a loaf has gone up so much even for the store brand.  Guess now I will, at least until this bag is done.  I'm going to bake it, pre-slice, and then freeze the loaves, like I do with my challah.  Grocery bread is so loaded with preservatives that it lasts a month in the fridge, but home-baked will only survive a few days unless frozen.

There was enough pumpkin in the bag for a half recipe, which ended up being seven muffins the way I portioned it.  Now that I know how the batter behaves, I won't be afraid to fill the muffin cups a little more next time.

I did get concerned about the author's notes about the muffins sticking a little and greased the heck out of the pan with shortening instead of using pan spray.  It worked, so I'm glad I did.

The original post has tons of substitutions for various diets.  The only modification I made, other than cutting it in half, was using powdered milk.  Home-roasted pumpkin purée has a higher moisture content than what's in the can.  I had almost 3/4 C of it, but I was counting at least 25% as water and added the milk powder to balance.  I was happy with the consistency of the batter, so that seems to be a good call.

1/3 C neutral oil like grapeseed or coconut
*1/2 C maple syrup
2 eggs, room temperature
*1 C pumpkin purée
1/4 C milk
2 tsp pumpkin pie spice
1 tsp baking soda
1 tsp vanilla
1/2 tsp salt
1-3/4 C whole wheat flour
1/3 C rolled oats, plus more for tops

1.  Preheat oven to 325º and grease a muffin pan with pan spray or shortening (unless using silicone).

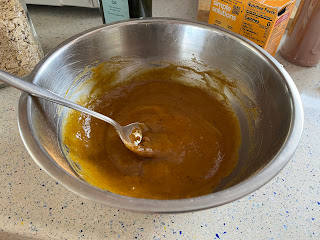
2.  In a bowl, combine oil, syrup, eggs, pumpkin, milk, spice, baking soda, vanilla, and salt until uniform.

3.  Stir in flour until about half mixed, then add oats.  Batter will be very thick.  Get all the major clumps of flour stirred in, but try not to over mix it.

4.  Portion evenly into muffin pan.  I used the 3 Tb cookie scoop and got seven out of the half batch, so about a generous 1/4 C per muffin.

5.  Sprinkle tops with more oats, and perhaps some sanding sugar if you want them sweet.  Without, they come out just a touch sweet, enough to taste the spices.  Bake for 22-25 minutes, until lightly browned and pass the toothpick test.

6.  Allow to rest in pan 5 minutes, then run a butter knife around the edges before turning out onto a rack to cool.  These can be stored in the fridge 5 days or in the freezer for up to a month.

Makes 12

Difficulty rating  π

Saturday, June 15, 2024

Quick Bean Chili

As much as I wished I had all day to tend a pot of chili, this happened on a work day.  I wanted something flavorful to have with a hot dog that would come together quickly after work.  I could have used the Crockpot, but didn't think about that until halfway through my shift.

So here's a 15 minute chili-ish side dish of seasoned kidney beans.  I'm not going into whether beans belong in chili in the first place.  I needed a vegetable side.  Most of the prep and cooking time is for the onions.  Then you add everything else and bring it up to temp for serving.  I topped it with provolone, but you could use any cheese, sour cream, chopped onions, jalapeños, or whatever you like as a garnish.

1 Tb olive oil
1 C diced onion
*2 Tb tomato paste
2 tsp chili powder, or to taste
1/2 tsp mustard of choice (I used *Dijon)
*1 clove garlic, minced
salt to taste
*1 15 oz can kidney beans, drained and rinsed
water as needed

1.  Heat oil in a medium saucepan over medium heat.  Add onion and cook until starting to brown, about 5 minutes.  Add tomato paste, chili powder, mustard, garlic, and a pinch of salt.  Cook until fragrant.

2.  Add rinsed kidney beans and stir to coat.  Gradually add water to desired consistency.  I used about half a cup.  Heat to serving temperature, just below boiling.  Taste and add more salt if needed.  Serve hot.

Difficulty rating  π

Wednesday, June 12, 2024

Oniony Lentils and Brown Rice

It can get difficult to come up with a new way to serve green lentils.  Red lentils, no problem, I can always find a new use for them.  Green take longer to cook and sometimes get that muddy flavor.  I'm always looking for a new way to flavor them.

Becky at Acre Homestead made a dish similar to this.  I'm not going to caramelize the onions all the way like she did, but this is definitely inspired by her post.  I'm also using brown rice, for two reasons.  One, it's on my Mediterranean diet and white rice isn't, but two, it cooks in the same amount of time as the lentils.  White rice would leave the lentils underdone.

I debated whether to do this in the oven or on the stove, but I was already getting a pan dirty for the onions and decided to finish it by stovetop.  If you caramelize your onions as a do-ahead, this can be "simmered" in the oven at 225º for 45 minutes, or until the rice is done.

This dish is a vegan main on its own, but I wanted some color and roasted up carrots to have with it.  Sweet potato would have been good, too, but I'm kind of thinking of having some next week.

1 Tb olive oil
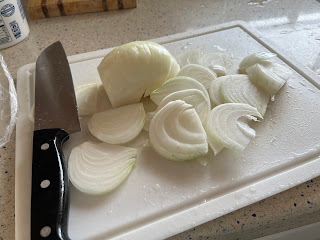
1 lb onion, Frenched
1 tsp kosher salt
*4 cloves garlic, minced
1/2 bunch parsley, finely chopped
*3/4 C green lentils
3/4 C brown rice
3 C water or vegetable stock

1.  In a stock pot or wide skillet with a lid, heat oil over medium-low heat.  Add onion slices and salt.  Stir to coat the onion, then let it slow roast 15 minutes.  Stir and continue cooking at 5 minute increments until the onions are as caramelized as you like.

2.  Sprinkle in garlic and parsley and allow to cook until fragrant.

3.  Rinse the lentils and rice, after checking the lentils for stones.  Add to the skillet and spread out evenly.  Add water, turn up the heat, and bring to a low boil.

4.  Lower heat to a simmer, cover, and cook until lentils and rice are done and most of the water is absorbed, about 45 minutes.  Serve either hot or cold.

Serves 4 as a main dish, 6-8 as a side

Difficulty rating  π

Sunday, June 9, 2024

Pesto Vegetables with Pasta

Ok, this would look a whole lot less weird with tri-color rotelli.  I had macaroni.  The point I was trying to make was that this is a vegetable dish, not a pasta one.  Plus bacon, because...bacon.

It also uses only half a cup of pesto for the whole pot.  It was all I had left, and I was kind of wondering if it would be enough.  It absolutely was, because you could taste both the pesto and every other ingredient in the dish.  More would have drowned out the pile of veggies that inspired the whole thing.

I forgot to buy an onion, and subbed in celery.  The herbiness of it came through, and I ended up liking it better than if I had used onion, so it's going in the recipe.

I finally get to showcase my new meal bowls!  The old pasta set served me well, but I wanted something smaller that would look good in a picture.  I'm also saying goodbye to the soup crocks, which get out once a year at the most.  I can use a regular cereal/soup bowl for soups.  These meal bowls will be good for stews, pasta, curries, and salads.  Plus, they go with my other dishes.

1 Tb olive oil
*1 C diced celery (about 3 ribs)
*2 cloves garlic, sliced
*4 C chopped kale or spinach
8 oz button or baby bella mushrooms, sliced
*1 C artichoke hearts, quartered
1 dry pint grape tomatoes
*4 strips cooked, thick-cut bacon
*1/2 C pesto
*4 oz pasta of choice (1 C small piece for salad-style, strand if you want this spaghetti-style)
*Parmesan and/or pine nuts for garnish, optional

1.  Heat the oil in a large pot or deep skillet over medium heat.  Add the celery and cook until slightly softened, 5 minutes.  Add the garlic and cook another minute, until fragrant.

2.  While that's happening, start a medium sized pot of water boiling for the pasta.

3.  Add the mushrooms to the celery pot and start cooking them down, 5-8 minutes.  If using kale, add it with the mushrooms.  If using spinach, it goes in at the end.  Around now, the pasta water should be boiling, so stir in the pasta to that and get it on a low boil.

4.  Add artichokes and tomatoes to the mushroom mix and put a lid on the pot while the pasta is cooking.  For me, that turned out to be the magical point where the tomatoes taste cooked, but are still firm as though they are fresh.  While both pots are going, chop the bacon into bacon bits.

5.  Remove the cooked pasta from the heat and drain.  Stir bacon and pesto into the veggies (and spinach, if using) until the pesto is evenly distributed, then stir in the pasta.

6.  Spoon mixture into bowls (or refrigerate to serve cold).  Garnish with Parmesan and pine nuts, if using.

Difficulty rating  :)

Thursday, June 6, 2024

Lemonade Concentrate for Freezing or Canning

I went out to get a lemon for a recipe and realized what a crazy lot of them I have at the moment, with several more ripening.  It was time for a preserving project.

I really like lemonade, but I don't like to make it.  So I decided to get all of that prep work over with and can however much I had enough juice for.  Lemonade can also be frozen with equal success, but I have a lot of stuff my freezer right now.

After researching recipes, it really isn't hard to make or can.  It's just a simple syrup made of lemon juice.  Because of the high acid, you don't even have to boil it that long.  Less than a minute will kill anything naturally occurring, and you're good to go.

When ready to use, you mix this concentrate with water or another liquid to desired strength.  That could be a single spoonful into carbonated water for a refresher, 5:1 or 6:1 with water for lemonade, into iced tea for an Arnold Palmer, or into a variety of liquors for an adult beverage.

I'm giving the recipe for a quart of lemon juice.  It's a ratio, so you can adjust as necessary.  You can also reduce the amount of sugar as far as half without impacting safety.  I went with 75% sugar and plan to supplement it with stevia when reconstituted.  If freezing instead of canning, you can use artificial sweetener.  Canning recipes can only use granulated sugar, honey, or maple syrup.

*4 C fresh-squeezed lemon juice
4 C granulated cane sugar

1.  If canning, prepare for a 5 cup yield.  Maybe a bit more, but you can do what I did and make a glass right then with the leftovers.  I found it amazingly smooth, because I don't normally strain it.  Get the water bath started, because you will have the mix ready by the time it is up to boiling.

2.  Wash the lemons well.  Peel off strips from a couple of them and stir them in with the sugar, to infuse their oils into it.  Juice your lemons.  I was saving the zest to dehydrate, so it took me quite a bit longer than it would otherwise.  I have no idea how many grocery store lemons it would take to do this project.  I had 10 and got about 5-1/2 cups of juice, but the largest one weighed almost 12 ounces and yielded 3/4 C on its own.  I'm guessing 16-20, or about 1/4 C each if they're juicy.

3.  Stir together juice and sugar in a saucepan.  Bring to a low boil over medium heat, stirring frequently.  It will feel thick from the sugar.  Boil for one minute, then remove from heat.

4a.  If freezing, allow syrup to cool to room temperature.  Strain out the peels any any large particles.  Pour into freezable containers with one inch of headspace.  Refrigerate until chilled, about 4 hours, before moving to the freezer.  To use, defrost in the fridge overnight to thaw then reconstitute to desired strength.

4b.  If canning, strain syrup through a fine-mesh sieve into the hot jars to 1/4" headspace.  Pith will become very bitter if it is processed.  Wipe rims, center lids, and screw on bands finger-tight.  Process for 10 minutes for half pints, 15 minutes for pints and quarts.  Allow to cool 24 hours.  Check seals and wash jars for storage in case there was siphoning.  Refrigerate or freeze any failed seals.  To use, open jar and reconstitute to desired strength.  Refrigerate any unused portion up to 7 days.

Makes about 5 cups concentrate, each equal to about six cups of lemonade


Difficulty rating  :)

Monday, June 3, 2024

Summer Garden 2024

Now that the Pond is sorted out and my winter garden is dying, it's time to figure out what I want to grow this summer.

As much as I love my in-ground gardening options, I've been having far better luck with items I grow in pots, so that happened first.

I bought the Dollar Tree stackable planters that everyone raves over.  Just two, so $2.50 plus tax.  They are so tiny, just about 3" across.  But considering I will never fill a Greenstalk, this was a decent option.

Then came the decision about what to plant.  I haven't grown green beans since the 5th grade, and I eat a lot of them.  I decided to try a bush variety in the Dollar Tree planters, which I have heard is possible.  So most of those got a bean in them, and the backside, where less sun will fall, became an assortment of herbs.  I'm pushing it on herb season, but thought I'd give it one last try.

Reading the packet of pickling cucumber seeds, I realized they're actually cool weather crops.  That's the mistake I've been making.  Oh well, I planted them anyway.  If they succeed, they'll be ready for the chicken-wire trellis about the time the peas die.  If not, I'll find something else to put in there, maybe pole beans.

I planted watermelon in a bowl pot.  Squashes and gourds have remarkably shallow roots for plants that huge.  I'm going to do a pumpkin in a bowl as well once it warms a bit more.

For the in-ground, I did something I have never done before.  I bought a compost/manure mixture to give extra nutrients to the soil.  You're kind of supposed to amend the soil every year or so, but I've only been doing it with Miracle-Gro.  Then I planted three types of tomato in the lettuce patch.  Something that is not a tomato is coming up, and I really hope it isn't another sunflower.  I'm going to work the manure into the Pond before sowing anything in it, which should be fairly soon.  I'm also going to build up the soil level with at least two bags.  Not entirely sure what I'm going to put in there.  Some tomatoes for sure, maybe cauliflower, and carrots in between.  Then another watermelon and pumpkin at the edges, so they can vine on their merry way.

I'm really hoping the new soil and compost will nourish this planting.  It would be nice to have some home-grown fruits and veggies this summer, after not growing much last year.