Sunday, October 30, 2022

Pomegranate Parfaits

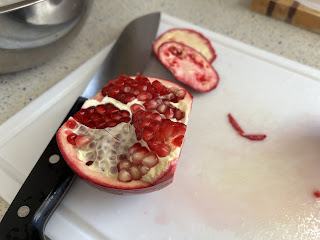
I noticed a pomegranate tree in someone's yard on my commute.  That's so cool.  Now I want one.  I only buy one or two a year, so the tree wouldn't even have to be all that productive.

So of course I had to go buy a pomegranate on my next shopping trip.  That happened to be to the 99¢ Only Store, where they did not have the red potatoes I was looking for but did have these.  Half the price of the regular supermarket, so I got one.

Next up, what to do with it.  I had a bit of whipped cream, and quickly came up with this dessert.  It would be great at a holiday dinner as an alternative to a heavy cake.  If the oats are certified GF, this can even be that option.

*1 C whipping cream
2 Tb sugar
*1/2 tsp rosewater (or vanilla)
*1 C pomegranate arils
3 Tb rolled oats

1.  Toast the oats in a dry pan over medium low heat.  Don't walk away.  They go from nothing to burnt in a blink.  Set aside to cool.

2.  If working from fresh, remove the seeds from the pomegranate.  An easy-ish way is to get a bowl of water.  Cut off the top and bottom of the fruit.  Run a knife down the sides to score it into six pieces.  With the fruit in the bowl, peel open the segments.  Then it's going to take about ten minutes to separate the seeds from the pith.  Toss anything that floats, and you're good to go.  Or, buy them already done.  It's probably worth the money.

3.  Whip the cream to soft peaks.  Add sugar and rosewater and whip to firm peaks.

4.  To assemble the parfaits, arrange four serving cups.  Clear ones make a prettier presentation, as do wine glasses.  A dollop of cream goes on the bottom, then a layer of pomegranate.  Sprinkle lightly with oats, then repeat the layers.  Chill until ready to serve.  Try not to make them more than two hours before serving, or the oats will start to soften.

Difficulty rating  :)

Thursday, October 27, 2022

BBQ Black Bean Pupusas


I decided to put black beans and mozzarella into some pupusas, and quickly decided to open a jar of Victorian BBQ sauce to have with it.  It seemed a natural fit.  Also, I didn't make any salsa this year.

Don't be intimidated by working with masa harina.  This whole project comes together in a few minutes and dinner is on the table in half an hour.  They don't have to look perfect, or even all that round.  With a side salad, or coleslaw and refrigerator pickles in this case, you have a quick family meal.

*1-3/4 C masa harina
1 tsp kosher salt
*1/2 tsp paprika
1-1/2 C water
*1/2 C canned black beans, drained
*1/2 C shredded mozzarella or other melty cheese
oil for the pan
BBQ sauce, for serving

1.  In a bowl, stir together masa harina, salt, and paprika.  Add water and stir into a pasty batter.

2.  Preheat griddle or skillet over medium heat.  Grease lightly with about a tablespoon of vegetable oil.

3.  Scoop out batter into 8 portions on a piece of parchment or wax paper, roughly 1/4 C each.  With damp hands, shape each into a ball, then flatten into a disc.

4.  Sprinkle each circle with about a tablespoon each of beans and cheese.  Fold dough over fillings and seal, then pat back down into a circle about 1/2" thick.

5.  Cook the pupusas in batches, about 5 minutes per side.  Re-oil the pan before going at it again.  Serve hot, with bbq sauce on the side.  You could even go fancy and garnish with fresh cilantro or green onion.

Difficulty rating  π

Monday, October 24, 2022

Sloppy Joes

Ok, so in the 12 years of this blog I've never posted this recipe because it is so basic.  Yet, whenever I casually mention that I'm making sloppy joes, someone inevitably asks what they are.  Really?  Are they not a thing anymore?

I don't think I ever "learned" how to make them.  It just made sense to throw sauce and ground beef together to get the desired result.  This is going to come across as more of a method than a recipe.  I'm going to hope new home cooks find it useful.

1 lb 80/20 ground beef
*1-1/2 C spaghetti sauce of choice
4 hamburger buns

1.  In a 10" skillet, brown the ground beef over medium heat.  When there's very little pink left, drain off the fat, then cook the rest of the way.  You do want some fat for flavor and moisture, but not a pool of it.

2.  Add the pasta sauce and continue to heat.  If desired, doctor it up with herbs, onions, or whatever else you tend to add to your sauce.

3.  While the sauce is heating, toast the buns.  A light toast will keep them from getting soggy too fast.

4.  Plate the buns, then spoon meat sauce on top of them.  Serve hot.  I usually do them open-faced with utensils, but these can also be picked up as a "sloppy" burger.

Difficulty rating  π

Friday, October 21, 2022

Parlor Herb Garden

 
I ordered seeds online.  I've never done that before, at least for myself.  I've done it as gifts.  Three garden shops later, I figured the only way to get what I wanted was to have it come to me.

I mean, seriously, it would have cost me more than the shipping fee in gas to go to the ONE Armstrong in the L.A. basin that had celery seeds.  So as long as I was getting those, I ordered some herbs.  Ferry-Morse isn't my favorite seed merchant, but they had what I wanted.  And I'm not growing for the whole neighborhood, just my own use, so even a 25% germination rate would be more than I needed.

I have two decorative shelves in the front parlor and a houseplant I never wanted underneath so I don't accidentally bump into them.  The wall gets plenty of morning sun, but the room doesn't really get hot.  I don't know why it never occurred to me before to put my herbs in there.

I already had seeds for chives, parsley, cilantro, English thyme, and Mexican tarragon.  I ordered sage.  I was going to order oregano, until I found out it's part of the mint family.  Cats will nibble on anything even remotely related to catnip, so there was no way I was putting that on the floor.

Ferry-Morse didn't have lacinato (dinosaur) kale.  Neither did MIgardener or two of the other seed shops I searched.  Ferry-Morse did have lacinato kale as a microgreen.  I'm going to see if it will grow a full-sized kale if you let it go.  If not, I can still grow it as a garnish.  Ferry-Morse did finally explain why I can't find French tarragon seeds; they aren't seeds, they are propagated from plant stems.  I might buy some at the grocery store and try to root it.

There was a slight snafu when the sage packet arrived empty.  I wasn’t mad, because these things happen and I had ordered two months before it would be time to plant.  They shipped a replacement the same day I sent what I hope was a pleasantly worded email, and sent an apology from a real person.  Then, when I opened the package, it was someone else's order.  Her address was on the invoice, so I mailed it off to her in Texas for far less than she had paid in shipping costs.  She returned the favor a week later.  Not the seed swap you usually hear about, but we both got what we paid for.

When I have herb pots outside, I don't care what they look like.  For inside, I bought matching 6" pots.  Cheap, but matching.  Some of the seed packets recommend 12", but I'm intentionally stunting their growth by using a smaller pot.  Seriously, one person.  I never finished the basil I dried last year, but hung up more to dry anyway.  I bought a couple of inexpensive shoe racks when the plant stands I saw were too tall.  I'm a huge fan of using shoe racks for things other than shoes.  They're cheap and easily fit in small spaces.

It finally cooled off enough to plant.  Herbs need temperatures consistently below 80º, or they try to go to flower.  While I was at it, I planted my lettuces, fennel, and radish outside.  I did start some celery in the seed-starting tray because you can do that up to three months before you plan to move it outside.  Parsley and kale can also be picky about their starting soil, so I put some of them in the seed tray too.  The herbs should start coming up any day now, probably starting with the cilantro.  That's good, because there wasn't any in the market last time I looked.  Random shortages of groceries are back.

Tuesday, October 18, 2022

Salmon Timbale

This was an adorable idea I saw on Jar of Fireflies.  Chana did it to make a fun presentation for her kids.  It's just a sushi roll stacked up, but it's really cute.  I don't remember which video it was in.

I couldn't find sushi-grade salmon at my local market, and it was too hot of a day to bring it back 30 minutes from Mitsuwa, so we're poaching my old friend "chowder pieces".  For those who missed it the first time, my market packages the salmon trimmings for $4/lb less than a filet.  You could also use canned salmon if you're going for cooked.

There's a lot of pieces in this one.  Fortunately, they are all do-ahead and it comes together quickly once they're prepped.  I'll link the original recipes where applicable, but still give new directions.

*1-1/2 C short-grain "sushi" rice, like Calrose
*Rice wine vinegar as needed
salt to taste
sugar to taste
1 English or 2 Persian cucumbers, thinly sliced
a few drops of soy sauce
*white or black sesame seeds
*1 lb salmon, either sushi-grade, fresh, or canned
*1 medium carrot, cut in matchsticks
2 green onions, cut in 1/2" lengths
*Asian sauce of choice for serving

For the Sushi Rice

1.  Bring rice to a simmer with 2-1/2 C of water.  Cook until water is absorbed, about 20 minutes.  Remove from heat.

2.  Allow rice to cool to room temperature, stirring periodically and adding more water as needed to keep the grains from turning into a brick.

3.  Stir in 2 Tb rice vinegar, 1/2 tsp of sugar, and 1/2 tsp of salt.  If desired, stir in black sesame seeds for contrast.  Taste and adjust seasonings to taste.  Chill until ready to use

For the Cucumbers (sunomono)

1.  Create a dressing with 2 Tb rice vinegar, 1 tsp of sugar, and 1/2 tsp of salt.  Add a couple of drops of soy sauce and stir until granules are dissolved.

2.  Pour dressing over cucumber slices.  Chill 2 hours, to marinate.

For the Salmon

1.  If using raw, slice thinly and in pieces no longer than 2".  They should be easy to eat in one bite.  For canned, drain and check for bones.  For fresh, poach in hot (not boiling) water on the stove until cooked through but still tender, 8-10 minutes.  Drain off water and flake into bite-sized pieces.  If making ahead, chill until ready to assemble.


To Assemble

1.  Lightly grease whatever you're using as your timbale with a few drops of vegetable oil.  I used a clear quart container so you could see it, but a washed-out pint yogurt or sour cream container will work just as well.

2.  Lay down a layer of salmon first.  Don't pack it down too much.  Air pockets will help everything slide out later.  Top with a 1" layer of rice.

3.  Top the rice with a layer of carrot and onion bits, then the cucumber slices.  Layer on another inch of rice.  Press down until everything looks even.  You don't have to make it a totally solid brick, but it needs to have some structure.

4.  Invert serving plate over the timbale.  Take a deep breath and flip it over.  Shake a bit if necessary, until all of the contents have slid down to the plate.  Don't rush it.  Slowly remove timbale.  Garnish the stack with more sesame seeds and sauce of choice.  I used black bean paste and char siu sauce, even though this is Japanese-inspired and those are Chinese sauces.  Teriyaki is acceptable, as is a side of soy sauce.  Satay would be pretty good too.


 Difficulty rating  :)

Saturday, October 15, 2022

Lentil and Potato Salad

I went looking for something new to do with the last cup of green lentils in the jar and found the lovely idea of combining them with potatoes and a lemony herb vinaigrette.  The salad is meant to be served warm or cold, making it great for picnics.  I'm making an amalgam of a few recipes here, but the feel should essentially be French.

To that end, I found out that French tarragon is not available this time of year.  I even had trouble finding it dried.  It's Delish had a huge jar of it for a reasonable price, so I got a lifetime supply.

I'm not sure why small potatoes cost so much more than regular size.  Odds are, they grew under the same plant.  One potato plant produces many potatoes of varying sizes, from smaller than a golf ball up to a pound.  It doesn't hurt the farmers any to dig up the small ones, like it does waiting for a red pepper to ripen from a green one.  If you decide to go with a medium or large potato, just cut it up into the bite-sized pieces.

1 lb small potatoes, any color
salt and pepper to taste
olive oil as needed (about 3 Tb)
*1 C green/brown lentils
*1/4 C chopped fresh parsley or 1 Tb dried
*1/4 C chopped fresh tarragon or 1 Tb dried
*1 Tb chopped fresh dill or 1 tsp dried
*1 Tb white wine vinegar
*1 preserved or fresh lemon
1 small shallot

1.  Preheat oven to 375º.  Wash potatoes and drizzle with about 1 Tb of olive oil.  Rub to coat all sides, then place on a baking sheet or on a rack in a roasting pan.  I used foil for easy cleanup, but it isn't necessary.  Sprinkle with salt and pepper.  Roast until easily pierced by a fork, which will be anywhere from 20 minutes for small potatoes to over an hour for a large one.  Allow to cool until able to handle.  This will also differ based on the size of the potato.

2.  While the potatoes are cooking, check the lentils for stones or shriveled seeds.  Rinse, then place in a saucepan with about 2 C water and a touch of salt.  Bring to a low boil.  Lower heat to a simmer, cover, and cook until lentils are split and tender, about 35-40 minutes for brown.  Drain off any remaining water and allow to cool.

3.  While that's going on, make the dressing.  If using dry herbs, pre-soak in hot water for 15 minutes.  Use 2 Tb of water for every 1 Tb of dried herb.  For fresh, this is not necessary.  The water mimics what the fresh would have given off in the food processor.  If using fresh lemon, zest and juice.  For preserved, rinse well to remove salt, then pull out pith so you only have the soft rind.

4.  Place herbs, vinegar, and lemon in the bowl of a food processor.  I've been using the little one that came with the blender more and more for small jobs.  Whiz into a pourable dressing.  Add oil to your preference, about 1-2 Tb.  Taste, then add salt and pepper.  Chill until ready to use.  Oh, and mince up the shallot while you're waiting for all the hot items to cool a bit.

5.  Cut up any potatoes larger than one bite.  You should not need a knife to eat this salad.  In a bowl, toss together potatoes, lentils, dressing, and shallots.  If serving as a warm side dish, plate immediately.  As a cold salad, chill at least 2 hours.

Difficulty rating  :)

Wednesday, October 12, 2022

Beef and Spinach Baked Meatballs

I haven’t made baked beef meatballs in close to two years.  They aren’t a priority for me.  But suddenly I wanted some, with homemade pasta on the side.

One problem with meal planning is the occasion that you don't really want what's on the calendar, but there's nothing else in the house to prepare.  We had such a mild summer in my area, it didn't occur to me that there might be a huge heat wave the day I planned to turn on the oven.  I did it anyway, and even made the fettuccine from scratch.  At least the sauce was out of a jar, or that would have been two burners going.

I bought marjoram for probably the first time ever because it was on the clearance rack.  Then there was an extra discount I didn't know about on my loyalty card, so it was just over a dollar for a $6 container.  When I opened it, I realized this was the herb missing from my homemade Italian seasoning mix.  It isn't quite oregano.  More floral notes, like basil.

I used a pound of the 73/27 beef for this, knowing that there would be a significant layer of fat once they baked.  I was able to pour off more than half of what was sitting on top of the sauce in the baking dish.  And I have to admit, the extra fat made them extra yummy.

1 lb ground beef
2 C frozen chopped spinach, thawed
2 Tb flour, breadcrumbs, or *matzoh meal
1 Tb Italian seasoning
1/4 tsp salt
*1-1/2 C marinara or your favorite pasta sauce
*Parmesan cheese and cooked pasta for serving, if desired

1.  Start preheating oven to 350º.  Pour sauce in bottom of a 9" x 13" casserole and swirl to coat the bottom.

2.  In a bowl, combine beef, thawed spinach (I kind of forgot the thawing part), breadcrumbs, seasoning, and salt.  Knead until evenly distributed.

3.  Portion and roll mixture into 16-ish balls.  Arrange in casserole dish.  You don't need to coat the meatballs.

4.  Bake about 30 minutes, until center of meatballs reach 160º.  Allow to rest until no longer bubbling, 5 minutes.  Serve hot, over pasta if desired and with a sprinkling of cheese.

Difficulty rating  :)

Sunday, October 9, 2022

Apples & Honey Challah


I had a bit of fun this year for my High Holy Days challah bake.  I've wanted to do some kind of apple-filled one for a year or two, and never got around to it.

For those who don't know, apples dipped in honey are a Rosh Hashanah tradition.  There are apple/honey cakes, which I don't really like, and all sorts of other goodies along those lines.  I happen to prefer simple apple slices dipped in a bit of honey for my treat.

I did have trouble finding dried apples.  Could have been just me.  I often don't see things on market shelves right in front of my face unless they're alphabetized.  I finally found dried apple rings at Sprouts.  It was more than I was planning to buy, so there will be other recipes using them.  Dried (dehydrated) apples are different than freeze-dried chips.  They still have a decent amount of moisture in them, and are very snackable.

This is the same recipe as Challah #2, but I'll post it again for simplicity.

2-1/4 tsp (1 packet) yeast
1 C 100º water
*1/4 C honey
4-1/2 C bread flour (or 5-1/2 C A.P.)
*3 eggs, room temperature, plus 1 for egg wash
1/4 C vegetable oil
2 tsp kosher salt
1 C chopped dried apple slices

1.  Stir together yeast, water, and honey and allow to sit until foamy, about 5-10 minutes.

2.  In stand mixer with the paddle (or by hand), combine yeast mixture and 1/2 C flour.  Beat into a thin batter.

3.  Beat in 3 eggs, then 1 C flour until smooth.  Beat in oil and salt.

4.  Switch to the dough hook and knead in remaining 3 C of flour until smooth and it rides the hook, 10 minutes.  If doing it by hand, go easy on the flour by 1/2 C because you're going to end up kneading more in.  Pour onto a floured surface and finish kneading by hand.  This time, I chose to do it on a washed countertop instead of the pastry board.  It gave me more space, but I still had to wash it again when I was done.  Shape dough into a ball and place in an oiled bowl.  Allow to rise in a warm place until tripled, up to 90 minutes.

5.  Punch down dough.  Divide into however many loaves you want.  For the wreath design, roll out one dough ball into a long rope.  Flatten it with a rolling pin.  Cut the piece in half lengthwise, then place apple pieces along the length.  Pinch shut back into ropes, then twist the ropes together.  Make into a ring and place on parchment-lined sheet pan.  If you know what honey container you're going to use, put a glass or wadded up foil in the middle to keep the size of the hole.  For a turban design, just roll out the rope, fill it, and pinch it shut.  Coil into a snail shape and place on parchment.  There are certainly other shapes you can do.  Be creative.

6.  Let loaves rise about 30 minutes while you preheat the oven, more on a cold day.  Beat remaining egg with a little water into an egg wash.  I tried a hack where you put the egg and water into a half-pint jar and shake it really hard until it's scrambled.  It worked pretty well.  Brush loaves all over with egg wash.  Any bare spots will show.

7.  Bake 30-40 minutes, depending on size of loaves, until they sound hollow when thumped.  Cool completely and serve or freeze for later.


Makes about 2 lbs of dough

Difficulty rating  :)

Thursday, October 6, 2022

Charred Tomatillo Salad

Once I decided to have tortillas as a side with the tilapia, the vegetable dish was destined to be hispanic-influenced.  What I came up with is basically a salad version of tomatillo salsa, but cooked on the grill.

You can simulate the charring effects of a grill under the broiler.  If you have a gas range, you can even spike them on a metal skewer and hold it directly over the flame.  I probably could have made this as tomatillo and onion brochettes with a cilantro-lime dressing drizzled over them.

If you want to spice up this recipe, throw a hot pepper or two on the grill with the tomatillos.  Maybe make it a red one for color contrast.  I kept mine mild, not even putting red pepper flakes in the dressing.  I didn't want it to clash with the mustard fish.

I used up the rest of the towel-dried cilantro on the dressing.  It did not get slimy, but it did wilt.  Next time, I'm going to try a different hack of putting the bunch in a glass of water in the fridge, like a bouquet of flowers.  Just a few weeks before I can grow my own.

*3 Tb lime juice (bottled is fine)
1 Tb olive oil
1/2 tsp kosher salt
1/4 tsp cumin
1/8 tsp black pepper
*1 C cilantro leaves
*1/2 yellow onion
*1-1/2 lbs tomatillos (about 6-8)

1.  Start heating up the grill, if using.  For broiler, line pan with foil.

2.  In food processor, whiz up lime juice, oil, salt, cumin, pepper, and cilantro.  It isn't a lot of dressing, because you don't need a lot.  Taste and adjust seasonings.  Chill until ready to use.

3.  Slice onion into rings 1/2" thick.  Peel dried husk off tomatillos and wash to remove sticky coating.

4.  Place tomatillos directly on grill if they're big enough.  Otherwise, use a grill pan, foil, or a mat.  Onion slices go on the pan.  Cook until bottoms are beginning to char, about five minutes.  Turn and cook to char other side.  You don't want to cook them too thoroughly, or they get mushy.  In an oven broiler, maybe 3 minutes per side, just to blacken.

5.  Allow veggies to cool until able to touch.  Chop into bite-sized pieces and toss with dressing.  Chill until ready to serve.  Having it immediately while still warm is fine, and was really yummy on the tortillas.

Difficulty rating  :)

Monday, October 3, 2022

Mustard Grilled Tilapia

This finished off the last jar of wholegrain mustard from last year.  I wanted to grill and I've never done fish, so here was a new experience.

I did use the grill pan for this project, but also put half of the filets on foil.  I definitely recommend a grill pan, mat, or foil liner.  Closing the lid gets you the smoky flavor, which doesn't matter if the filet falls apart and lands on the coals.  I ended up preferring the results of the foil because the juices stay with the fish.  The two cooked in the pan got a bit overdone and tasted more like chicken.

I made some homemade tortillas to go with these, even though mustard isn't much of a South American condiment.  Tossed them on the grill for that special flavor. I didn't make tomatillo salsa this year, so I made a tomatillo salad instead, which will be the next post.

This process is very easy and can be done under the broiler if you don't want to grill.  Step one, marinate.  Step two, cook.  Step three, eat.  I just drew it out into a two hour project waiting for the coals to heat up.

*2 Tb grainy mustard
1 Tb olive oil
*1 preserved lemon or one lemon, zested and juiced
1/2 tsp salt if not using preserved lemon
4 tilapia filets

1.  For the marinade, rinse preserved lemon well and finely chop peel or zest and juice lemon.  Whisk together with mustard, olive oil, and salt if needed.  Smear onto fish and allow to marinate at least 4 hours, or overnight.

2.  If using grill, get up to a medium heat.  The filets are thin and you don't want to overcook them.  For oven, set to broil and line the pan with foil.

3.  Place marinated filets on foil or other liner and grill with the lid closed until cooked through.  This will vary entirely by how hot your grill is.  On a broiler, probably only five minutes per side.  I grilled mine for about 20 minutes, checking every 10, and didn't flip them.  I just loosened them from the pan and foil after 10.

4.  Serve while still hot, either on their own or as part of a fish taco.

Difficulty rating  π