Tuesday, June 28, 2022

Mincemeat Tamales


I had a weird amount of pie crust in the freezer and decided to open up a jar of mincemeat.  Then there was too much in the jar for that and I went looking for other ideas to do with the rest.  Tamales at Christmas are a thing, and so is mincemeat, so what happens if you put it in a tamale?  That's how my mind sometimes works.

Once again, if you're using a pre-made filling, tamales aren't any more labor intensive than any filled cookie, like hamantaschen, linzer, or thumbprint.  Yes, they take time, but a lot of it is passive.  Soak the husks, beat up the masa, assemble, and steam.  Out of 2 to 2-1/2 hours, maybe 20 minutes is active time.

*about 12 dried corn husks
*3/4 C prepared mincemeat filling, or another thick pie/cookie filling
1/4 C unsalted butter
2 Tb brown sugar
1/2 tsp baking powder
1/4 tsp cinnamon
dash of salt
*1 C masa harina (corn flour)
3/4 C water
1/4 C orange juice

1.  An hour before starting, place corn husks in a casserole.  Pour boiling water over them and let them sit to hydrate.

2.  In mixer with the paddle, cream together butter and brown sugar.  Add in baking powder, cinnamon, and salt.

3.  Stir together water and orange juice.  Alternate masa flour and liquid in two additions.  Beat into a thick batter.  Allow to stand 5 minutes, and it will be easier to handle.

4.  Set up a pot with a steamer basket in it and 1/2" of water at the bottom.  On a work surface, place one of the wet corn husks pointy-side down.

5.  Place about 3 Tb masa batter in the top half of the husk.  Top it with a heaping tablespoon of mincemeat.  Fold in the sides of the husk, then fold the point up.  If necessary, tie with a strip of corn husk.  Place in basket and move on to the next.

6.  When all the masa and filling are used up, cover the pot and move it to the stove.  You might still have a couple of husks left over.  Bring to a low boil.  Check that the lid is on well and place a towel over it.  Make sure the edges of the towel do not dangle too close to the heating element.

7.  Steam for about 75-90 minutes, until the masa is cooked.  Check the water level every 20 minutes or so and add more as necessary.  Remove steamer basket and allow tamales to cool a bit before serving.  They go well with whipped cream or vanilla ice cream.

Makes 8-10

Difficulty rating  :)

Saturday, June 25, 2022

Summer Garden 2022


Thanks to the meal calendar, I have so many recipes ready to post that I haven't been doing any garden updates.  I like to show off any successes, as they are rare.

I harvested my garlic!  Well, one anyway.  If you let them go too long, the cloves separate and start to become their own plants, so I pulled one when the stalk became thick and the outer leaves were starting to die.  Those outer leaves become the "paper" coating over the bulb.  The bulb wasn't as big as I was expecting, so I hung it up in the garage to dry and left the rest to grow a bit more.  PS, cure your garlic somewhere you can't smell them.  The garage was a good choice because it stays dry without too much temperature change.

Once the spinach was out of the long planter, I made a chicken-wire trellis for this year's cucumbers.  "Make" is a strong word.  I tied it to the wall with twine.  The piece goes all the way to the ground, so I'm hopeful the plants with latch onto it.  It's easy to reach behind if that's where the cucumbers happen to grow.

I haven't killed the blueberry bushes yet, but they also aren't flowering or producing new blueberries.  I'm adding vinegar to their water once a week, which has improved their color immensely.  Websites suggest that once the weather is more stable they will be healthier.

The celery bolted in mid-May, so now I know they last a year when you replant from scraps.  Still a pretty good savings.  I'll buy another celery when I need some and plant that base.

The first carrot I pulled from the pot planting was lovely.  I should have taken a photo.  I'm still going to clear it to put the butternut squash in there, but now I know that carrots are just fine in a deep pot.  Pumpkin is going to go in the Pond.  I have more space in there than I realized, now that the peas are gone.

I didn't can my artichokes this year.  Any that I had to pick before I was ready to use them were trimmed, boiled, and then frozen for later.  Recipe using them coming soon.  There were three trimming sessions that left my thumbs blackened for a few days.  I'm getting better at it, though.  And seriously, how cool is it to say you grew more artichokes than you could eat?!

Wednesday, June 22, 2022

Star Bread

I was looking at babka recipes when this came up.  I thought it would be much harder than it actually is.

I made this during my monthly challah bake.  This was only the second month I've done it, but I'm really liking the concept.  It makes me more likely to do a Friday night routine.  You can do the shape with most yeast bread doughs.  Kick-ass rolls would probably be very good with it.

There are a variety of fillings you can use for this bread.  The simplest is cinnamon sugar.  I decided to use Nutella (or whatever generic version Target carries) because I end up eating most of the week's challah for breakfast over the next several days.  A second one went savory with an herb mix.  You could use pesto, but I'm now trying to keep my challahs pareve (neither meat nor dairy).

The technique works for any number of points to your bread.  I chose six points for the challah.  Eight is easier mathematically if you don't have a star cookie cutter to use as a guide.

Yeast dough of choice (approx weight 10-16 oz, depending on size of finished bread)
1/4 C filling of choice

1.  Proof your dough the first time as usual and punch down.  This is done on the shaping step.  Measure out 4 portions of your dough by weight.  I did 2 oz each, for a half pound loaf.  That was on the small side.

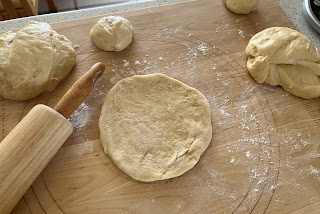
2.  With a rolling pin, roll each ball out into a thin circle.  The 2 oz ended up about 6" across, but proofed out to fill the width of the baking sheet.  This part might take a while.

3.  Place a circle on a parchment-lined baking sheet.  Cover with 1/3 of your filling, about 1-2 Tb, leaving the rim clean.  It should be spread or sprinkled very thinly, or it will ooze out while baking.  Lay on another circle and coat again.  Repeat with the third.  Lay the fourth circle on top.

4.  This is where I got out the cookie cutter to mark the points.  Cut radii in your circle, leaving enough uncut in the middle to hold everything together.  Then cut those in half.  So, for six points I had twelve wedges.  Take two adjacent wedges and twist inward about three times, then pinch the points together.  Move on to the next pair, all the way around the circle.  Arrange evenly on the baking sheet.  Proof according to your dough recipe, and bake at that temperature.  If it works for your dough, do an egg wash.

5.  Cool on the baking sheet for at least five minutes before trying to move it to a cooling rack.  These are fragile when warm, and you don't want to break off an arm.  Serve as normal.

Difficulty rating  :)

Sunday, June 19, 2022

Brussels Sprouts with Mustard-Orange Vinaigrette

I finally roasted up that last pound of lamb in the freezer.  And you have to make something pretty and fun for side dishes when you have lamb.

This is a variation on an idea from the L.A. Times.  I don't even read half of the recipes in their weekly newsletter, just the basic descriptions.  This one suggested lightly steamed asparagus with an overly complicated vinaigrette.  The picture was pretty, and I had an orange left on the tree, so here goes a much easier version.

I was originally going to do this with fresh veggies.  The green beans looked hideous.  Asparagus was $5 a pound.  The fresh Brussels sprouts weren't terrible, but by then I was fed up with the produce options and had pretty much made up my mind to use frozen.  I had picked up a lot of frozen veggies the week before when they were 77¢ a bag.  I've decided to reduce my stock-up levels, but will still buy the maximum allowed of an extreme deal that will never happen again.  It would be really nice to get everything off the top shelf of the pantry again.

*1 small orange
*1 Tb grainy mustard
1 Tb olive oil
1/4 tsp dried oregano
1 12 oz bag frozen Brussels sprouts or 1 lb fresh

1.  To make the dressing, zest and juice the orange.  I actually used two very small Valencia oranges off my tree.  Place in a small, sealable container with the mustard, oil, and oregano.  Close the lid and shake vigorously to make the vinaigrette.  Set aside or refrigerate until ready to use.  Also makes a good marinade for chicken or fish.

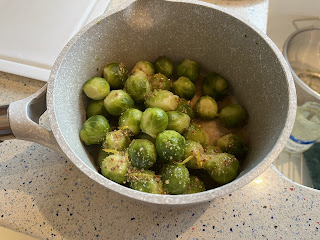
2.  For frozen, cook according to package directions.  For fresh, trim sprouts and place in 1/2" of water or on a steaming tray in a saucepan.  Bring water to a low boil and steam for 10 minutes, just to get them partially softened but not mushy.  Drain.

3.  Toss together sprouts and dressing.  Serve hot.

Difficulty rating  π

Thursday, June 16, 2022

Gatnabour (Armenian Rice Pudding)

I've had this bookmarked for ages.  I stopped in at a Middle-Eastern-looking place to pick up a snack of hummus or whatever and this was on their dessert list.  I looked it up when I got home and found out it's Armenian.  Ok, something new to try.

I'm following the recipe from The Armenian Kitchen, just cutting it down to four servings.  That's a really cool widget that does the cooking math for you.  This is a basic rice pudding, but with new flavors.

The recipe recommends short-grain rice.  I do have Calrose, but chose to use Arborio because there was just enough left for this recipe.  It's going to be on the stove for over an hour, so you can use a harder rice.

1/2 C water
*1/3 C short-grain rice
*2 C milk
1/4 C sugar
pinch of salt
*1/2 Tb rosewater
cinnamon and nuts for serving, optional

1.  Bring rice and water to a simmer in a medium saucepan.  Lower heat to lowest setting, cover, and cook 15 minutes.

2.  Add milk to the saucepan.  Keeping the heat on low, simmer for 45 minutes, covered, stirring frequently to prevent scorching.  By the end, it's going to look like a rice soup.

3.  Stir in sugar and salt.  Continue to simmer for 15 minutes uncovered, or until thickened to desired consistency.  Stir in rosewater.

4.  Remove from heat and portion into serving bowls.  Can be served warm or chilled.  Dust with cinnamon and crushed nuts, if desired.  Pistachios are traditional, but I don't like them and used sliced almonds.

Difficulty rating  π

Monday, June 13, 2022

Sultan's Delight (Hunkar Beguendi)

Also from Mideast and Mediterranean Cuisines is this Turkish recipe for a cheesy eggplant purée.  It's a "salad" in the sense that it's sometimes served cold, but it is a cooked dish.  I'm learning that in some parts of the world, "salad" refers to pretty much any prepared vegetable dish.

The description in the recipe says it should be a bed for lamb stew or chicken.  You could use it instead of couscous or rice as a lower-carb option.  It would also make a great dip or sauce for falafels, or even a pasta sauce.  I topped it with lightly seasoned chickpeas for a vegetarian night.

What I wasn't expecting was for it to be more cream sauce than eggplant.  While not really complaining, it isn't what I had planned.  The yield was also a bit under what I had envisioned.  So I'm keeping the sauce recipe the same and adding a second eggplant to this post.  If you want yours to look like my photos, use only one eggplant.

2 large eggplants
2 Tb butter
2 Tb flour
1 C milk or half and half
1/2 C grated Parmesan
salt and white pepper to taste

1.  Preheat oven to 400º.  Wash eggplants and pierce in several places to prevent explosions.

2.  Roast eggplants on a foil-lined baking sheet or roasting pan until soft, about 1 hour.  Allow to cool until easy to handle, then split open and scoop out the roasted flesh.  Mash the pulp and set aside.

3.  In a saucepan, melt the butter (or margarine) over medium heat.  Add flour and cook into a roux.  Slowly add milk, about 1/4 C at a time, and allow it to thicken before the next addition.  Add Parmesan to the cream sauce.  Taste, then add salt and pepper as desired.

4.  Stir in mashed eggplant and heat thoroughly.  Spoon onto plates and top with whatever you choose, or chill to serve as a dip.

Difficulty rating  :)

Friday, June 10, 2022

Carrot and Orange Salad

I haven't made Moroccan in a long time, and I really miss it.  It's the fascinating combination of sweet and savory spices in the same dish, and on foods you wouldn't anticipate if you come from a Western tradition.

This is a pretty basic salad from Rose Dosti's book.  You can serve it raw in no time, well, if you have a food processor or totally cheat and buy the shreds.  I prefer my carrots blanched or cooked, and added a step of pouring boiling water over the grated strands.  To me, that brings out their flavor.  They aren't fully cooked, or even all that much softer, but they do end up more flavorful.

3 large carrots, peeled
*2 Tb lemon juice
*1/2 Tb orange blossom water
pinch of sugar
pinch of salt
*2 oranges, peeled and sliced
parsley for garnish, optional

1.  Grate carrots, either on a box grater on in a food processor.  Place shreds in a sieve.  Slowly pour 1 quart of boiling water over them.  Allow to cool until no longer steaming and the extra water has drained off.

2.  Into serving bowl, stir together carrot shreds, lemon juice, orange blossom water, sugar, and salt.  I actually used some of my orange blossom extract instead of the water.  Alternately, you could add a few drops of orange juice, but the flavor is not the same.

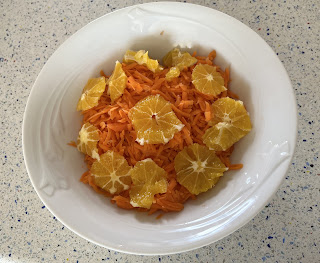
3.  Arrange slices of orange around the carrots.  The recipe does say sliced, not wedged, so that's how I did it.  It's different.  Chill for at least an hour, then serve, garnished with chopped parsley if desired.

Difficulty rating  π

Tuesday, June 7, 2022

Lemon Curry

Why yes, I did end up making a quart of preserved lemons.  Why do you ask?  This recipe will work just as well with lemon zest and juice.  I just happened to run a bunch of the preserves through the mini food processor.

This recipe is just for the sauce.  What you put in it is up to you.  I would recommend a protein and one or two vegetables.  I did cabbage, the last of the garden's spinach, and lentils, because that's what I had.  You could do spinach and chicken, or fish and green beans, or any of a dozen combinations that sound good with coconut-and-lemon sauce.

I'm reaping the benefits of the pantry restock and not spending as much per week on groceries as I would if all these ingredients were new.  My only new purchase was $1 for half of a cabbage, since I had stewed up the other half to have with the leftover mafé sauce and some shredded chicken and the last of a box of linguine.


*2 lemons, preserved or fresh
1 Tb olive oil
*1/2 onion, finely chopped
1/2 tsp turmeric
1/2 tsp ground coriander
*1 tsp curry powder, or to taste
*1 clove garlic, minced
*1/2 tsp grated ginger
1 Tb sugar
*1 14 oz can coconut milk, lite ok
*1/2 tsp honey
kosher salt to taste
*1 Tb herb of choice to go with the dish, like cilantro or basil

1a.  If using preserved lemons, soak them in water for 12 hours and drain to reduce saltiness.  Run through food processor into a slurry.

1b.  For whole lemons, zest as well as possible.  Juice lemons and keep both juice and zest ready.

2.  Drizzle oil into a medium saucepan.  Heat over medium and add onions.  Cook until well softened, about 8 minutes.  Add turmeric, coriander, and curry powder and cook until fragrant.  Add garlic and ginger and cook 2 minutes more.

3.  Add puréed lemons or zest & juice and cook into the mix.  Stir in coconut milk and sugar, and bring everything to a low boil.  Taste and add salt if necessary.  Drizzle with honey and any fresh herbs to finish.
4.  Sauce can be served on the side or poured over veggies and protein to make a stew.

Difficulty rating  π

Saturday, June 4, 2022

Artichoke Burgers

I got this idea because there actually is an artichoke burger you can buy in the freezer section.  I wasn't thrilled with the filler ingredients, salt, and fat content.  So I waited until my artichoke plants budded and harvested myself half a pound.

Of course, you can absolutely make these with artichokes frozen or canned in water.  I opted to do it this way instead of filling the canner with water for a mere two jars of pickled artichokes.  They're getting serious about water usage.  I'm only going to can this summer if I really need something.  I did make the beans from dry because I wasn't sure about consistency in the vegan recipe I was using.  They use canned, which seemed like far too much water to make a patty.  I've had that problem before.  Turns out, the mixture was on the dry side, so you can definitely go either way.

There were a couple of changes because I didn't shop ahead for anything except the hamburger buns, because those were free.  I used jarlic instead of roasting garlic, which would surely bring a new depth of flavor.  The filler is matzoh cake meal, after I went through all that gas to find some, but I'm putting the original panko in the recipe below.  The important part is to use a filler that is pre-baked, because these do not cook all the way through to a temperature that would make an uncooked ingredient safe.  I didn't have Dijon mustard and opened a jar of my wholegrain mustard instead.  Instead of adding so much liquid with lemon juice, I subbed in a bit of preserved lemon and skipped adding salt.  And some of the "parsley" is actually cilantro because I didn't have 1/4 C on the plants.

My burgers were vegan, but the meal was not because I made pesto with some onion scapes and the rest of the cilantro to have on it.  The rest of the sandwich was a few spinach leaves and the last of the tomato confit.  And I opened the last jar of last year's ketchup to have with some freezer fries.  Because you just throw everything in the food processor, the burgers were done before the fries.

1 14oz can cannellini or white beans, drained; or 2/3 C dry, soaked and cooked
*9 oz frozen artichoke hearts, thawed or canned in water, drained
1 C panko bread crumbs

  • or 1/2 C regular bread crumbs or matzoh meal
  • or *1/4 C matzoh cake meal
*1/4 C fresh parsley
*3 Tb lemon juice or preserved lemon
*2 Tb Dijon or grainy mustard
1/4 tsp kosher salt
1/4 tsp black pepper
1 head roasted garlic or 1 Tb minced garlic
Olive oil for frying
Buns and condiments for serving

1.  Get out the food processor.  Everything except the olive oil and serving ingredients goes in.  Pulse at first to get things moving, then run about ten seconds to make a thick paste.  If too dry, add a little more lemon juice.

2.  Preheat a griddle or large skillet over medium heat.  Add a thin layer of olive oil.  Shape your mixture into patties roughly the size of your buns.  I decided to use my largest circle cutter directly on the griddle and pack it with the mixture.  That made five patties nearly an inch thick.  I could have made six or seven thinner burgers, but didn't need that many.

3.  Fry the patties until browned and crispy, roughly 6 minutes per side.  If you used a spicy mustard, your eyes are going to start watering as they cook.  I added a bit more oil after flipping them.  You could probably also bake or broil these, just put them on greased foil first.  They might dry out in the oven.  Remember, because you did not use flour or eggs, all of the ingredients are pre-cooked or safe to eat raw.

4.  Serve hot on buns, garnished with veggies and any condiment you prefer.

Makes 4-6 burgers

Difficulty rating  π

Wednesday, June 1, 2022

Stretch-Lattice Top Crust


Shortly before the pandemic, my current location ordered a 30 lb case of frozen blueberries.  Soon after, the ingredient was removed from the menu.  I've been making little personal coffee cakes occasionally for whoever is working that day, but there's still at least 20 lbs left.

I decided to bring some home and make a blueberry-rhubarb pie with the last jar of last year's rhubarb pie filling.  My original intent was to top it with twisted strips or a lattice, but there was more pie crust for the top than I had anticipated, and it felt like a shame to re-roll that much again later.  So I decided to do this design.

Yes, there is a tool that will make this design.  You can find it at any craft shop with a cake decorating section.  But unless you're making several of these in one go, it doesn't save that much time and is an unnecessary expense.  You can be precise if you want with a ruler, but I just eyeballed it.

1.  Roll out your top crust, or use one out of a box.  Nothing wrong with that.

2.  With a sharp, thin knife, start making slits about one inch long.  Skip an inch, make another, all the way down a line.

3.  Move half an inch over, parallel to the first line, and slit where you skipped before, leaving whole where the first slits were.

4.  Move over half an inch, and slice parallel to the first row's slits.  Continue this alternating pattern all the way across the dough.

5. To make it easier to move, roll the top crust over a rolling pin.  This will also separate the lattice sections.  Slowly unroll it over the filled bottom crust.  Pinch the rim sealed as you would for any other top crust and trim off the excess.

6. Brush top with egg wash or milk as desired, and sprinkle with sanding sugar if you wish.  Bake at 375º (or recipe indications) until golden and filling is cooked.  Cool and serve.

Difficulty rating  :)