Sunday, December 15, 2024

Canning Sweet Potatoes

I have been waiting since I got the canner in June for sweet potatoes to go on sale for a price to make it worth canning.  Thanksgiving week, one store had them for $1.20 per pound in a five pound bag.  Everyone else was still advertising $2 per pound, and that was for the giant ones that you can't really use for canning.  This happens with every grocery item that gets trendy.  Celery used to be cheap until people started juicing it.  Now it's everything with a low glycemic index that has shot up faster than inflation can justify.

In a way, I'm glad it took this long to get to canning a root vegetable.  I've learned more about the science behind pressure canning.  Things that are dug up need special care to prevent botulism.  And before you freak out that all potatoes and carrots probably have botulism spores on them, remember that the toxins can only grow in an anaerobic environment.  Such as a canning jar.  This is why low acid foods must be pressure canned, and even some items that you can buy in the market cannot be safely canned at home.

As usual, I'm linking the NCHFP procedure for pressure canning.  Unlike most YouTube videos I've watched on the topic, I'm following the instructions.  The rebel canners have followed procedures close enough to be safe, but only Rose Red Homestead has done a video demonstration that follows it word for word - that I've found.  The only issue I have with the NCHFP is their guideline that it takes 11 pounds to make 9 pint jars.  I bought ten, expecting to get eight jars out of it plus a few slices for snacks.  Yeah, it only took six pounds to fill the jars.  I could have gotten out the rack and more jars, but I don't actually want any more jars of it than what I had planned.  So the rest of the par-cooked potatoes went in the freezer.  Spoiler alert, we're having sweet potatoes at Chrismukah.

It did take a long time to peel the potatoes after steaming.  I had put on the soundtrack to "Wicked" while they were steaming and I was cleaning the jars and setting up the canner.  By the time the second batch was steamed and I still wasn't done peeling the first five pounds, we were on to "Spamalot".  I did get better at it, but I was seriously starting to think that paying extra to buy commercially canned sweet potatoes wasn't such a bad deal.

Despite some siphoning, all of the jars sealed before I opened the canner.  I was having a terrible success rate with the wide mouth jars and thought I was doing something wrong, but all my regular mouth were sealing.  I opened a different box of lids for this project and that seems to be the issue.  I'll use the last few in the other box for something I don't mind freezing if they fail.  I'm almost out of the Kerr and Ball lids anyway, after which I'm switching to ForJars.  I bought a couple hundred of each on a gift card and BOGO sale.  I'm good for a while.

It is important to understand what the final product will be like when pressure canning.  It isn't like water bath, where you get a slightly more cooked version of whatever you put in.  This is like the Princella potatoes, only I made them with water instead to cut back on sugar.  That was the whole point of doing them myself instead of buying them.  These are the sweet potatoes you mash for casserole or pies.  They will not hold their shape unless you fry them gently in a dry pan.  They will be so soft that you may have to eat them with a spoon.  But they're excellent for turning into purée for soup.  If this is the texture you want, then canned sweet potatoes could be your choice.

Difficulty rating  :-0

Thursday, December 12, 2024

Carrot and Chickpea Tart

I bought two pounds of carrots, then kept not using them for their intended purpose.  While they do store for an extended period in the fridge, I didn't want to test the limits.  So "chickpea flour" on the meal calendar turned into this instead of a socca.

I bought a steamer basket at an estate sale for $2.  They probably cost just a bit more than that new, but it was there and in really good shape.  Maybe had been used twice.  I definitely need one, so I can stop gumming up mesh strainers when I steam.  Steaming the carrots for this dish was its first adventure.

This recipe is a dirty dishes factory, even if you use an immersion blender instead of a food processor.  I knew that going in and just did the best I could.  You have been warned.

I'm including the recipe for the yogurt and feta sauce I had with it, but you could have it with anything, or even no sauce at all.  This tart would be great with a side of roasted vegetables, or as the side dish for fish or chicken.  I happened to have it with a green salad because Smart & Final was having some crazy sale on salad ingredients and I ended up with a week's worth for $2.  Meal plans are adaptable.

1 lb carrots
*3/4 C chickpea flour
1/2 tsp salt
1 tsp curry powder
*1/2 C (about 2) chopped green onion
*1/4 C cilantro or parsley

1.  Peel carrots and trim off tops.  Chop into pieces and place in a steamer basket in a pot over 1" water.  Close lid, bring water to a boil over medium-high heat, and steam until easily pierced with a fork, about 20 minutes.  Remove carrots to cool and dry out a bit.

2.  Preheat oven to 350º and grease an 8" pie pan with oil or pan spray.

3.  Place carrots, salt, curry powder, green onion, and cilantro in a food processor and pulse into a slightly chunky paste.  I wanted this to have some texture, and for the herbs to be visible.  If you run it all the way, green and orange make brown, and I didn't want that.

4.  In a bowl (or back in the original steamer pot), stir together purée and chickpea flour into a paste.  Pat into the cake pan.  If you plan to fill the finished tart with a sauce or other topping, make a rim around the edges.  Bake until set, about 30 minutes.

5.  Allow tart to cool in pan about 10 minutes, to firm up a little, but remove it while still warm so the oil hasn't hardened yet.  If you want to serve this in one piece, a removable-bottom tart pan or springform might be a good choice.  None of mine were the right size, so I cut wedges.  Serve warm or room temperature, with a sauce if desired.

Yogurt & Feta sauce

1 C plain yogurt
*1/2 C crumbled feta cheese
*1/4 tsp celery salt
*1/4 tsp sumac
1/4 tsp cumin

1.  Stir together all ingredients while the tart is baking.  Rest in the refrigerator until ready to use.

Serves 4-6

Difficulty rating  :)

Monday, December 9, 2024

Pulled Pork Biscuit Sliders

So, I canned eight pounds of pork butt.  Now what?  I thought of making some into breakfast biscuit and gravy, which eventually evolved into this.

I decided to make these BBQ and cilantro, but you can totally use different flavors.  I found recipes that toast the split biscuits with cheese on them.  Some have just seasoned pulled pork with no sauce.  I thought I was out of BBQ sauce at first and almost used the Bibigo Korean sauce.  I'm out of sauce now, and really needed a bit more, but it's probably good that it isn't dripping everywhere.  You can go wild, also with any veggies you put on it.

While I did make the biscuits from scratch, and will repost the recipe from an earlier post here, a lot of the recipes I found used Grands.  I'm also going to post how to make the pulled pork, minus the whole pressure canning part.  Go ahead and use an Instant Pot if you have one.  Or open a can or two of shredded meat.  This day was largely about making an easy pantry meal for me.

Buttermilk Biscuits

2 C flour
2 tsp baking powder
1/4 tsp baking soda
1 tsp salt
*1/4 C cold shortening
*3/4 C buttermilk

1.  Preheat oven to 450º.  Line a baking sheet with parchment or a Silpat.

2.  In a bowl, combine flour, baking powder, baking soda, and salt.  Cut in shortening until it makes pea-sized flakes.

3.  Stir in buttermilk until almost combined.  It will make a wet, shaggy dough.  Knead gently several strokes, until uniform.

4.  Pat out into a rectangle 1/2" thick on the baking sheet.  With a knife or bench scraper, score the biscuits all the way down to the bottom.  I actually made 12 so they would be smaller, then saved the four corners for other uses.

5.  Bake 12-15 minutes, until lightly browned and set.  Cool on a rack, then break apart along the scoring lines.

Pulled Pork

1 lb pork butt or pork loin
salt to taste

A.  For stovetop, place meat in a saucepan slightly larger than the piece.  Sprinkle with salt and add one inch of water.  Bring to a simmer, cover, and cook at least 2 hours, until meat is falling apart when pricked with a fork.  If the water level dips, add as needed.

B.  For the oven, place meat in an oven-safe casserole.  Sprinkle with salt.  Add 1" of water.  Cover, either with a lid or foil.  Cook at 250º until fork-tender, about 2 hours.  Check the water level after an hour.

C.  For the slow cooker, place meat in cooker with 1" of water and sprinkle with salt.  Cook on low 6 hours or high for 3.

D.  For all pressure cookers, see manufacturer's instructions.

Once cooked and slightly cooled, shred with a fork.  Should produce 2-3 cups of meat.

Assembly

8 biscuits
2-3 C shredded meat
*1/4 C barbecue sauce
*1/2 C chopped cilantro
sliced onions or other sandwich garnishes

1.  In a pot, reheat meat with barbecue sauce and cilantro.

2.  Split biscuits and place on serving plate.

3.  Add meat to the bottom halves of the biscuits.  Top with onions or other favorite toppings.  Place biscuit top on the fillings and serve.

Difficulty rating  :-0 from scratch or π with premade biscuits and meat

Friday, December 6, 2024

Zaalouk

I went down another recipe rabbit hole after discovering a Moroccan brand of pouch meals.  Mina has a vegan harira that I might try, and a few other dishes I hadn't heard of and googled.  That led to Moroccan recipe blogs, and of course an entry will be linked to good things to serve it with.  This cooked salad from Salima's Kitchen sounded like something I've probably had at a Moroccan restaurant, so I decided to give it a try.

I find it interesting that Mediterranean cuisines often consider cooked vegetables to be salads.  American salads are almost always primarily raw foods.  Even when you think of something like tuna or egg salad, only the proteins have been cooked, and they're still served cold.  These salads can be served hot, what we would consider a vegetable side dish.

If you aren't an eggplant person, zucchini is a reasonable substitute, or a summer squash.  I really liked this and will probably make it for Passover if it goes with whatever menu I develop.

1 large eggplant, peeled and chopped into cubes
*1 15 oz can diced tomatoes (or 3 Roma tomatoes, peeled, seeded and chopped)
4 cloves garlic, minced
2 Tb fresh parsley, chopped
2 Tb fresh cilantro, chopped
1 tsp kosher salt (or to taste)
2 tsp paprika
1 tsp cumin
2 Tb olive oil
3/4 C water
1 tsp white wine vinegar

1.  I don't remember ever peeling an eggplant before, but it does work better for this recipe.  To reduce oxidation, I poured the water over the cubes as they went in the bowl.

2.  While you're busy peeling and dicing said eggplant, heat the oil in a large skillet or saucepan over medium heat.  Add the paprika, cumin, salt, and garlic and cook into a fragrant paste, about 3 minutes.

3.  Add eggplant cubes and the water to the pot and toss to coat with the spices.  If using fresh tomato, add that at the same time.  Cover and cook until eggplant is broken down, about 20 minutes.  Mash, either with a fork or a potato masher.

4.  If using canned tomatoes, add after the eggplant is cooked, including the sauce.  Also add in the parsley and cilantro at this point.  Stir in the vinegar and bring back up to a simmer.  If desired, mash again into a smoother dip.  You can also leave it somewhat chunky.  If too thin, remove lid and allow the liquids to reduce.  If too thick, add more water.  Taste and adjust seasonings.

5.  Serve either hot or cold, with crusty bread if desired.

Difficulty rating  :)

Tuesday, December 3, 2024

Quinoa Dolmades

I'm not a huge fan of rice dolmades (or dolmas).  Something tends to be not right in the consistency half the time, or maybe the way the rice reacts with the herbs.  I thought I'd give a different filling a try, using quinoa to make it lower carb and a vegan protein.

It could have gone a little better, but I did get over half of them to stay wrapped.  Quinoa doesn't have any sticking power, unlike rice and most grains.  It's a seed, like sesame seeds or chia.  At least chia develops that gummy exterior.  The taste, however, was what I was expecting.  The nutrition level was exactly what I wanted it to be.  There are numerous recipes that turn this idea into a salad with finely chopped grape leaves, and that may be a better idea if I were to try this again.

Also, I have a ton of grape leaves left.  The jar I bought had approximately 90 leaves in it.  The jar that had the 30 I wanted cost twice as much.  Fine, whatever, I'll find a use for them.  I topped off the brine with vinegar and stuck the jar in the fridge.  I might try to wrap tamales with them.  It will probably require two leaves each, so there you go.

3/4 C dry quinoa
1/2 tsp kosher salt
*1 tsp dried rosemary
1 tsp dried oregano
*1/2 tsp dried mint
*1/2 tsp dill weed
*1 C kalamata olives, minced
about 30 grape leaves
*1 orange or lemon, thinly sliced

1.  Rinse quinoa well.  Add it and 1 C of water to a small saucepan.  Bring to a simmer, cover, and cook 10 minutes.  Set aside to cool, and it should absorb the remaining water.  It's ok if it isn't fully cooked.  You want it to expand more in the wrappers.

2.  Rinse grape leaves very well.  I rinsed, then left them in a container of hot water while I was working.

3.  In a bowl, mix together quinoa, chopped olives, salt, and herbs.

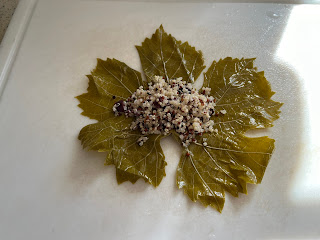
4.  Line a large saucepan or soup pot with a few grape leaves.  On a work surface, lay one leaf shiny-side down.  You want to see all the veins on the inside part.  Cut off the stem if still attached.

5.  Spoon a generous tablespoon of quinoa onto the center of the leaf.  Fold in the sides, then roll from the stem end to the point.  Place, point-side down, in the pot.  Continue until the rolls are tightly packed.  Cover with orange slices and a few more leaves, then start another layer.

6.  Once all the quinoa is rolled, fill the pot with water to cover.  They float, so you may have to place a plate over them to keep them under water.  Bring to a simmer and cook for 30 minutes.

7.  When I took the plate off and there was quinoa floating, I knew there were fails.  Still, it was a lot.  Gently remove the rolls from the water and place on a serving plate.  Can be served hot or cold, with any sauce of your choice or a squeeze of lemon.

Makes about 30

Difficulty rating  :)

Saturday, November 30, 2024

Pickled Red Onions

I don't have a Condiment label, but that's really what this is.  Like kimchi, sauerkraut, caramelized onions, and the tomato-garlic confit, this is a go-with for many different things that is not a sauce.

Quick pickling onions is super fast and easy.  I had bought the onion for the salmon pasta salad and decided not to use it.  Nothing on the meal plan for the rest of the month needed raw red onion, so I decided this would make a nice side for both the gozleme and an upcoming mezze meal.  Five minutes later, it was done and cooling on the counter.

After, I was in the pickles aisle at the market and looked to see what they had that might be similar.  $6 for essentially what I'm making in this post.  An onion costs what, about a dollar?  Vinegar, sugar, salt, and spices are pennies.  This is definitely going into my rotation of from-scratch recipes.

*1 medium red onion
1 C water
1 C white distilled vinegar (or part flavored vinegar; feel free to experiment)
1 Tb kosher salt
2 Tb sugar
seeds or spices of choice, optional

1.  Peel the onion and slice thinly.  Place into a glass jar or two, depending on the size of your onion.  Do not use metal, as the vinegar could corrode it.  Plastic will absorb flavors.  If you aren't into Mason jars, an old pickle jar would be perfect and you wouldn't have to worry about residual vinegar smell on the lid.  Add a little of any spice you would like directly into the jars.  I used mustard seed.  You could add peppercorns, sliced jalapeños, bits of garlic, fresh dill, or any other flavoring you like in "pickles".

2.  In a small saucepan, combine water, vinegar, salt, and sugar.  Bring to a low boil for two minutes, to be sure that the solids have dissolved.

3.  Carefully pour brine into the jars.  If there isn't enough to cover the onions, add a bit of boiling water.  This isn't a canning recipe, so exact acidity isn't an issue.  Allow to cool to room temperature.  Cover with the lid and refrigerate at least one hour.  Keeps in the fridge for about a week.

Difficulty rating  π

Wednesday, November 27, 2024

Lamb Gozleme

This is the meaty filling recipe for gozleme.  I used lamb because I like it and it's more traditional, but a lean (93%) beef or ground turkey can be used for the recipe.

Because I was using a pound of ground meat, I made the full recipe this time.  These things are huge.  Fortunately, my sides were simmered carrots and pickled red onions, which are super light and have very few calories.  Well, I'm the person who keeps complaining that she needs to put on weight.  Realistically, I think making this into six gozlemes would be a more appropriate serving size.

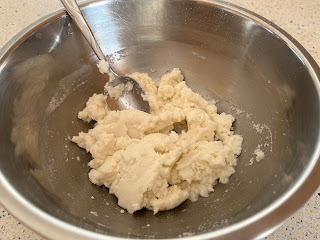
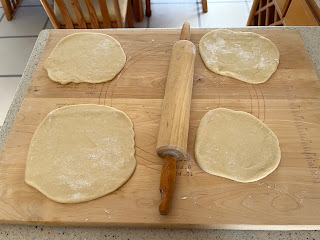
I was trying to make this quickly.  It was after day 9 of ten work days in a row.  That's just how my days off fell over two schedules.  Somehow, I never broke down and picked up drive-thru on the way home.  I thought I could shortcut the dough resting time to more like ten minutes.  Turns out you can't.  The first time I tried to roll them out, the dough was still tight and made squares about 7x7.  I let those rest while I made the pickled onions and was able to roll them to the proper size.  Gluten is a real thing.

I'm using kale instead of spinach today.  My boss keeps using her PTO, and someone's got to eat it.  If you're using a tougher green, you'll have to add it to the skillet before the meat.  For spinach, it goes in last.  I omitted the original recipe's red bell pepper.  It adds a nice color contrast, but wasn't the flavor I was going for.  Plus, it would probably upset my stomach.

Dough

2-1/2 C flour, plus more for rolling
1/2 tsp salt
1/3 C olive oil, plus more for the pan
3/4 C water

1.  Stir salt into flour in a bowl.  You can make this in the stand mixer, but I didn't find it much harder to do by hand.  Stir in olive oil and water into a rough dough.

2.  Knead dough until smooth, without adding more flour.  I didn't time it, but it was probably 5-8 minutes.  Allow to rest 20-30 minutes while you make the filling.

3.  When ready to go, divide dough into 4-8 portions by weight, depending how big you want the finished product.  Roll each into a rectangle, about 8"x14" if you're doing 4, so half that size for 8.

Filling

1 Tb olive oil
1 small onion, diced
2 cloves garlic, minced
1-1/2 tsp cumin
1 tsp paprika
1/2 tsp salt
1/2 tsp ground pepper
*1 lb ground lamb
4 C fresh spinach or other leafy green
1/2 C crumbled feta cheese

1.  In a large skillet, heat the oil over medium-high.  Add onion, garlic, and spices and cook until the onion is softened, about 5 minutes.

2.  Add ground lamb to the skillet, breaking it up, and cook until browned in crumbles.  If using a tougher green, cook with the lamb.  If using spinach, add to the mixture in the last minute.  Once the meat is done, remove from heat until easily handled.

3.  Preheat a griddle over medium-high heat, lightly coated with oil.  Spoon a portion of meat mixture onto half of a dough rectangle.  Sprinkle generously with feta.  Fold other half of dough over and pinch shut all around the edges.

4.  Carefully transfer gozleme to the oiled skillet and cook until the dough is done and crispy, about 3 minutes per side.  That will give you time to prepare the next.  Repeat until all are cooked, adding more oil to the griddle as necessary.  Cut into wedges and serve.

Serves 4-8, depending on how hungry everyone is

Difficulty rating  :-0

Sunday, November 24, 2024

Pearl Couscous Salad with Tomato Confit and Salmon

I'm not doing pesto this month.  Need a break.  I decided to blow my remaining home-grown tomatoes and last year's tiny garlic on this instead.  Also, the kale needed a trim.

It didn't seem right to add beans to this particular pasta dish for the protein, so I got out a can of salmon.  I forgot that the big cans are literally a rolled piece of fish.  Tastes the same.

I'm calling this a salad, but you could have it hot as a regular pasta dish.  I served it slightly warm, so the olive oil-based sauce would be fluid.

*2 lbs Roma or Campari tomatoes (or a similar salad tomato)
1 head garlic
1 tsp kosher salt
*1 tsp dried basil
1/2-ish C olive oil
2 Tb white wine vinegar
1 C pearl couscous
*6 C chopped leafy green such as kale, chard, or spinach
1 4-serving can salmon or chicken, optional
crumbled or grated cheese, such as parmesan, feta, or chèvre for garnish

1.  At least two hours ahead, or the day before, roast the tomatoes.  Preheat the oven to 375º.  Quarter the tomatoes and place in an 8x8 baking dish.  It's going to be snug, but they should all fit.  Peel the garlic cloves and arrange in the pan.  Sprinkle with the salt and basil.  Drizzle olive oil on the tomatoes until the dish is full at least 1/4" deep.  I didn't measure an exact amount, but the bottle looked like I had used half a cup.  Roast until the tomatoes are thoroughly softened, 60 to 90 minutes.  Set aside until ready to use, in the refrigerator if it's for the next day.

2.  Cook pasta according to package directions.  If using a sturdier green like kale, cook it in the pot with the pasta.  For spinach, you will be adding it after cooking.

3.  Drain the cooked pasta.  Put it back into the pot and stir in cooked tomatoes with their oil, spinach (if using), vinegar, and salmon.  Either chill for cold service, or serve immediately garnished with cheese.

Difficulty rating  :)

Thursday, November 21, 2024

Chickpea and Pumpkin Curry

Pie pumpkins were on sale, so I decided to make this as my undefined "squash" meal on the calendar.  Also, I canned chickpeas and one siphoned badly.  It did seal, but I didn't like the idea of storing it with an inch of beans above the liquid, so it went in as the protein.

I think I've hit the break-even point on the pressure canner, if you don't count the three cases of pint jars I've bought this year.  If not, it's pretty close.  Next year will likely recoup those jars and the lids.  I didn't realize how fast it would happen.  It's mostly in the meat, but everything I've put in jars this year except the beef bone broth has been cheaper than buying the generic brand.

You'll notice there's no curry powder in this dish.  I went for half savory, half sweet flavors, and omitted all heat except the cumin seed.  There was still plenty of flavor, which is really what curry is.  The dish refers to a stew in a gravy that is spiced.  Curry powder, turmeric, etc are used because they are prevalent in Indian curries.  I'm calling this an American curry.

1 pie pumpkin (2-3 lbs) or butternut squash
2 Tb olive oil
1/2 onion, diced
1 clove garlic, minced
*1 tsp grated ginger
1 tsp cumin seed
1 tsp coriander seed
*1/2 tsp ground sumac
1/2 tsp ground cinnamon
1/2 tsp salt
*1 Tb date syrup or molasses
1 can coconut milk (lite is ok)
*4 oz spinach, either fresh or thawed
*1 can chickpeas, drained and rinsed

1.  Preheat oven to 375º and line a baking sheet with parchment for easy cleaning.  Cut squash in half and remove stem and seeds.  Place cut-side down on baking sheet and roast until the flesh separates from the skin, about 30-40 minutes.  You don't need to cook it completely.  This is just making it easier to peel and dice.  Allow pumpkin to cool until you can handle it and peel off skin.  Cut into 1" chunks and set aside.  All this can be done as a do-ahead, even frozen and defrosted.

2.  This whole thing comes together quickly at this point, so start your rice first, if using.  If desired, lightly grind cumin and coriander seeds in a grinder or mortar and pestle.  I really like the aroma of freshly ground coriander.  Heat oil in a large skillet over medium.  Add onion, garlic, ginger, cumin, coriander, sumac, cinnamon, and salt.  Once the onion is softened and everything is fragrant, stir in the date syrup.

3.  Add the coconut milk, spinach, pumpkin, and chickpeas.  Wait until the coconut melts before deciding if you need to add water.  Stir everything together and bring to a simmer for 5 minutes, to finish cooking the spinach and pumpkin.

4.  Taste and adjust spices.  Adjust sauce with water or vegetable broth if needed.  Serve hot as a stew or over rice.

Difficulty rating  π

Monday, November 18, 2024

Cod Risotto with Artichokes

I haven't done a risotto in ages.  Frozen cod was on sale, so I bought it without knowing what I was going to do.  This evolved later, and kept evolving while I was in the grocery store.  That doesn't happen much anymore with my meal planning.  It was kind of nice.

There was a lot of variation in the recipes I researched.  The vegetables were different in all of them, and the sauces ranged from a tomato base to lemon to pesto.  I ended up striking out on my own.  Pretty much all agreed that the fish should be cooked separately for a better presentation.  I was going to stir it in with the vegetables for the last 10 minutes.

As long as I was getting another pan dirty, I decided to cook the lemon slices in it first.  They didn't get as caramelized as I had hoped, but that probably had more to do with me being hungry and not waiting long enough.  They did flavor the margarine when I added the fish afterwards.

1 Tb olive oil
*1 leek or 4 green onions, sliced
*2 ribs celery, diced
*1 tsp dill weed
*1 tsp tarragon
1/2 tsp salt
1 C risotto
1/2 C white wine (or broth)
3-4 C vegetable broth
1 large carrot, diced
*4 oz frozen artichokes, defrosted and quartered
1 Tb margarine
4 cod fillets
*1 lemon, sliced
salt and pepper to taste
*grated parmesan for topping

1.  In a small saucepan, bring broth to a simmer and keep over low heat.

2.  In a large pot, heat oil over medium.  Add onions, celery, dill, tarragon, and salt and cook until onion is tender, about 5 minutes.  Add risotto and toast for 2 minutes.

3.  Add wine (or 1/2 C broth) and allow the rice to absorb it.  Most of the alcohol will also cook off.  Begin ladling in 1/2 C broth at a time, stirring it into the rice and allowing most of it to absorb before adding again.  It's going to take about 5 minutes per ladle.

4.  When you have stirred in 2 C of broth, add the carrot and artichokes.  They will cool down the mixture, so give it a few minutes before adding more broth.

5.  Somewhere between 3 and 4 cups, the rice will be cooked and creamy.  Taste and add salt and pepper as needed.  Remove from heat while you prepare the fish.

6.  In a large skillet, melt margarine over medium-high.  If desired, place lemon slices in skillet and cook 5 minutes on each side to caramelize.  This can overlap with the end of the risotto.  I moved my cooked slices to sit on the rice while I made the fish.

7.  Place filets in skillet and season with salt and pepper.  Cook until outside is crispy and middle is opaque, about 6 minutes per side depending on thickness.

8.  Spoon risotto into plates or bowls.  Top with cod and a slice or two of lemon.  Sprinkle with parmesan, if desired.  Serve hot.

Difficulty rating  :)

Friday, November 15, 2024

New Kitchen Gadget

I didn't really need another kitchen toy, but there were some really good sales everywhere to counter October's Amazon Prime Days.  I'm calling it an early Chanukah present to myself.

I bought a 7 qt Crockpot.  I love my little 1.5 qt, but a lot of the things I try to put in it are too big.  I was going to ask for a bigger one for a holiday gift, until Target ran a brand sale of 20-25% off.  I considered the 4.5 qt, which was only $20 that week and came in a couple of fun colors.  Then I realized that I would eventually get the big one and skipped right to it.  $32 on sale, plus I had a $5 coupon from getting a flu shot.

As you can see from the box, you can cook a whole chicken dinner in it.  At some point, I probably will, or maybe an 8-10 lb turkey.  I'm already planning to use it for the brisket.  Ooh, I bet a leg of lamb would fit.  Also, large batches of broth for canning and pots of soup that I don't want to leave on the burner for hours.  The insert comes out, to take along to pot lucks.  As you can tell, I've thought about this a lot.

I put it back in the box, and I'm going to try not to use it until Chrismukah.  If I need it to cook for a party, then it will come out earlier.  It's amazing that I've gone from being scared of leaving the little one alone to this.  I'm also not scared of the pressure canner anymore.  It's nice to be able to trust basic technologies that have been around for decades.

Tuesday, November 12, 2024

Mediterranean-Style Pizza

Ok, so I get that Italian food is Mediterranean.  It just isn't the way Americans make it.  This one is closer to how Italians would have made pizza before tomato sauce was a thing.

I've been watching a lot of historical food channels lately, and it's pretty impressive how many ingredients we take for granted are native to the Americas.  The most famous export to the rest of the world is probably the tomato.  I didn't realize that most beans are American.  Nearly all edible nightshades and about half of the gourds were unkown to ancient civilaztions on other continents.  Then there's corn and quinoa.  Corn may not be as pervasive across the other continents, but it probably makes up a significant portion of Americans by weight.

That said, my tomatoes finally ripened after I stopped planning recipes with tomatoes in them, so I chopped up a couple to put on these pizzas with everything else.  The artichokes were a box I bought on clearance in case my home-grown wasn't enough for a full year.  They were, so I defrosted half of them and sliced them up.

I forgot to buy a red onion, then realized that my pesto is onion-based and went out to pick basil instead.  It needed a trim anyway.  If you're using a traditional basil pesto, slice up a red onion to give this a little flavor contrast.

For the crust you can use store-bought, naan, a pizza crust dough - which I do not appear to have as a stand-alone; I'll fix that next time I make pizza - or an overnight pizza crust recipe.  I made whole wheat naan.

1 large or 4 personal-sized pizza crusts
cornmeal to dust the pan
*1/2 C pesto
2 C mozzarella cheese
*2 cloves garlic, minced
1/2 red onion, sliced
*4 oz frozen artichoke hearts, quartered
*2 Roma or Campari tomatoes, diced
*8-12 Kalamata olives, halved
*handful of basil leaves, optional

1.  Preheat oven to 350º.  Scatter cornmeal generously on one or two baking sheets or a pizza stone, if using.

2.  Lay the crust or crusts on the baking sheets.  Spread with the pesto, then sprinkle evenly with the cheese.  I like to have a clean outer rim, but there's nothing in pizza theory that says you can't spread everything all the way to the edge.

3.  Scatter the toppings on top of the cheese, trying to get a little in each slice.  If the dough recipe requires it, allow the pizza to rise for the appropriate amount of time.

4.  Bake the pizzas according to the dough recipe.  None of the toppings have to be cooked to a specific temperature.  It will probably be around 20 minutes.

5.  Once done, allow pizzas to rest 5-10 minutes before cutting and serving.  I know, it's hard, but the dough and cheese really should finish their cooking process before you eat any.  I burned the roof of my mouth a little.

Difficulty rating  π for store-bought crust, :) for homemade