Tuesday, January 31, 2023

Fig and Rose Cake

This is the fun part of doing a pantry challenge.  When odd ingredients turn into something other than stew or quiche, it's a fantastic win.

I don't remember where the other half of the package of figs went, probably into a mezze dinner.  And it's embarrassing to admit that I bought the rosewater before the pandemic.  Most of the searches for fig-and-rose-cake ended up with Persian Love Cake, which I have made without the figs.  I changed the search to cake-with-dried-figs and other options appeared.

I'm adapting a recipe from Martha Stewart.  It sounded too sweet, so halving the figs and subbing buttermilk was a solution.  Some comments said it was dense, so I'm subbing part of the flour with cake flour.  I do see how the original ingredients make it kind of like a big Welsh cake.  It won't be as light as a layer cake, but much lighter than a scone.  And of course, the lemon is being changed to rosewater.  The original recipe did not have any kind of frosting, but I thought a basic powdered-sugar glaze would be appropriate.

1/2 C olive oil, plus a bit for greasing the pan
*1/2 C buttermilk
1 egg
*2 tsp rosewater
1 C all-purpose flour
*1/2 C cake flour
3/4 C sugar
1/2 tsp baking powder
1/4 tsp baking soda
1/4 tsp kosher salt
*5 oz dried figs

1.  Preheat oven to 350º while you're chopping the figs into bite-sized pieces.  Make sure to remove the stem if the fig has one.  They don't soften when baked.  Grease a 10" tart pan with removable bottom with olive oil.  If you only have regular cake pans, grease, line with a parchment or wax paper round, and grease the round.  The original recipe left off that part, and the full cake did not release; I was able to get the removable bottoms off without breaking the tartlets by using an offset spatula.  Broken scraps are still yummy.  For a tart pan, place on a parchment-lined baking sheet.  Some of the batter is bound to leak through.

2.  In a small bowl or pint measuring cup, whisk together oil, buttermilk, egg, and rosewater.  In a medium bowl, sift together both flours, sugar, baking powder and soda, and salt.  Since I was using powdered buttermilk, the milk solids went in with the dry and I mixed water in the wet.

3.  Pour the wet mixture into the dry and stir until mostly moistened.  Add figs and stir again to distribute and make sure there are no large pockets of dry mix on the bottom.

4.  Pour batter into prepared pan.  I used my four individual tartlet pans and one 6" round, rather than make one full sized cake.  Considering that the cake broke, that was a good idea as far as food photography goes.  You could also make muffins out of this batter.  I'm guessing about a dozen.

5.  Bake 35-40 minutes, until golden on top and firm to the touch.  If you're using the tart pan, it might be a bit thin for a toothpick test, but you can try.

6.  Cool in the pan 15 minutes, then gently remove the ring (or turn out of a regular pan) and cool completely.  Can be served as is, or with a dusting of powdered sugar or glaze.

Cake release fail

Makes one cake, about 8-10 servings

Difficulty rating  :)

Saturday, January 28, 2023

Shredded Oven-Roasted Brisket

We never had that holiday party at work, probably because I end up organizing them and that was the week I went on vacation, then the week I was out with Covid.  And now I have seven pounds of brisket in the freezer.

I really do need to decrease the chest freezer inventory.  Annual pre-Passover defrost is the first week of April.  I'm forcing myself not to buy any meat until it's under control.  Half the dinners I cook are vegetarian, so why do I have about 20 pounds of various meats in there?  I'm so thankful I didn't give into temptation and buy a turkey when there was a good deal recently.

For this month's challah bake, I decided to make four hamburger buns with eight ounces of the dough, and shredded meat on them sounded like a good idea.  I got out some cranberry ketchup to put on the sandwiches, and just needed a vegetable side.

Roasting brisket to shred is very easy.  You rub on the spices, pour a little water onto the meat before you wrap it in the foil, and let it do its thing in a low oven for most of the day.  Once the connective tissue and least dense fat cooks away, the meat will fall apart on its own.

The spices I'm listing here are my personal favorites.  You may want to do something slightly different, maybe to make the meat very spicy, or to lean toward a specific cuisine.  Focus more on the method in order to get shreddable meat, and flavor it however you like.  This is your starting point.

*2 lbs brisket
2 tsp kosher salt
1/2 tsp each pepper, paprika, chili powder, and granulated garlic
1/2 C water
*1 tsp liquid smoke

1.  Trim excess fat from brisket, but leave at least 1/4".  The brisket needs to baste itself.  Line a roasting pan with heavy-duty foil and place the roast on it.

2.  Stir together salt and spices.  Sprinkle on all sides.  Stir together water and liquid smoke, then pour around the meat, inside the foil.  Seal with a top piece of foil into a secure package.

3.  Place pan in oven and set to 275º.  This thing is going to be in there so long, you don't need to preheat.  Roast for 4 hours.  Yes, seriously.  As long as there is some water in there, you pretty much can't overcook it.  Check after about 2 hours to make sure the foil wrap didn't leak.  Add water if necessary, then reseal.

4.  Allow roast to cool until you can handle it.  Cut off any obvious fat, then cut across the grain into 2" slices.  Shred brisket, either with forks or your fingers.  I used the latter, which gets very greasy, but you can feel what parts are mostly fat more accurately than how they look.  Serve as sandwiches, in casseroles, in soups and stews, or any way you can think of.


Serves 4-6, depending on fattiness of meat
Difficulty rating  π

Wednesday, January 25, 2023

Golden Mushroom Chicken

There's a lot of chicken in the freezer.  I think I bought some every time it was on sale.  I also have a can of Campbell's golden mushroom soup that I bought for one post-vaccine or another, expecting to have a stronger reaction than I did.  One of the recipes I found when I googled the title also used French's fried onions, which I have, so we're basing it on that.

Since I forgot to write a date on the chicken leg quarters, that's what I got out for this recipe.  They're probably not the oldest chicken in the freezer, but why take that chance.  You can make this with any cut of chicken or turkey.

*8 pieces chicken (I count one breast as two)
*1 can Golden Mushroom soup
1/4 C water
1 small can sliced mushrooms, optional
*1/2 C crispy fried onions

1.  Preheat oven to 350º.  Get out a 9x13 baking dish.  I lined mine with foil for easier cleanup because it was metal.  For glass or ceramic, you can soak off anything that scorches to the pan.

2.  Arrange pieces of chicken in pan.  In a small bowl, stir together soup and water to make it pourable. If using extra sliced mushrooms, stir them into the soup.

3.  Pour thinned soup over chicken.  Cover with foil so the sauce doesn't evaporate off too soon.  Bake 45 minutes.  Remove foil, sprinkle with fried onion strips, and bake uncovered until chicken reaches 165º on a food thermometer, another 10+ minutes.

4.  Serve chicken hot, with extra sauce spooned over and more onion strips if desired.

Difficulty rating  π

Sunday, January 22, 2023

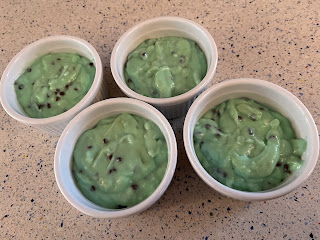
Grasshopper Pudding


Pantry challenges don't have to be just food.  I've been adding booze to recipes for twelve years to make a dent in my parents' liquor cabinet.  It took me 11 years to finish off Papa Smurf's Tanqueray.  At least this time, it's something I bought.

I probably could have made this with store-bought vanilla pudding, but I have all the ingredients I need.  My version probably has less sugar in it.  Plus, I did buy a whole bunch of vanilla beans I haven't been using.  I might have to make more things with vanilla pudding in them.

One important note, I'm using a pudding recipe that is thickened with cornstarch instead of eggs.  Eggs are stupid expensive now, if you can even find them.  The avian flu has decimated flocks all over North America.  I'm considering my weekly challah to be a luxury item, even though I costed it out to roughly $3 per month.  $1.55 of that is the 4 eggs.  To put it in perspective, I spent less per pound for the brisket than I'm paying per dozen for eggs.

3 Tb cornstarch
1/2 C sugar
*2 C milk
1/2 tsp vanilla
1/8 tsp salt
*1/4 C creme de menthe liqueur (or 1/4 tsp peppermint extract for no alcohol)
*1/4 C mini or micro chocolate chips
whipped cream for serving

1.  In a medium saucepan, combine cornstarch, salt, and sugar.  I used vanilla sugar and left the bean in instead of adding extract later.  Stir in milk and allow to combine.

2.  Heat on medium, stirring constantly, until mixture comes to just below a boil and thickens.  It should fall in clumps from the spoon.  Stir in vanilla extract and creme de menthe or peppermint extract.  The pudding will become more liquid.  I brought it back up to a low boil in case there was any cornstarch that hadn't thickened yet.  If using extract, you might add a drop or two of green food coloring for effect.  This is when I fished out and discarded the vanilla pod.

3.  Remove pudding from heat and allow to cool to room temperature, stirring frequently to avoid a skin forming.  You can do this in the fridge in 10 minute increments.  Once below 80º, you can stir in the chocolate chips and they won't melt.

4.  Spoon pudding into serving cups and chill until ready to serve.  Top with whipped cream if desired.

Difficulty rating  π

Thursday, January 19, 2023

Vegetable Stew over Quinoa


I'm not actively doing the January Pantry Challenge.  I actually forgot about it when I was making this month's meal plan.  I've been trying to use items that haven't been in rotation for a while since October.  This whole blog is one giant Pantry Challenge, so it isn't like I'm doing anything different than usual.

Today's ingredients to be used are quinoa and tomato paste, with an honorable mention for the radishes in the garden and most of the assorted veggies in the fridge and freezer.

*1 C dry quinoa
1 Tb olive oil
*1/2 onion, diced
*2 ribs celery, diced
*2 Tb tomato paste
*1 tsp dried tarragon
*3 C leafy greens, chopped (arugula today)
*4-6 radishes, sliced (or tiny potatoes if you don't like radishes)
*1 C asparagus, in 2" lengths
*1/2 C corn kernels
water as needed
salt and white pepper to taste
*2 Tb lemon juice or 1/2 preserved lemon

1.  Start to cook quinoa according to package directions.  In many cases, that will include rinsing.  I rinse even when it says pre-rinsed if there's any soapy residue in the water when I add it.

2.  Drizzle oil into a large skillet and heat over medium-high.  Add onion, celery, and radishes and cook until softened, stirring frequently, about 5 minutes.  Sprinkle in the tarragon and add tomato paste and a bit of salt and pepper.

3.  When mixture is mostly cooked, add in corn and asparagus.  Add water slowly, a quarter cup at a time, until the stew is as moist as you like it.  Maybe you want a lot of sauce, or you might prefer it on the dry side.  Allow to simmer until quinoa is ready, up to 10 minutes.

4.  Add chopped greens and allow to wilt, about 2 minutes.  Add lemon juice, then taste and add salt or pepper as needed.  Adjust water level by adding or letting it boil off.

5.  Make a bed of quinoa on the serving plate, or a ring of it.  Spoon the stew on top and serve.  As written, this is vegan and gluten-free, but you could add cheese (or bacon) to the mix as desired.  Without the corn, it's Passover-friendly.  To keep vegetarian but not vegan, crack a few eggs into the stew to make a kind of shakshukah.

Difficulty rating  :)

Monday, January 16, 2023

Bulgur and Feta Fritters


Chrismukkah was cancelled when I brought back an unexpected souvenir from London.  Really thought it was just a cold and was surprised when the test was positive.  I shouldn't have been, after five days in a country where no one wears masks, including me.  Sure, four extra days of vacation, but is it really fun when you're sick?

It did get me out of making latkes.  I still cooked up the leg of lamb.  For an easier fried patty, I chose to make these little fritters.  I took the suggestions from the Food 52 comments and made them with an egg as binder.  The parsley in the Pond went crazy again, so I made a side salad like in the post.  The result is a deconstructed, partially cooked tabbouleh, which I apparently forgot to photograph, after picking the prettiest patties and arranging everything neatly on the plate.

Olive oil
*1 C #2 bulgur
water
salt
4 oz feta
1 egg, lightly beaten

1.  Drizzle just a bit of oil in a large saucepan, one tablespoon at the most, and heat over medium.  Add bulgur and cook lightly just to toast, about 4 minutes.

2.  If feta is in brine, drain the liquid into a measuring cup.  Add water to make 2 cups.  If dry, add a pinch of salt to 2 cups of water.

3.  Once bulgur is toasted, stir in water and bring to a low boil.  Lower heat and simmer until bulgur has absorbed most of the water, about 20 minutes, stirring occasionally.

4.  Once bulgur has cooked, remove from heat and mash until it gets sticky.  Bulgur is wheat, so once it's boiled it does have some gluten.  Crumble feta into the bulgur. As it starts to melt, stir in egg.

5.  Line a baking sheet with wax paper or parchment.  Spoon out mixture in generous tablespoons, about 24.  I used the smallest cookie scoop.  Flatten slightly into patties and chill until firm.  That's a minimum of 30 minutes, but you can do it even a day ahead.  Refrigerate until ready to fry.

6.  Coat the bottom of a skillet or griddle with oil and heat over medium-high.  Fry patties until golden, about 4 minutes per side.  Serve hot, with salad if it's a main dish or sauces as an appetizer.

Makes about two dozen

Difficulty rating  :)

Friday, January 13, 2023

Chocolate Almond Spread


The labels on this one are weird because I don't have a nut category.  My bad.

Maybe a year ago, I had a coupon for a free jar of almond butter.  I use it during Passover as a peanut butter substitute, so went ahead and picked it up.  Since then, I've barely used it.

When my jar of Target-brand Nutella ran out, I decided to make a chocolate spread of my own with the almond butter.  A quick search led to several super-easy recipes, about half of them vegan.  Nice to know this is a thing.

When you make your own nut butters and spreads, they don't have the preservatives of the commercial versions.  This one must be refrigerated and used within a couple of weeks, especially if you decide to put milk or cream in it.

You can absolutely switch out a lot of these ingredients, and quantities are flexible.  Want more of a nutty taste?  Go easy on the cocoa.  Huge sweet tooth?  Add more sweetener.  It's best to start off with smaller amounts of the non-almond ingredients until you find a combination you like.


*1/2 C almond butter
*2 Tb cocoa powder
*3 Tb liquid sweetener such as maple syrup, corn syrup, or honey
dash of cinnamon or powdered espresso
water or milk for thinning

1.  In a small bowl, stir together almond butter, 1 Tb cocoa, 1 Tb sweetener, and cinnamon.  It's going to form a very thick, dry paste.  Taste and add more cocoa or sweetener to your preference.  The amount of sweetener will depend on what you use; I finished off the corn syrup, which required more than if I had used honey.  You shouldn't taste the cinnamon; it's one of those flavors that merely enhances chocolate in small quantities.  Depending on the brand of almond butter, you may need a pinch of salt to get everything right.

2.  Once the flavors are in balance, start adding water, milk, or milk alternative to desired consistency.  I added boiling water, and went thinner than I wanted the final product to account for refrigeration.  I was shooting for frosting-level softness, and must have added close to half a cup of water.  I didn't measure it.

3.  Place spread in a sealable container and refrigerate when not in use.  Keeps about 2 weeks.

Makes up to one cup, depending on consistency

Difficulty rating  π

Tuesday, January 10, 2023

Tomato and Swiss Quiche

I finally made my meal-planned quiche!  All it took was prepping some pâte brisée for the freezer and baking the pie the day before.  Honestly, the vast majority of the hangup was the crust, as usual.  It took less than ten minutes to prep the filling and get it in the oven.  If you buy the crust, this is something so easy you can get it baking, go run a quick errand, and have dinner on the table.

I did make this smaller, a 7" crust for four servings, which is why I didn't go the easy route.  I'm scaling up the recipe for a standard 9" pie pan or storebought crust.

Crust for 9" pie (raw)
*1 C shredded Swiss cheese
1 15 oz can diced tomatoes
3 eggs
*1 C milk
*1 tsp dried tarragon
*1/4 tsp fennel seed
1/4 tsp granulated garlic
1/2 tsp kosher salt
1/4 tsp pepper

1.  Preheat oven to 375º.  Set pie pan on a lined baking sheet, in case of overflow.  Drain tomatoes.

2.  In a small bowl, whisk together eggs, milk, and spices.  I ground up the fennel a bit in the mortar, but not into powder, and it made a really nice note in the finished product.  Not overpowering at all.

3.  To assemble, arrange most of tomato pieces in bottom of pie dish.  Sprinkle with Swiss, then top with remaining tomato so you can see them when it's baked.

4.  Pour egg mixture over fillings and allow to settle for a couple of minutes.  Bake for 30 minutes, then lower temperature to 350º and continue to bake until crust is done and center is set when the pan is jiggled.  Areas of the filling that appear burned are just toasted cheese.

5.  Allow to cool at least 15 minutes before slicing.  Can also be served cold, or even frozen baked for the future.

Serves about 6

Difficulty rating  π

Saturday, January 7, 2023

I Bought a Brisket

I didn't just buy brisket.  The markets I usually go to sold it pre-inflation for about $8/lb, seven on sale, so I would pick up a couple of pounds maybe twice a year.  It was a treat.

One day, I was running errands for work at Smart & Final.  For those who don't live near one, they're like Costco or Sam's Club, but smaller and without membership, and primarily focused on food.  It's where restaurants go in desperation when the egg delivery is two days late and there's catering to finish.  I also downloaded their app, but really only use it for work.

Anyway, I was on the way to the register with 2 cases of eggs when I passed by the meat section and noticed a whole brisket slab weighing 22 pounds.  Yes, it was a good price, but 22 pounds?  There's no way I needed that.  I couldn't imagine anyone buying that.

Over the next few weeks, $3.79 per pound for any kind of beef kept gnawing at me.  Every time I popped into S&F, I glanced at the brisket selection.  They weren't always that big.  Some were as "small" as 14 pounds.

I was on the app checking prices for work and plugged in brisket out of habit.  It was on sale for $3.49/lb for the week, $3.19 with an app coupon if you bought a 50 pound case.  Hard no on the latter, but I started asking around for anyone who wanted to go in with me if I bought one.

The last day of the sale, I took a big breath and plunked down $57 dollars on over sixteen pounds of brisket.  That day, Pavilions had it for $10.99.  Granted, the ones at the fancier store were trimmed lean and beautiful, but not enough for a $7.50 per pound price difference.

My friend came over with foil, freezer bags, and an excellent knife.  The package had suggestions for how to cut it up, clearly acknowledging that no one was going to roast it whole.  I cut her several smaller roasts.  A piece in the middle of even thickness will be for corned beef.  I got a few 1 to 2 pound roasts off the knobby end.  Weird, uneven pieces got chopped into about a pound of stew cuts.  And about a pound of excessively thick fat ended up in the trash.  I was expecting that.

I had planned to take a picture of the cuts, then forgot until they were wrapped and in freezer bags.  I have a new appreciation for butchers.  We each got about 7 pounds of trimmed meat.  I don't know about my friend, but that will get me until at least Passover.

The lesson I got out of this one is that a single person can buy in bulk.  Find friends or neighbors willing to split whatever it is: meat, produce, dry goods.  You could get a case deal on canned vegetables and split it up, or one of those huge bags of rice at Costco and everyone take 5 pounds.  We all need to get creative to lessen the pain of rising prices.

Wednesday, January 4, 2023

Carrot Ravioli

The day I made the fruit cocktail and three other canning recipes, I also ended up making a batch of cookies and homemade ravioli.  I'm not going to have that kind of motivation for the foreseeable future, so I took the opportunity.  There was also a batch of pâte brisée on the list, but I just ran out of time and didn't feel like cleaning the food processor.

This was originally going to be mezzelunes to use up the last of the buckwheat flour.  The nice thing about pasta dough is that it's all the same thing.  You can made over a hundred shapes from the same basic recipe.  I decided that ravioli was less work and about the same number of dishes.  It does help that I used the pasta roller, but that is not necessary.

200 g flour (sorry, you have to weigh this one in metric)
kosher salt
2 eggs
1 tsp olive oil
3/4 C ricotta cheese
1 small carrot
1/4 tsp dried marjoram
pasta sauce of choice (I used *pesto)

1.  For the pasta, stir together flour and 1/2 tsp salt in a bowl.  Make a well in the middle.  Crack two eggs into it and add olive oil.  With a fork, bring everything together into a crumbly dough.  If necessary, wet hands and knead until dough is smooth.  Wrap in plastic and let relax at least 30 minutes and up to 24 hours in the fridge.

2.  While the dough is resting, make the filling.  Grate or shred carrot (sorry) after peeling.  Stir together with ricotta and marjoram.  Taste and add salt as necessary, or any other spices you might like that go with your sauce.  Refrigerate until ready to use.

3.  Start a large pot boiling with at least a gallon of water and a bit of salt.  Working with half or one-third of the dough at a time, roll out into long strips.  I went to a 5 thickness on my roller, but you're looking for about 1/16" thick.  Definitely less than 1/8", and about 4" wide.

4.  Spoon rounded teaspoons of filling on bottom half of strips, leaving enough room in-between to crimp off the ravioli.  With a damp pastry brush or your finger, wet the dough around the filling.  Fold over top half of dough and press down to seal each filling packet.  With a sharp knife or pizza roller, cut apart each individual raviolo (that really is the singular of ravioli) and place on a lightly floured sheet.

5.  At this point, you can freeze the ravioli for later or cook them now.  Gently place them in the boiling water, checking seals as you go.  I did lose a couple, but it think that was from stirring them with the pointy pasta spoon.  I should have used a flat one.

6.  Cook at a low boil until al dente, about 8 minutes for fresh and 10-12 from frozen.  Drain and add sauce.  Serve hot.

Difficulty rating  :)

Sunday, January 1, 2023

Eating in London

One of the sweets displays at Harrod's
Happy New Year!  I decided to save the culinary aspects of my trip to London for this post.

Now, not every meal was a blog-worthy, quintessentially British experience.  The first night, we went to an Italian restaurant.

My culinary adventures did start the next morning.  The Costa Coffee chain serves a lot of British pastries and sandwiches.  In the U.S., they are primarily licensees in AMC theaters and airports.  Techie had a sausage roll and I instantly went for a mince pie.

That day we also visited Harrod's department store.  The food halls are amazing, and not as overpriced as I was expecting.  The Pound is currently around $1.10, which is basically the same as the dollar when you live somewhere with a 10% sales tax.  I didn't buy anything there, but we went up to afternoon tea, which was lovely and so filling none of us finished our scones.  That wasn't too disappointing, because the texture was more of a buttermilk biscuit than a cake scone.  I'm kind of picky about scone texture.

We went to a mart for incidentals and candy, and I decided to use up the rest of my spare change on a Kinder Surprise.  I was curious, since they're illegal in the U.S.  It's just a chocolate candy shell around a case containing a mini toy.  The FDA has decided it's a choking hazard, and they are some of the most-confiscated items at the Canadian border.  It wasn't anything special, but now I've tried one.

Next morning I decided to have a Bakewell Tart, with no idea what one was.  It's a thin cake baked inside a pie shell, with cherries or jam and cookie icing on top.  Probably not something I'll get again or try to make myself, but it was a new experience.
I got way out of my comfort zone one night and ate at an Indian restaurant.  In England, they take food allergies seriously and ask when you're seated if anyone has one.  They were sweet and asked the chef about jalapeños, but I don't think they understood that nightshade allergies wipe out entire categories of vegetable.  I got some lamb samosas that were a bit spicy, but my daily Claritin handled the rash.

At some point, we all needed a change from Costa for breakfast and found a small restaurant with traditional British breakfasts.  The beans take a bit of getting used to, but by the time we ate it was more like brunch anyway.  They basically tasted like Van Camp's, which I happen to like.

Many quick meals and snacks were picked up at Pret A Manger, which is like the fresh food selections at a Seven-Eleven with an espresso bar.  We did eat at a couple of pubs, but none of us ordered "pub food".  The closest to that I had was a venison Scotch pie from an open-air market that I forgot to photograph.  And I don't think I had any alcoholic drinks the whole trip.  Not intentionally, I just got on the sparkling lemonade train and never wanted a beer.  I did want mulled wine and never got around to buying one.

Since I could have made two posts on only the Harrod's food halls, I'll end with another photo of that.  I knew I would come back having had too much meat and planned a couple of vegetarian meals to end the year.  It was very nice to get back to fresh foods.