Showing posts with label Cookies. Show all posts

Friday, July 17, 2026

Chocolate Cashew Cookies

This recipe came with the dehydrator.  I believe you could do this in a convection oven at a low temperature.  It just won't take 12 hours.

The dehydrator cookie recipes have one thing in common: they're vegan and gluten-free.  This machine maxes out at 158º.  You're making them largely out of shelf-stable foods, so the end result is also shelf-stable.  This makes the cookies great for camping trips and other occasions that they may be stored in less than ideal conditions.

I chose to start with this cookie recipe because I had all the ingredients.  Nothing fancy, just stuff the average household has in the pantry.  You can sub any kind of nut for the cashews if you prefer.

*2 C unsalted cashews
1/2 C cocoa powder
*1/4 C maple syrup
1/2 tsp cinnamon
1/4 tsp nutmeg
1 tsp vanilla
1/2 tsp kosher salt

1.  Place all ingredients in a food processor and run until well combined.  You will have to scrape it down a few times.  It's ok if the cashews don't break down completely.

2.  Shape the dough into tablespoon-sized balls, then press into 1/4" thick discs.  You can do this between two pieces of parchment, or just with your hands.

3.  Place cookies on parchment-lined dehydrator trays.  Dry at 158º (or a similar setting) for 8 hours.

4.  Remove from the parchment, turn over, and continue to dry on the unlined trays until firm, another 4-ish hours.

5.  Allow to cool, then store in an airtight container if not serving immediately.

Makes about 16

Difficulty rating  π

Thursday, May 21, 2026

Chickpea Flour Pumpkin Cookies

After buying two pounds of chickpea flour, I suddenly had a safety net of it to experiment.  It was a tossup between this and brownies.  Brownies are hard to sell as a breakfast option, but they would have met the nutritional criteria.  Maybe next week.

And then I couldn't find a recipe for what I wanted to make.  Fine, I found the closest thing Google had and swapped out ingredients.

I got a little impatient waiting for the batter to thicken and added another 1/4 C of chickpea flour.  What that gave me was a little more of a scone than a cookie.  If I had simply left the batter to set up for another hour, they would have spread out more.  The taste is the same, just a slightly different texture.  This is to explain why the photos may not match the posted recipe's final result.

What I forgot while subbing pumpkin for the oil was that these are low-fat.  Just the egg and whatever naturally occurring oils there are in the grains.  And while it looks like a lot of honey on paper, this made a lot of cookies.  They aren't overly sweet, and benefitted from the white chocolate coating I put on some.  Not bad for a high-fiber snack or portable breakfast option.

1/2 C rolled oats
1-1/2 C chickpea flour
1 tsp baking soda
1/4 tsp baking powder
1/4 tsp salt
1 tsp cinnamon
1/4 tsp nutmeg
1 egg
*1/2 C pumpkin purée
*1/3 C honey
1 tsp vanilla
Up to 1/2 C mix-ins like raisins or chips, optional
Chocolate or sugar glaze, optional

1.  If desired, pulse oats in a food processor with the salt to make a coarse oat flour.  This can also be made with regular oats.

2.  In a medium bowl, combine oats, chickpea flour, baking soda, baking powder, salt, cinnamon, and nutmeg.  Separately, whisk together egg, pumpkin, honey, and vanilla.

3.  Stir together wet and dry mixes into a batter.  Refrigerate until thickened, about 2 hours and up to eight.  Stir after an hour to make sure everything is evenly mixed.

4.  Preheat oven to 350º.  If desired, stir in any mix-ins like nuts, dried fruit, coconut, chips, etc.  Scoop generous tablespoons onto parchment-lined cookie sheets.

5.  Bake 15-18 minutes, until lightly browned and starting to firm up.  Cool 2 minutes, to make them easier to handle, then cool on a rack.  If desired, drizzle or dip in a glaze once cooled.

Makes about 18

Difficulty rating  :)

Wednesday, November 19, 2025

Butterscotch & Pecan Oatmeal Cookies

As a reduced-carb person, I haven't bought cookies in a while.  Wow, they got expensive.  All I wanted was a box to throw in the freezer and pull out a couple when I wanted a sweet snack.  Time to make my own.  There were butterscotch chips in the mix-ins box and I had bought pecans for the muffins.  Oatmeal cookie time.

I decided to try a different recipe, one with two eggs in it so I could cut it in half.  It still made two dozen.  Sunset Easy Basics for Good Cooking came out in 1982 and is surprisingly available used on Amazon.  I don't open it often, but it has a lot of good recipes for the comfort foods everyone makes.  It's also a bit of a textbook, which was great in the days before the internet.  The first cookie recipe is oatmeal chip.

*1/2 C chopped pecans
1/2 C margarine, room temperature 
3/4 C lightly packed brown sugar
1 egg, room temperature 
1/2 tsp vanilla
3/4 C flour
1 C + 3 Tb rolled or quick oats
1 tsp baking soda
1/2 tsp salt
*1 C butterscotch chips

1.  Lightly toast the pecans, either in a dry pan over medium heat or in the oven, stirring every minute or two.  Nuts go from not done to burnt in a blink.  Set aside to cool.  Preheat oven to 350º and line a cookie sheet or two with parchment paper or a Silpat.

2.  Cream together margarine (butter is ok, but margarine or shortening makes a crisper cookie) and brown sugar until smooth.  Scrape down bowl.  Add egg and vanilla and beat again until smooth.  Scrape down again.

3.  Add flour, oats, soda, and salt and mix until combined but not over-beaten.  Stir in chips and pecans.

4.  Drop by rounded tablespoons on the prepared sheets.  I used the small cookie scoop.  At this point, you can freeze them to bag up and bake later.  I don't have room in the freezer right now for a cookie sheet and baked them all.

5.  Bake 12-14 minutes, rotating halfway through.  Let sit on the sheet for 5 minutes, then transfer to a rack to cool.  Store airtight at room temperature up to 3 days, or freeze for longer storage.

Makes 2 dozen

Difficulty rating  π

Wednesday, August 14, 2024

Rugelach

I'm not a super fan of rugelach, but they are what I tend to snack on after Shabbat services most weeks.  They have chocolate ones.  I have leftover cherry filling from the cake, so that's what I'm making first.  It was also one of the photos on the can.

For those who have never heard of them, they're cookies from Eastern Europe that are popular in the Ashkenazi Jewish community.  Properly pronounced ruh'-ge-luch', with the "ch" being a glottal stop, they're more commonly pronounced rug'-uh-luh, or "you know, those yiddish cookies".

What I did not realize until I bookmarked Ina Garten's widely respected recipe, from her book Barefoot Contessa Parties!, was that these are essentially shortbread cookies.  No egg, lots of butter, and cream cheese to hold it together.  It makes four dozen, so I made up one quarter and froze the other three as discs.  I can defrost, fill with whatever I want, and bake off the rest at a later date.  Chocolate ganache or Nutella make great chocolatey fillings if you aren't into my cherry or Ina's fruit and nut.  A thick layer of cinnamon sugar is also a good flavoring.

I'm only posting the dough recipe, so please refer to the links if you want the whole thing and a video.  Without filling, you could also make these as eggless rolled or refrigerator cookies.  They would be a touch on the bland side, so a chocolate dip or drink for dunking would be in order.

8 oz cream cheese, room temperature
2 sticks (1 C, 1/2 lb) unsalted butter, also room temperature
1/4 C sugar
1/4 tsp salt
1 tsp vanilla
2 C flour, plus more for rolling

1.  Realize there are equal parts fat and flour in this recipe, get over it, and move on.

2.  Cream together cream cheese and butter in a stand mixer with the paddle.  Scrape down and beat a little more.  Add salt, sugar, and vanilla and beat 1 minute.  Scrape down and beat again.


3.  With mixer on low, slowly add the flour until evenly blended.  Liberally flour a work surface and pour out dough onto it.

4.  Divide dough into 4 pieces.  I did it by weight, and Siri comes in handy when your hands are doughy to do math for you.  Shape each quarter into a disc, wrap in plastic wrap, and chill at least 1 hour or freeze for later.  Use this time to prepare your filling.

5.  Line a baking sheet with parchment.  Roll out each disc on a floured board into a 9" circle.  Spread filling all over the circle, including the outer edge.  Cut in 12 wedges.  Roll each wedge from the outside in.  Transfer to baking sheet, point down.  Chill for 30 minutes.

6.  Preheat oven to 350º.  If desired, brush with egg wash and sprinkle with an appropriate garnish like sugar, cocoa, nuts, or coconut.  Bake 20-25 minutes, until lightly browned.  Allow to cool several minutes on the baking sheet before transferring to a rack.  Cool on a rack before dusting with powdered sugar or a drizzle of icing, if using.

Makes 4 dozen

Difficulty rating  :)

Thursday, December 21, 2023

Russian Tea Cakes

 I've done a variation of these Snowballs, European Wedding Cakes, Mexican Wedding Cakes, whatever you want to call them.  They're honestly the easiest Christmas cookie around and everyone loves them.

I did mess with them a little and add some micro chocolate chips, which you can see in the photo, but I usually just add the walnuts.

This post will be a half recipe, which is easy since there's no egg in these.  Just one sheet of cookies in the oven while you're getting dressed for whatever holiday party you forgot to make something for.

1/2 C (1 stick) butter
1/4 C powdered sugar, plus more for dusting
1 C + 2 Tb flour
*1/3 C finely chopped walnuts or other nut
dash of salt
1/2 tsp vanilla
1/2 tsp baking powder

1.  Cream together butter, sugar, and vanilla.  Sift together flour, salt, and baking powder.

2.  Beat flour into creamed butter, scraping the bowl at least once.  Gently beat in nuts.  Form into a disc, wrap in plastic wrap, and chill until firm, about half an hour.

3.  Preheat oven to 350º and line a baking sheet with parchment or a baking mat.

4.  Form into 3/4" balls and place at least 1" apart on the sheet.  Bake until pale gold, about 20 minutes.


5.  While still warm, roll in powdered sugar or sprinkle it on top.  Cool on a wire rack before plating.

Makes about 18

Difficulty rating  π

Monday, December 18, 2023

Mincemeat Bars

I saw a different take on thumbprint cookies that is far less labor intensive.  Plus, I'm not a huge fan of cookies that are mostly shortbread.  I like filling.  This way increased the ratio and made them party-friendly.  I switched the filling to mincemeat to make them "Christmas" cookies and here we are.

I can't remember if I've posted the cookie part of the recipe before.  It's the "Cherry Thumbprints" out of the L.A. Times cookie anthology.  The link I found says 2004.  The glaze is my idea.

I did not go shopping before deciding to make these, so I used regular butter instead of European and a touch of milk instead of the cream.  Oh yeah, and erythritol for the granulated sugar.  No idea if it made a difference, but everyone at work loved them.  I doubt any of them had tried mincemeat before, so that was the novelty.

1/2 C (1 stick) European-style unsalted butter, softened
1/4 C sugar
2 Tb brown sugar
1/2 tsp baking powder
1/4 tsp baking soda
1/4 tsp salt
1 egg
1 Tb heavy cream
1 tsp vanilla
1-1/2 C flour
about 1 C mincemeat filling
1/2 C powdered sugar
1-2 tsp *brandy or lemon juice

1.  In stand mixer with the paddle, cream together butter, sugars, baking powder, baking soda, and salt until fluffy.  Scrape down bowl.

2.  Add egg and beat 1 minute, until smooth.  Add cream and vanilla and beat in.  Scrape sides of bowl and beat again.  Add flour and beat until combined.

3.  Wrap dough in plastic and chill for 30 minutes.  It will not be completely firm.

4.  Preheat oven to 350º.  Line a baking sheet with parchment or a silicone mat.  Separate dough into 2 pieces.  Shape each into a log about a foot long and lay down on sheet.  Create a channel along the length of each log.  Fill with mincemeat to the top of the groove.

5.  Bake 16-20 minutes, until puffed and golden.  Watch the bottoms.  I rotated the tray halfway through because I was putting more cookies in the oven.  No idea if it helped.  Cool on the tray.

6.  Stir together powdered sugar and brandy until it drizzles in a ribbon from the spoon.  You can use a bit of water or milk if it takes more liquid.  Be careful, it goes from clumpy to runny very fast.  Drizzle over the cookie logs and allow to set.

7.  Once cookies are cooled, cut into bars and arrange on tray.  For storage beyond one day, refrigerate.

Makes about 18

Difficulty rating  :)

Friday, May 19, 2023

Passover Chocolate Chip Cookies

Ok, and I'm still not done with Passover recipes.  I took the week off to avoid being in a bakery, so I was eating every meal and snack at home.  Plus, you aren't supposed to go grocery shopping during the holiday.  I did, just for bananas and a leg of lamb that was on sale for only $5/lb.  I'll figure out when to cook it another time.

This started with the recipe on the back of the bag of Glick's chocolate chips.  Their recipe was gluten-free.  I spent a lot of money on that KLP baking powder and wanted to use it for something, so I subbed part of the almond flour with matzoh cake meal.  And cut the recipe in half, because that's a lot of cookies.

I'm pretty sure the reason my cookies didn't spread out was because I wasn't paying attention and put in 1/3 C oil instead of 1/2 C.  You wouldn't think 2 Tbs would make such a huge difference, but it does.  They also came out a bit crunchy, more like dunkers, which is probably because I baked them quite a bit longer than the 12 minutes on the package, waiting for them to brown.  But the flavor is very nice, and not overblown with almond, which is what I was trying to avoid.  As soon as I dipped them in tea, coffee, or warm milk, they softened right up.

1 C sugar
1 egg, room temperature
1/2 C oil
1 Tb vanilla sugar
*1 C almond flour
*1/2 C + 2 Tb matzoh cake meal
*1/2 C potato starch
*1 tsp baking powder
*1/2 C chocolate chips

1.  Cream together sugar, oil, and egg until fluffy.  Add vanilla sugar (or KLP vanilla extract, if you have it), almond flour, cake meal, potato starch, and baking powder.  Beat until it forms a dough.  Stir in chips.

2.  Put the bowl in the freezer while you preheat the oven to 350º.  Form into small balls, about a generous tablespoon, and place on a parchment-lined baking sheet.  Do not flatten the balls; they will spread out on their own.  Bake 12-14 minutes, until browned.  Allow to cool about 3 minutes, then transfer to a rack to cool completely.

Makes 24-28

Difficulty rating  π

Monday, March 20, 2023

Crispy-Chewy Coconut Cookies


I wanted cookies.  No idea why, but I really wanted to make some as an easy snack.  And I was not all that convinced they needed to have dark chocolate in them, which is pretty unusual for me.

When I opened the mix-ins box to decide what I wanted, there was more coconut in there than I was expecting.  Coconut is mostly saturated fat, which will go rancid if you don't use it.  So, there was my theme.

I found a recipe on The Café Sucre Farine that looked like what I wanted.  Generally soft and chewy, but with a bit of crispiness around the edges.  They aren't hard enough to require dunking, but if you want to dip them in coffee or hot chocolate, they would probably soak up just a touch of flavor.

I'm modifying the recipe slightly and using the unsweetened shavings in the body of the dough and rolling them in sweetened flakes.  There's a lot of sugar in the cookies, so they don't need all sweetened coconut.  Since I have coconut extract, I used that instead of vanilla.  And instead of toffee as a topping, which I do like but don't have on hand, I'm using some white chocolate micro-chips that live in my fridge.  You can use any flavor of chips, preferably minis, that you like.  If you don't have any chips, a coarse sugar, crushed nuts, or even a sprinkling of brown sugar will top these nicely.

1/2 C (1 stick) butter, softened
1/2 C packed light brown sugar
1/2 C granulated sugar
1 egg, room temperature
*1/2 tsp coconut extract (or 1 tsp vanilla)
1/2 tsp baking soda
1-1/4 C flour
1/4 tsp salt
*1-1/2 C unsweetened coconut flakes
*1/2 C sweetened grated coconut
chips, nuts, toffee, etc for garnish

1.  Preheat oven to 350º and line two baking sheets with parchment or baking mats.

2.  Cream together butter and both sugars.  The original recipe says you can do this by hand with room temperature butter, but it was about 60º in my kitchen the day I made these, so in the mixer it went.  Once smooth, beat in egg, extract, and baking soda.

3.  Stir in flour and salt just until mixed, then add unsweetened coconut shavings and beat until combined.

4.  I used a 2 Tablespoon (one ounce) cookie scoop to portion these, which is larger than I usually make my cookies but works better here because you're rolling and topping them.  Form dough into 2 tablespoon balls, about 1-1/2 inch, and roll in the sweetened coconut before placing on prepared cookie sheets about 2" apart.

5.  Bake 12-14 minutes, until browned around the edges but not 100% baked in the middle.  Pull from oven, sprinkle with topping, and put back in for another 2 minutes to melt in the topping and finish baking the cookie.  Cool on the baking sheet for about 3 minutes, until they firm up enough to be moved, then cool on a rack.  Stores room temperature about 3 days or in the freezer for a month.

Makes 20

Difficulty rating  :)

Monday, February 27, 2023

Pumpkin Biscotti

The coffee cake took care of the fresh-roasted pumpkin, but I still had some purée in the freezer.  I decided to make biscotti out of them, and opted for a variation of King Arthur Flour's recipe, using the comments as a guide.

I should have listened more to the one comment about them being too hard.  These definitely don't need to be dried as long as the recipe states.  They should be pulled from the oven when the middles are still a tiny bit soft.  They did soften up quickly in hot drinks, but were rocks otherwise.

If you don't want to make these as biscotti, but as regular cookies, I would scoop them out and bake the original 25 minutes.  They will not spread too much and will develop a crunchy exterior.  I'm assuming the  centers will stay relatively soft.  At worst, they would be dunking cookies.

1/4 C unsalted butter, room temperature
2/3 C sugar
*1-1/2 tsp pumpkin pie spice
1 tsp cinnamon
1-1/2 tsp baking powder
1/2 tsp salt
1 egg, room temperature
*1/2 C pumpkin purée
2 C flour

1.  Preheat oven to 350º and line a baking sheet with parchment or a Silpat.

2.  In a medium bowl with an electric beater, cream together butter, sugar, spices, baking powder, and salt.  I didn't wait for the butter to soften, and things got messy fast.  I'm used to doing creaming recipes in the stand mixer, with its high sides.  The only reason you're doing this with a hand one is because the amounts are too small for the stand mixer to be effective.

3.  Beat in egg and pumpkin.  It's going to smell lovely.  Stir in the flour until you get a dough.

4.  Shape dough into two logs on the cookie sheet, roughly 10" by 2-1/2" and a little over an inch high.  Bake 25 minutes, until the logs have a bit of a crust to them.

5.  Remove the baking sheet from the oven and wait about 5 minutes, while you turn down the oven to 325º.  Slice the logs crosswise with a very sharp knife into 1/2" to 3/4" slices.  Arrange the slices with some space between them and put them back in the oven for another 15 minutes.  The outer edges should seem fairly dry, but the middles will be a bit soft.

6.  Remove cookies to a rack and cool completely.  If desired, ice with powdered sugar glaze, royal icing, or white chocolate ganache (what I did).

Makes about 2 dozen

Difficulty rating  :)

Sunday, September 11, 2022

Peanut Butter and White Chocolate Cookies


I haven't made peanut butter cookies in a while.  Cookies are a great snack to have on hand, either as portioned dough or pre-baked treats in the freezer.  Sure, they aren't healthy, but you don't always want an apple for afternoon snack.

This time, I decided to use the Bible's recipe, which is for honey PB cookies.  To mellow the honey tang, I decided to add white chocolate chips.  I'm putting it as mini chips in the recipe, but what I happen to have are micro-chips, the kind you use for cake decorating or in fancy espresso drinks because they melt easily. They melted into nothing in these cookies, which was my goal anyway.

Because these are traditional-recipe PB cookies, they will not be super soft.  Also, I used up the last of the free Bob's GF flour, so they came out crispy once cooled.  That just makes them great for dunking with tea, coffee, or Ovaltine.

Some of the amounts are going to be a bit odd because I made a half batch.  I saw "1 cup peanut butter" and skipped to the number of eggs in case I could cut it down.

1 C + 2 Tb flour
1/4 tsp baking powder
1/4 tsp baking soda
*1/2 C peanut butter, creamy or chunky ok
1/4 C unsalted butter, room temperature
*1/3 C honey
1/4 C sugar
1 egg, room temperature
*1/2 C white chocolate chips, mini preferred

1.  Preheat oven to 350º.  Line two cookie sheets with parchment or a silicone mat.

2.  Sift together flour, baking soda, and baking powder.  Set aside.

3.  In mixer, cream together peanut butter, butter, honey, and sugar.  Quick tip for measuring the honey and PB: spray the measuring cup with pan spray first.  Once smooth, beat in egg.

4.  Stir in flour mixture until mostly combined.  Stir in chips.

5.  If dough is super soft, chill before proceeding.  Since I was using GF flour, my experience might be different, but I had to use a scoop.  Shape dough into 1-1/2" balls (about 1 oz) and place on cookie sheets 3" apart.  At this point, you can freeze the balls for later if desired.  If so, freeze them on wax paper on a flat tray, then store in a freezer baggie.  Defrost for a couple of hours before baking if you want to press them into shape.

6.  With the back of a floured fork, press down in a criss-cross pattern.  Bake 15 minutes, until just barely starting to brown.  By the time they start to look dark, they will be overdone.  Maybe start with 12 minutes and add time as necessary.  Allow to cool 2 minutes on the pan, then remove to a wire rack to cool completely.


Makes 18

Difficulty rating  π

Wednesday, March 30, 2022

Apricot and Coconut Biscotti (GF-optional)

I got in a cookie mood.  Well, I was in a generally snacky mood and was torn between cookies and muffins.  I finally opted for biscotti, then decided to use the Bob's GF flour to see how it performed.

When copying a recipe by hand for easy access, make sure you can read your own writing.  I thought the first temperature was 375º, which seemed awfully high for 30 minutes, but *shrug*.  These came out darker than they were supposed to, but were fine inside.
The main difference I found with using the GF flour was that the cut sides of the cookies stayed moist on the second bake, drying out only upon cooling.  I also had a harder time getting the consistency I wanted out of the batter, and accidentally made them too moist to start.

What I did achieve was the taste I wanted.  Basic drop cookie flavor, with bursts of apricot and/or coconut.  They don't fall apart too easily when dunked, which is what I was mostly concerned about in using the GF flour.  You would not have to worry about that at all with normal AP flour.

*1 C AP or Bob's 1-1 GF flour
1/2 C sugar
2 tsp baking powder (can make it 1 Tb for GF)
1/4 tsp baking soda
1 egg
1/2 tsp almond extract or *1 Tb amaretto liqueur
*1/3 C dried apricots, diced
*1/4 C shredded coconut
2 milk or water, or as needed for consistency

1.  Preheat oven to 325º.  Line a baking sheet with parchment or a Silpat.

2.  Sift together flour, sugar, baking powder, and baking soda in a bowl.

3.  Beat together egg and extract or liqueur.

4.  Stir wet ingredients into dry until evenly mixed.  It's ok if it's still dry and crumbly.  Stir in diced apricots and shredded coconut until evenly distributed.
5.  If necessary, add milk or water a tablespoon at a time until cookie dough holds together but is not runny.  Mine got a bit runny, so less than that.
6.  Pour dough onto prepared baking sheet.  Shape into a 9" x 3" x 1" high loaf.  Mine did not want to shape because it was too wet.  Don't do that.  Quickly put it in the oven and bake for 30 minutes.

7.  Remove pan from oven and turn the oven down to 275º.  Wait a few minutes, then transfer to a cutting board.  Slice the giant cookie mound into roughly 12 1/2" wide slices.  Place back onto the cookie sheet with at least 1/2" between the slices.
8.  Return the pan to the cooler oven and bake another 20 minutes.  The cookies might not feel completely dry, but should firm up later.  Remove to a cooling rack and let rest until room temperature before storing. Can be kept airtight at room temperature for up to a week, or frozen for longer storage.

Makes about 12

Difficulty rating  :)

Tuesday, December 21, 2021

Double Chocolate Chip Cookies

Forget electronics.  I asked for ambidextrous cookie scoops for Chanukah.  And a brown apron in the style I bought over the summer, because it's very comfortable but I don't want to ruin the yellow one.  The scoops came in 1, 2, and 3 Tb sizes.  I prefer small cookies and expect to use the #60 (1 Tb) the most often.  The largest actually got used first, when I realized it was the perfect size for scooping latkes.  It's also good for tamale masa and smaller scoops of ice cream.  The 2 Tb (1 oz) probably won't get used much.  I'm not into large cookies because you don't get to eat as many.

So of course I had to make some kind of scooped cookie the next time I was baking a dessert.  Preppy Kitchen posted these the same week.  I like John's recipe selections, but some of the recipes themselves need a bit of tweaking.  His drop cookies in particular have the flaw of using all butter instead of part margarine or another oil-based fat.  This recipe doesn't have you chilling the dough, but every time he chills a butter-based cookie dough, they end up baking unevenly.  If you are pre-making this to freeze in balls for later, always use margarine instead of butter.  I'm changing it here to margarine only and omitting the salt.  You could use half unsalted butter and half margarine without burning these.

Which brings up another point.  It is very easy to burn a dark cookie.  You can't tell if they're done by color.  It's important to know your oven before making these.  I know not to bake cookies the full amount of time on the bottom rack and rotated these halfway through.  Every oven has its own hot spots, so if you've never made cookies in yours before, experiment with Tollhouse or peanut butter first.  Those will be close enough in consistency and ingredients to give you a rough idea how these will react.

John weighs all his ingredients, which is the proper way to bake, but I got lazy and just did cup measuring for this.  If you're going to do flour by volume, make sure to fluff it first or spoon it into the measuring cup, as flour settles in the bag.

1 C flour
*1/3 C unsweetened cocoa powder
1/2 tsp baking soda
1/2 C (1 stick) margarine
1/2 C light brown sugar, lightly packed
1/3 C granulated sugar
1 egg, room temperature
2 tsp vanilla
1 C semisweet chocolate chips (or chips of choice)

1.  Preheat oven to 375º.  Line two baking sheets with parchment or a silpat.

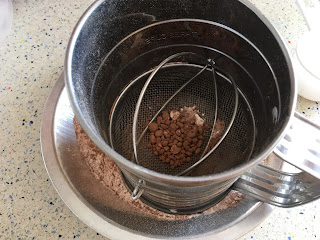
2.  Sift together flour, cocoa powder, and baking soda.  I'm usually not huge on sifting, but cocoa powder tends to clump.  Set aside.

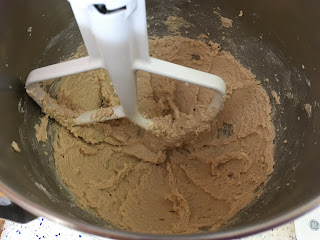
3.  In a stand mixer with the paddle (or electric hand beater), cream together margarine and both sugars until smooth.  Scrape down bowl.  Add egg and vanilla and beat again until light and smooth, 3-5 minutes.  Scrape down bowl and run a few more seconds to make sure everything is mixed.

4.  Add flour mixture to bowl and beat in on low until mostly combined.  Add chips and beat on low until evenly distributed.

5.  Scoop or spoon batter onto lined sheets in 1 Tb mounds two inches apart.  Bake 5 minutes, then switch racks and bake 3 more minutes.

6.  Allow cookies to sit on baking sheets 5 minutes to firm up before transferring to a wire rack.  Cool completely before storing in an airtight container or freezing for longer storage (dough can also be scooped onto parchment and frozen for later baking).


Makes about 2-1/2 dozen

Difficulty rating  π