After the success of my first potato gratin, I decided to invent one using what I had learned and what was on hand. Passover is the only time of year I buy that five-pound bag of potatoes. While it is inexpensive at any time of the year, I'm not a huge potato eater and don't want it to go bad because I hate wasting food, no matter how much money I saved. If this didn't work, I still had about a quarter of the bag left.
I went light with this one, mainly because I'm saving the cream to make ice cream and didn't think to pick up more. Regular milk won't leave the potatoes as creamy, but I did have some leftover Alfredo sauce to use up that I tossed over it after the photo. The gratin itself is cheddar potatoes, which I have no problem with.
1 lb russet potatoes
*1 C milk
1/4 tsp paprika
salt
1/4 C fresh parsley, chopped
1 C shredded cheddar cheese
1. Grease an 8"x8" casserole and preheat the oven to 375º. Thinly slice potatoes. Arrange half on bottom of casserole.
2. Sprinkle potatoes with paprika, parsley, half of the cheese, and a light sprinkling of salt. Top with remaining potatoes and the rest of the cheese.
3. Pour milk over all. Cover casserole with foil tight enough to make the dish steam itself. Bake for 45 minutes. Remove foil and bake another 10 minutes to crisp up the top. Allow to cool slightly before serving.
Difficulty rating π
Friday, April 29, 2016
Tuesday, April 26, 2016
German Corned Beef and Cabbage
Going through the freezer before Passover, I found the last pound of corned beef. I used mustard in the brine, so it isn't KLP. Deciding what to do with it, I suddenly realized the problem with my mom's annual torture session for St. Patrick's Day. We're German and Russian stock, and she was forcing an Irish dish on us. What this really needed was vinegar, mustard, and a beer. This came to me as I was reading a post my cousin put on her blog about finding a jar of pickled cabbage and apples in her pantry. I'm not brave enough to ferment sauerkraut from scratch, but cooking down a cabbage with apple cider vinegar could make a quick substitute in 20 minutes.
I had this as it was on a plate with a side of potatoes. You could put it on rye for a sandwich, on a pretzel bun like a hot dog, or stuff it into a baked potato. It could also work as the basis for a soup, and a carrot in the mix wouldn't be questioned.
1 medium cabbage
2 Tb apple cider vinegar
1 cooking apple like Gala
*1 lb corned beef
salt to taste
*1 tsp horseradish (optional)
mustard for serving
1. Thinly slice cabbage, avoiding the core, and place the shreds in a large pot. Sprinkle lightly with salt, add the cider vinegar, and cover with a lid. Put it over medium heat and stir it periodically until it has cooked down to about half of its original volume. This takes 10 to 15 minutes.
2. While the cabbage is cooking, dice the apple and cut the corned beef strips into bite-sized pieces. Toss them into the pot and cook until apples are soft and beef is heated through, about 5 minutes. Serve hot with a side of some interesting mustard and maybe a beer for the adults.
Difficulty rating π
I had this as it was on a plate with a side of potatoes. You could put it on rye for a sandwich, on a pretzel bun like a hot dog, or stuff it into a baked potato. It could also work as the basis for a soup, and a carrot in the mix wouldn't be questioned.
1 medium cabbage
2 Tb apple cider vinegar
1 cooking apple like Gala
*1 lb corned beef
salt to taste
*1 tsp horseradish (optional)
mustard for serving
1. Thinly slice cabbage, avoiding the core, and place the shreds in a large pot. Sprinkle lightly with salt, add the cider vinegar, and cover with a lid. Put it over medium heat and stir it periodically until it has cooked down to about half of its original volume. This takes 10 to 15 minutes.
2. While the cabbage is cooking, dice the apple and cut the corned beef strips into bite-sized pieces. Toss them into the pot and cook until apples are soft and beef is heated through, about 5 minutes. Serve hot with a side of some interesting mustard and maybe a beer for the adults.
Difficulty rating π
Saturday, April 23, 2016
Bread with Butter Substitute
Let's see, why haven't I been posting? It started with a lot of meals out for my birthday, and their leftovers. I also wanted to get my laundry room repainted before the new washer & dryer arrived. Then I was cleaning for Passover and was too tired to do any elaborate cooking, or to write about it. Then I was just making random stuff to use up the chometz and kitniyot so I wouldn't have to stash as much of it, most of it on greens from the garden as a cobbled together salad.
But I did find the last of the can of prune filling from the hamantaschen, which contains corn syrup. For the heck of it, and because I'm out of molasses, I decided to make some bread using it as a substitute for both butter and sugar. What resulted was slightly sweet, yet somewhat savory from the buckwheat, and actually did taste slightly of the prune. The touch of fruity aroma made this a good bread to have with a mild white cheese like brie, or slathered with real butter (totally defeating the butter-free aspect).
*1/2 C milk
*2 Tb prune butter substitute
1 tsp yeast
*1/2 C buckwheat or whole wheat flour
*1 to 1-1/2 C all-purpose flour
1/2 tsp salt
1. Warm milk and prune purée to 100º. Stir in yeast and allow to sit until foamy, about five minutes.
2. In mixer, combine buckwheat flour and 1/2 C white flour. Pour in milk mixture and beat into a batter on medium for 2 minutes. Add salt and another half cup of flour and beat again into a thick batter or light dough.
3. Turn out dough onto a well-floured surface. Knead until smooth, adding as little flour as possible. Because of the purée and buckwheat, it's going to be sticky longer than usual. The dough almost behaves as though it had egg in it. Place into a lightly oiled bowl and turn to coat all sides. Set in a warm place to rise for 1 hour.
4. Punch down dough and allow to rest for 5 minutes. Either form into a round loaf or cut into pieces for rolls. Place on baking sheet and allow to rise for another 45 minutes.
5. Preheat oven to 350º. If desired, brush tops with butter. I misted the rolls with water to delay crust formation. Bake until hollow when tapped, about 15 minutes for rolls and 20 to 25 minutes for a loaf. Cool on a wire rack before serving.
Difficulty rating :)
But I did find the last of the can of prune filling from the hamantaschen, which contains corn syrup. For the heck of it, and because I'm out of molasses, I decided to make some bread using it as a substitute for both butter and sugar. What resulted was slightly sweet, yet somewhat savory from the buckwheat, and actually did taste slightly of the prune. The touch of fruity aroma made this a good bread to have with a mild white cheese like brie, or slathered with real butter (totally defeating the butter-free aspect).
*1/2 C milk
*2 Tb prune butter substitute
1 tsp yeast
*1/2 C buckwheat or whole wheat flour
*1 to 1-1/2 C all-purpose flour
1/2 tsp salt
1. Warm milk and prune purée to 100º. Stir in yeast and allow to sit until foamy, about five minutes.
2. In mixer, combine buckwheat flour and 1/2 C white flour. Pour in milk mixture and beat into a batter on medium for 2 minutes. Add salt and another half cup of flour and beat again into a thick batter or light dough.
3. Turn out dough onto a well-floured surface. Knead until smooth, adding as little flour as possible. Because of the purée and buckwheat, it's going to be sticky longer than usual. The dough almost behaves as though it had egg in it. Place into a lightly oiled bowl and turn to coat all sides. Set in a warm place to rise for 1 hour.
4. Punch down dough and allow to rest for 5 minutes. Either form into a round loaf or cut into pieces for rolls. Place on baking sheet and allow to rise for another 45 minutes.
5. Preheat oven to 350º. If desired, brush tops with butter. I misted the rolls with water to delay crust formation. Bake until hollow when tapped, about 15 minutes for rolls and 20 to 25 minutes for a loaf. Cool on a wire rack before serving.
Difficulty rating :)
Thursday, April 7, 2016
Pineapple Chicken
This is proof that you can make something special with almost no effort. I chose to use a fresh pineapple because they were cheaper than canned, and got lucky with a very ripe, sweet, juicy one. Since chicken takes at least 45 minutes to cook, you'll get about the same consistency whether you use fresh or canned pineapple. This takes less than 5 minutes to prep if you use a can, maybe 10 if you're cutting up a fresh piece of fruit. It produces a juice-braised chicken with just a few interesting spices.
1 whole cut-up chicken, or 8 assorted pieces
1 medium pineapple or 2 large cans pineapple chunks
*2 stalks green onion, chopped
1 tsp red pepper flakes or sriracha if you want some kick
1 Tb cornstarch
1. Start preheating oven to 350º. Arrange chicken in a 9x13 (or larger, if necessary) baking dish.
2. Peel and cut pineapple into chewable chunks, discarding woody core, or open cans. Place in a bowl, including the juice. Toss with onion, cornstarch, and any hot spices you choose. Pour the juicy mess over the chicken.
3. Bake 45 minutes to 1 hour, until juices run clear and a thermometer in the thickest piece registers 160º to 165º. Let rest until the juices stop boiling and serve pieces topped with the pineapples and syrup.
Serves 4 to 6
Difficulty rating π
1 whole cut-up chicken, or 8 assorted pieces
1 medium pineapple or 2 large cans pineapple chunks
*2 stalks green onion, chopped
1 tsp red pepper flakes or sriracha if you want some kick
1 Tb cornstarch
1. Start preheating oven to 350º. Arrange chicken in a 9x13 (or larger, if necessary) baking dish.
3. Bake 45 minutes to 1 hour, until juices run clear and a thermometer in the thickest piece registers 160º to 165º. Let rest until the juices stop boiling and serve pieces topped with the pineapples and syrup.
Serves 4 to 6
Difficulty rating π
Monday, April 4, 2016
Hot Cross Buns
This isn't just a leap year on the Gregorian calendar. It's a leap year on the Jewish one too, which means that there is an extra month. I don't understand why, but it also means that Easter did not fall during Passover. Some weird lunar-calendar thing. And it means I could have hot cross buns for Easter breakfast.
Yes, of course I can make them any time I want, but it's like having a whole roasted turkey not in November. There are some things that seem proper at their holiday.
These start with a half-batch of the Bible's standard sweet bread dough. It's just a rich yeast dough with an egg and raisins in it. The result is similar to a Hawaiian roll with icing. These are a lot lighter than the Stollen, despite being similar in construction. And they're kind of addictive.
1/2 C sugar
1 Tb (1-1/2 packages) yeast
4 C flour
1 C milk
1/2 C butter
1 egg
1/2 tsp salt
1/2 C raisins, currants, or similar dried fruit
1 tsp orange zest
egg wash or cream for brushing
1. Warm milk, butter, and sugar to 100º (about 1 minute in the microwave). The butter does not need to melt. Stir in yeast and allow to sit until foamy, five minutes.
2. In a stand mixer, combine 1-1/2 C flour and the salt. Stir in milk mixture and beat into a batter for two minutes. Add egg and 1 C flour and beat again until smooth. Add raisins, orange zest, and enough flour to make the dough stable and stir to combine.
3. Turn dough out onto a well-floured board and knead until smooth, adding just enough flour to get there. An egg dough will absorb a lot more flour than is good for it. Turn over in an oiled bowl to coat all sides and let rise in a warm place for 1 hour.
4. Grease a 9x13 baking pan. Punch down dough and separate into 12 pieces (mine were just under 3 oz each). Roll into balls and arrange in pan in 3x4 rows. Let rise in a warm place for 1 hour, or cover and refrigerate overnight and let rise in the morning for 30 minutes.
5. Preheat oven to 350º. With a sharp, floured knife, cut crosses in the tops of the rolls. Brush tops with cream or an egg yolk beaten with a tablespoon of milk. Both will make them dark, but egg will make them shiny. If you're making your own royal icing for the decoration, do the egg yolk so you have a white left over. Bake for 30 minutes, until browned on the tops, but still visibly soft where the rolls meet.
6. For the icing, I just used leftover cream cheese icing out of the can. You can make a simple fondant icing with powdered sugar, milk, and a touch of lemon juice. Substitute egg white for the milk to make royal icing. I never pay attention to quantities of the powdered sugar; I just start at 1/2 cup and keep going until it's the consistency I want. Drizzle or pipe icing following the crosses you already cut in the rolls. Serve hot.
Makes 1 dozen
Difficulty rating :)
Yes, of course I can make them any time I want, but it's like having a whole roasted turkey not in November. There are some things that seem proper at their holiday.
These start with a half-batch of the Bible's standard sweet bread dough. It's just a rich yeast dough with an egg and raisins in it. The result is similar to a Hawaiian roll with icing. These are a lot lighter than the Stollen, despite being similar in construction. And they're kind of addictive.
1/2 C sugar
1 Tb (1-1/2 packages) yeast
4 C flour
1 C milk
1/2 C butter
1 egg
1/2 tsp salt
1/2 C raisins, currants, or similar dried fruit
1 tsp orange zest
egg wash or cream for brushing
1. Warm milk, butter, and sugar to 100º (about 1 minute in the microwave). The butter does not need to melt. Stir in yeast and allow to sit until foamy, five minutes.
2. In a stand mixer, combine 1-1/2 C flour and the salt. Stir in milk mixture and beat into a batter for two minutes. Add egg and 1 C flour and beat again until smooth. Add raisins, orange zest, and enough flour to make the dough stable and stir to combine.
3. Turn dough out onto a well-floured board and knead until smooth, adding just enough flour to get there. An egg dough will absorb a lot more flour than is good for it. Turn over in an oiled bowl to coat all sides and let rise in a warm place for 1 hour.
4. Grease a 9x13 baking pan. Punch down dough and separate into 12 pieces (mine were just under 3 oz each). Roll into balls and arrange in pan in 3x4 rows. Let rise in a warm place for 1 hour, or cover and refrigerate overnight and let rise in the morning for 30 minutes.
5. Preheat oven to 350º. With a sharp, floured knife, cut crosses in the tops of the rolls. Brush tops with cream or an egg yolk beaten with a tablespoon of milk. Both will make them dark, but egg will make them shiny. If you're making your own royal icing for the decoration, do the egg yolk so you have a white left over. Bake for 30 minutes, until browned on the tops, but still visibly soft where the rolls meet.
6. For the icing, I just used leftover cream cheese icing out of the can. You can make a simple fondant icing with powdered sugar, milk, and a touch of lemon juice. Substitute egg white for the milk to make royal icing. I never pay attention to quantities of the powdered sugar; I just start at 1/2 cup and keep going until it's the consistency I want. Drizzle or pipe icing following the crosses you already cut in the rolls. Serve hot.
Makes 1 dozen
Difficulty rating :)
Friday, April 1, 2016
Meyer Lemon and Lavender Jam
I made this recipe from Marisa of Food in Jars the day after she posted it. I didn't make as much as she did, but I easily could have. I have a lot of lemons, and the recent weather made the Meyer and Valencia branches bloom up a storm.
What piqued my interest, other than having all the ingredients on hand, was that it isn't marmalade. You put the whole lemon, minus the seeds, in the blender. You still get the pectin properties of the rind, but in a puréed form.
I did process these for the pantry, but I'm scaling it down here for a batch that's both cheaper and something you can go through in a few weeks for refrigerator storage.
*1 lb Meyer lemons
*scant 1 tsp dried culinary lavender
1 C sugar
water
1. Thoroughly wash lemons and trim off the stem and bottom ends. Place in a saucepan in one layer and just cover with water. Place lavender in a cheesecloth or tea ball and dangle into the water. Bring to a boil over high heat, then lower to medium and cook until lemons are soft to the touch but not mushy, about 20 minutes. Remove from heat and allow to cool until easy to handle.
2. Remove tea ball, but don't throw out the water. Set a sieve over a shallow skillet. In the sieve, cut the lemons in half and discard the seeds. Dump contents of sieve and anything that ran out into the pan into a blender. Add 1-1/2 C of the cooking liquid and purée until fairly smooth. A few chunky bits are ok for character. Pour everything back into the skillet. It's going to look foamy from all the air whipped into it. That settles out as it cooks.
3. If you're going to process the jam, now is the time to start boiling water for it and sterilizing the jars. Bring jam to a boil over high heat. Lower heat to medium-high and continue to boil until thick, stirring occasionally to prevent scorching and skimming off any scum spots. It will take at least 20 minutes. When you get hit by a lava spit, it's probably done. Check to see that it coats the back of a spoon.
4. If processing, fill jars, wipe rims, set lids, and tighten bands finger-tight. Process in boiling water bath for ten minutes. If not, allow to cool to room temperature, place in a sealable container, and refrigerate.
Makes about 1 pint to 3 cups, depending how far you let it boil down
Difficulty rating π
What piqued my interest, other than having all the ingredients on hand, was that it isn't marmalade. You put the whole lemon, minus the seeds, in the blender. You still get the pectin properties of the rind, but in a puréed form.
I did process these for the pantry, but I'm scaling it down here for a batch that's both cheaper and something you can go through in a few weeks for refrigerator storage.
*1 lb Meyer lemons
*scant 1 tsp dried culinary lavender
1 C sugar
water
1. Thoroughly wash lemons and trim off the stem and bottom ends. Place in a saucepan in one layer and just cover with water. Place lavender in a cheesecloth or tea ball and dangle into the water. Bring to a boil over high heat, then lower to medium and cook until lemons are soft to the touch but not mushy, about 20 minutes. Remove from heat and allow to cool until easy to handle.
2. Remove tea ball, but don't throw out the water. Set a sieve over a shallow skillet. In the sieve, cut the lemons in half and discard the seeds. Dump contents of sieve and anything that ran out into the pan into a blender. Add 1-1/2 C of the cooking liquid and purée until fairly smooth. A few chunky bits are ok for character. Pour everything back into the skillet. It's going to look foamy from all the air whipped into it. That settles out as it cooks.
3. If you're going to process the jam, now is the time to start boiling water for it and sterilizing the jars. Bring jam to a boil over high heat. Lower heat to medium-high and continue to boil until thick, stirring occasionally to prevent scorching and skimming off any scum spots. It will take at least 20 minutes. When you get hit by a lava spit, it's probably done. Check to see that it coats the back of a spoon.
4. If processing, fill jars, wipe rims, set lids, and tighten bands finger-tight. Process in boiling water bath for ten minutes. If not, allow to cool to room temperature, place in a sealable container, and refrigerate.
Makes about 1 pint to 3 cups, depending how far you let it boil down
Difficulty rating π
Tuesday, March 29, 2016
Carrot and Beet Slaw
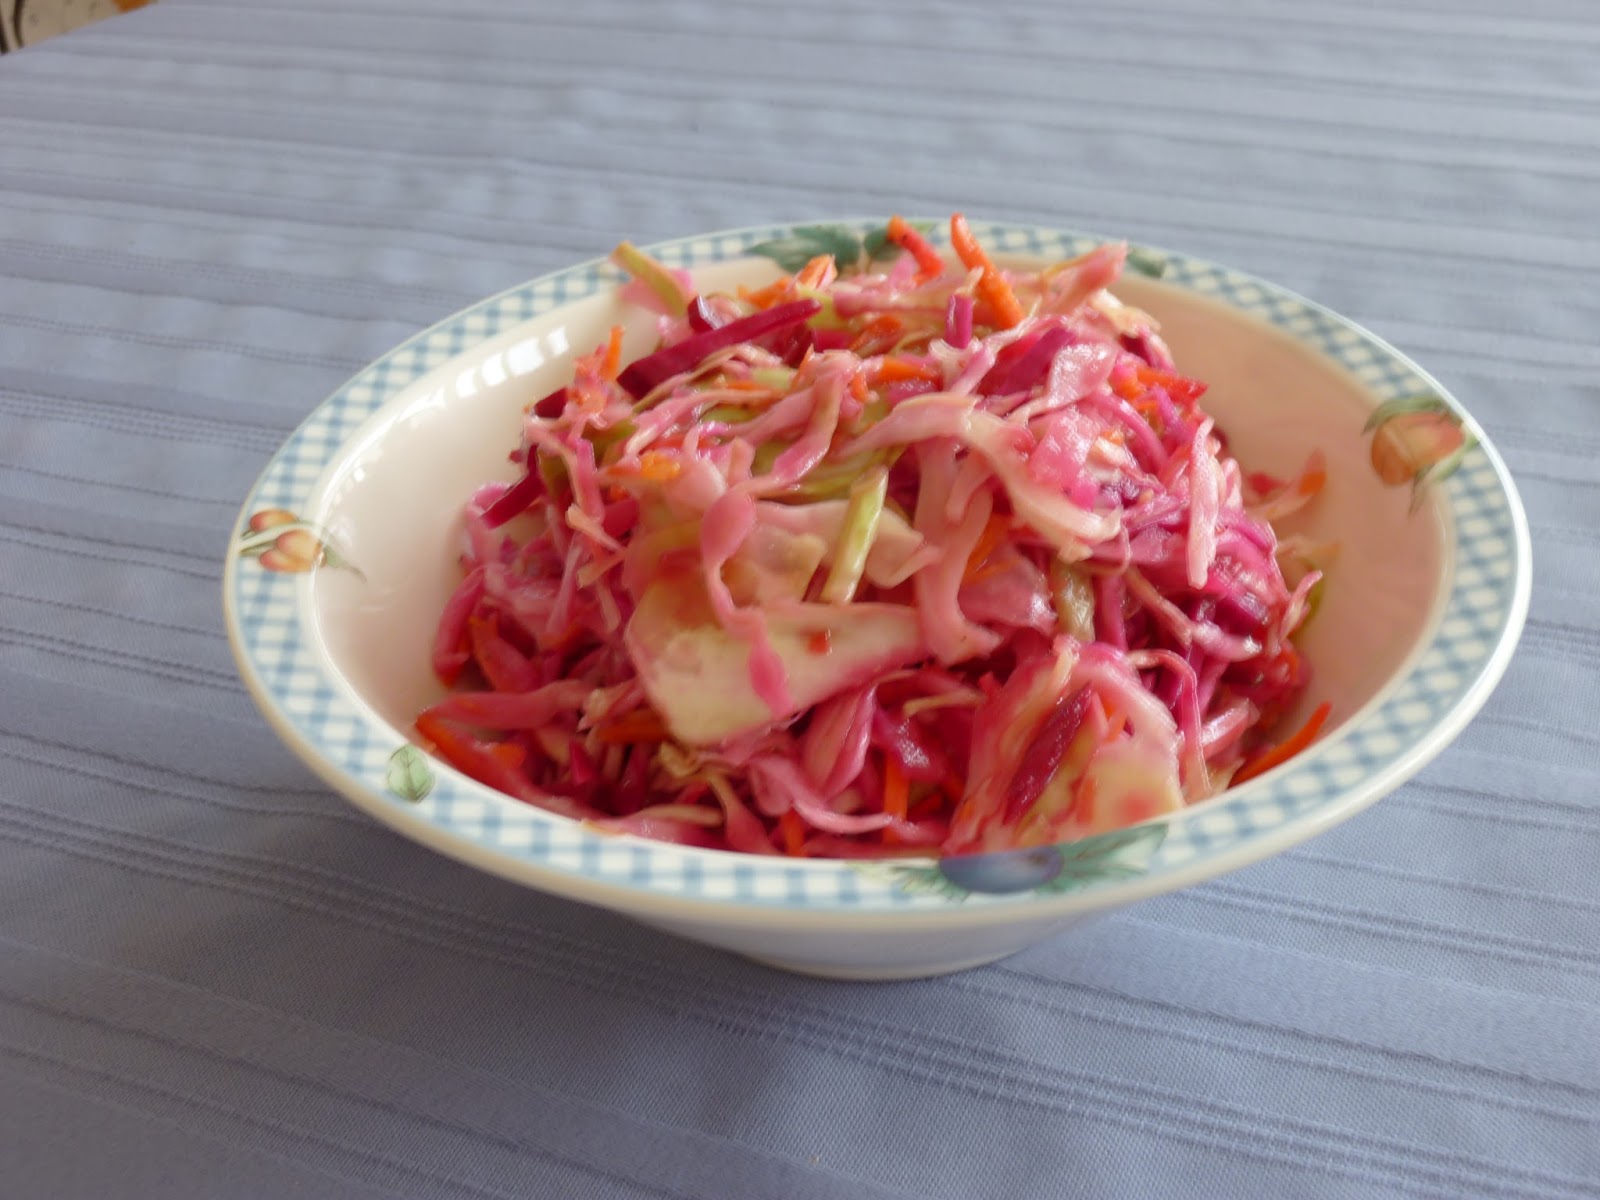
For this year's Purim vegetarian meal, I raided my very productive garden and used the other half of the cabbage from St. Patrick's Day. It was my first beets, and a way to use another carrot. I love how awesome the carrots are coming out, but I need to get them pulled and eaten so I can plant the next round that I have starting in seed trays in the kitchen window.
I'm finding more and more recipes on The Chew. Maybe it's because they've been around long enough to start popping up on searches. I don't seek out their recipes, but this one happened to use ingredients I had on hand or could come up with an equivalent. Not having to shop will always move a recipe to the top of my list.
I was a bit skeptical about a slaw without dairy or mayo. This turned out to be a lot like sunomono, and very refreshing. The sugar comes from the beets and carrots, so you don't have to add anything other than a little honey, which is more for flavor than sweetness. I ended up with a higher proportion of cabbage and less beets, but that worked because the beets didn't bleed all over everything until it was one uniform color.
And the V-slicer attachments made it super easy to make beautiful julienne slices with the beets and carrots, as long as I had it out for the cabbage anyway. A box grater or the shredder on a food processor would be just as good if you don't feel like using knife skills.
*1/2 medium cabbage
*2 medium carrots
*2 beets
*zest and juice of 2 lemons
*2 Tb rice vinegar
1/4 C vegetable oil (not olive oil, because it solidifies in the fridge)
*2 tsp snipped chives or minced onion
*1 Tb honey
*1" fresh ginger, peeled and grated, or 1/2 tsp ground ginger
salt and pepper to taste
1/2 tsp chili flakes (optional)
1. Thinly slice cabbage and discard core. Peel carrots (peeling beets optional) and slice carrots and beets into a julienne, or matchsticks if you want more crunch. Rinse beets in a strainer to get out some of the juice.
2. Toss together cabbage, carrots, beets, lemon zest, and onion in a large bowl.
3. In a separate bowl, whisk together lemon juice, vinegar, oil, honey, and ginger. Taste and add salt, pepper, and chili flakes to taste.
4. Pour dressing over vegetables. Toss to coat evenly. Refrigerate for several hours or overnight to marinate before serving.
Difficulty rating :)
I'm finding more and more recipes on The Chew. Maybe it's because they've been around long enough to start popping up on searches. I don't seek out their recipes, but this one happened to use ingredients I had on hand or could come up with an equivalent. Not having to shop will always move a recipe to the top of my list.
I was a bit skeptical about a slaw without dairy or mayo. This turned out to be a lot like sunomono, and very refreshing. The sugar comes from the beets and carrots, so you don't have to add anything other than a little honey, which is more for flavor than sweetness. I ended up with a higher proportion of cabbage and less beets, but that worked because the beets didn't bleed all over everything until it was one uniform color.
And the V-slicer attachments made it super easy to make beautiful julienne slices with the beets and carrots, as long as I had it out for the cabbage anyway. A box grater or the shredder on a food processor would be just as good if you don't feel like using knife skills.
*1/2 medium cabbage
*2 medium carrots
*2 beets
*zest and juice of 2 lemons
*2 Tb rice vinegar
1/4 C vegetable oil (not olive oil, because it solidifies in the fridge)
*2 tsp snipped chives or minced onion
*1 Tb honey
*1" fresh ginger, peeled and grated, or 1/2 tsp ground ginger
salt and pepper to taste
1/2 tsp chili flakes (optional)
1. Thinly slice cabbage and discard core. Peel carrots (peeling beets optional) and slice carrots and beets into a julienne, or matchsticks if you want more crunch. Rinse beets in a strainer to get out some of the juice.
2. Toss together cabbage, carrots, beets, lemon zest, and onion in a large bowl.
3. In a separate bowl, whisk together lemon juice, vinegar, oil, honey, and ginger. Taste and add salt, pepper, and chili flakes to taste.
4. Pour dressing over vegetables. Toss to coat evenly. Refrigerate for several hours or overnight to marinate before serving.
Difficulty rating :)
Saturday, March 26, 2016
Ranch Dressing
This idea was born of my ongoing problem of having planted too much lettuce, plus the new problem of buying a quart of buttermilk for the Irish soda bread and only using half of it.
When I was trying to figure out how to use the buttermilk, I realized that I had no idea what goes in ranch dressing. Buttermilk, and um… green herbs of some kind.
The recipe I settled on seemed harmless enough, and rather forgiving. I used all the chives on my lone plant and only had half as much as the recipe directed. I subbed in some cilantro and yellow onion to make up the rest. You could use fresh parsley if you have it.
All of the online recipes were rather snobby about using "good quality" or "real" mayonnaise. I used my vegan mayo and couldn't tell the difference. The buttermilk was the lower-fat option because I don't like super-thick, chunky milk. I also used fat free Greek yogurt for sour cream, as is my usual substitution. As a result, I'm assuming my version is much lower in fat, calories, and cholesterol than the original recipe. Oh, and I used half as much salt. I didn't set out to make "Lite Ranch", but that seems to be what happened.
A brief word of warning about the yield. Unlike store-bought dressing, this batch is going to spoil in about a week. Between the fresh dairy, fresh herbs, and lower salt content, you shouldn't make a giant batch to keep around. This is about the largest amount you're likely to go through unless there's a party.
1/2 C Nonfat, plain Greek yogurt
*1/2 C buttermilk (or more to thin)
*1/4 C mayo
* 2 cloves garlic, minced
1/2 tsp salt
1/4 tsp pepper
*1-1/2 tsp dried dill
*1/4 C fresh chives, finely chopped
*2 tsp lemon juice
drops of tabasco or a shake of cayenne if you like spicy
1. Place all ingredients in a bowl. Whisk until smooth. If thicker than you like, add buttermilk to desired consistency.
2. Chill until ready to use. Keeps about 1 week refrigerated.
Makes about 1-1/2 cups
Difficulty rating π
When I was trying to figure out how to use the buttermilk, I realized that I had no idea what goes in ranch dressing. Buttermilk, and um… green herbs of some kind.
The recipe I settled on seemed harmless enough, and rather forgiving. I used all the chives on my lone plant and only had half as much as the recipe directed. I subbed in some cilantro and yellow onion to make up the rest. You could use fresh parsley if you have it.
All of the online recipes were rather snobby about using "good quality" or "real" mayonnaise. I used my vegan mayo and couldn't tell the difference. The buttermilk was the lower-fat option because I don't like super-thick, chunky milk. I also used fat free Greek yogurt for sour cream, as is my usual substitution. As a result, I'm assuming my version is much lower in fat, calories, and cholesterol than the original recipe. Oh, and I used half as much salt. I didn't set out to make "Lite Ranch", but that seems to be what happened.
A brief word of warning about the yield. Unlike store-bought dressing, this batch is going to spoil in about a week. Between the fresh dairy, fresh herbs, and lower salt content, you shouldn't make a giant batch to keep around. This is about the largest amount you're likely to go through unless there's a party.
1/2 C Nonfat, plain Greek yogurt
*1/2 C buttermilk (or more to thin)
*1/4 C mayo
* 2 cloves garlic, minced
1/2 tsp salt
1/4 tsp pepper
*1-1/2 tsp dried dill
*1/4 C fresh chives, finely chopped
*2 tsp lemon juice
drops of tabasco or a shake of cayenne if you like spicy
1. Place all ingredients in a bowl. Whisk until smooth. If thicker than you like, add buttermilk to desired consistency.
2. Chill until ready to use. Keeps about 1 week refrigerated.
Makes about 1-1/2 cups
Difficulty rating π
Wednesday, March 23, 2016
Corned Beef and Cabbage Potato Gratin
This is why I made the corned beef. This recipe aired on The Chew last month as ham, to celebrate "The Martian". As they were putting everything together, I realized this would be perfect for St. Patrick's Day if you used corned beef. It's a Reuben sandwich with potato instead of bread, and potatoes are an Irish flavor.
There were some differences between what was on the show and the published recipe. I made it more like the show, including the larger pan. I don't know who thought you could get this in an 8" square casserole.
All of the work in this is the prep. Slicing the cabbage and the potatoes takes the most time. I did get gorgeous potato slices off the V-slicer, but I'm assuming a food processor's slicing blade would do just as well. It was nerve-wracking watching the show, with Daphne not looking at her hands as she sliced the potato on the V-slicer without a cut glove. I don't care how good a cook you are, that is a dangerous piece of equipment. But the slices are so pretty.
1/2 medium cabbage, thinly sliced
1 Tb butter
2 cloves garlic, minced
2 C chopped corned beef
2 medium russett potatoes, very thinly sliced
1 C heavy cream
1/2 tsp paprika
1/8 tsp pepper
2 C shredded Swiss cheese (about 8 oz)
salt to taste
parsley and chives for garnish
1. Grease a 9" x 13" casserole (I used butter). Melt butter in a large, deep skillet and add garlic and cabbage. While that's cooking down for about 5 minutes, slice potatoes, chop corned beef, and shred cheese.
2. Taste a bite of the corned beef and the cheese before proceeding. Both cream and potatoes dull the sense of salt. If the ingredients seem okay or bland, you'll need to add salt. If your corned beef is a bit on the salty side, you can skip it.
3. Preheat oven to 375º. Add corned beef, pepper, and paprika to the cabbage and continue to cook until cabbage is thoroughly wilted and beef is warmed. You don't want the cabbage giving off too much liquid when you get this thing in the oven. Add up to 1/2 tsp of salt at this point if you think you need it.
4. Arrange half of the potato slices on the bottom of the casserole, overlapping slightly. Pour half of the cream on them and sprinkle with half of the cheese. Cover with all of the cabbage mixture. Top with the other half of the potatoes, the rest of the cream, and the remaining cheese.
5. Cover casserole with foil and bake for 45 minutes. This will allow the potatoes to steam. Remove foil at that time and bake an additional 15-20 minutes to brown the cheese. Remove from oven and sprinkle top with chopped parsley and chives as garnishes. Allow casserole to cool for about 10 minutes before trying to serve.
Serves 4-6, depending how many sides you have. I had half of one of my awesomely huge carrots with mine.
Difficulty rating :-0 (for the slicing)
There were some differences between what was on the show and the published recipe. I made it more like the show, including the larger pan. I don't know who thought you could get this in an 8" square casserole.
All of the work in this is the prep. Slicing the cabbage and the potatoes takes the most time. I did get gorgeous potato slices off the V-slicer, but I'm assuming a food processor's slicing blade would do just as well. It was nerve-wracking watching the show, with Daphne not looking at her hands as she sliced the potato on the V-slicer without a cut glove. I don't care how good a cook you are, that is a dangerous piece of equipment. But the slices are so pretty.
1/2 medium cabbage, thinly sliced
1 Tb butter
2 cloves garlic, minced
2 C chopped corned beef
2 medium russett potatoes, very thinly sliced
1 C heavy cream
1/2 tsp paprika
1/8 tsp pepper
2 C shredded Swiss cheese (about 8 oz)
salt to taste
parsley and chives for garnish
1. Grease a 9" x 13" casserole (I used butter). Melt butter in a large, deep skillet and add garlic and cabbage. While that's cooking down for about 5 minutes, slice potatoes, chop corned beef, and shred cheese.
2. Taste a bite of the corned beef and the cheese before proceeding. Both cream and potatoes dull the sense of salt. If the ingredients seem okay or bland, you'll need to add salt. If your corned beef is a bit on the salty side, you can skip it.
3. Preheat oven to 375º. Add corned beef, pepper, and paprika to the cabbage and continue to cook until cabbage is thoroughly wilted and beef is warmed. You don't want the cabbage giving off too much liquid when you get this thing in the oven. Add up to 1/2 tsp of salt at this point if you think you need it.
4. Arrange half of the potato slices on the bottom of the casserole, overlapping slightly. Pour half of the cream on them and sprinkle with half of the cheese. Cover with all of the cabbage mixture. Top with the other half of the potatoes, the rest of the cream, and the remaining cheese.
5. Cover casserole with foil and bake for 45 minutes. This will allow the potatoes to steam. Remove foil at that time and bake an additional 15-20 minutes to brown the cheese. Remove from oven and sprinkle top with chopped parsley and chives as garnishes. Allow casserole to cool for about 10 minutes before trying to serve.
Serves 4-6, depending how many sides you have. I had half of one of my awesomely huge carrots with mine.Difficulty rating :-0 (for the slicing)
Sunday, March 20, 2016
Corned Beef
My mom used to love St. Patrick's Day because it was an excuse for her to make corned beef and cabbage. None of us liked it, but we had to suffer through it every year. After I grew up and moved out, it was many years before I would even eat corned beef.
Then we made it in culinary school from scratch. Like growing your own veggies, doing a big project like this makes you appreciate the process and the product. While corned beef was still not my first choice, it was no longer something to avoid.
I went through several recipes before deciding that Alton Brown's had the easiest math for the size of the brisket I had bought. The main substitution, and what I'm posting here, is using Prague Powder #1 instead of saltpeter. Either will give the brisket that pink color, but plain pickling salt won't. Even in L.A., I had to order it online after going to a whole lot of specialty markets. One pound is a lifetime supply, enough to cure over 200 pounds of meat. It's a bit nerve-wracking to receive a food product that is clearly labeled "toxic, use only as recipe directs", but technically nutmeg and rhubarb leaves also fall in the toxic category.
And yes, this is a horrendous list of ingredients that you may never use again. I hit the spice bins at Sprouts for the odd things like Allspice and Juniper berries, plus one-offs for other recipes I had planned. Since I got so little of each spice, she just weighed all the bags at once and I paid something like 50¢ for all of them.
Just a heads up on timing. You need about a two-week lead time for this. 4-5 days for the Prague Powder to arrive (unless you have Prime) and a minimum of 7 days brining. I did 7 days and there was one tiny half-bite in the middle that didn't cure. 12 more hours would have been enough. Don't look at this recipe today and expect to have everything done tomorrow. The actual process is beyond easy, but you have up to 10 days of inactive time.
2 quarts (8 cups) water
1 C kosher salt (2/3 if you want lower sodium)
1/2 C brown sugar
1 tsp Prague Powder #1
*1 cinnamon stick, broken (optional)
*1 tsp mustard seeds
*1 tsp whole black peppercorns
*8 whole cloves
8 whole allspice
12 whole juniper berries
*2 bay leaves, crumbled
1/2 tsp ground ginger
2 pounds ice
1 4 to 5 lb brisket, trimmed to 1/4" fat or less
2 C mirepoix (onion, carrot, and celery trimmings)
1. In a large stockpot, place water and next 11 ingredients (down to the ginger). Bring everything to a boil, stirring occasionally. Boil for at least three minutes, to make sure all the salt and sugar are dissolved. Remove from heat. Add ice and stir to dissolve. If brine is not yet cooled to at least 45º, place in refrigerator.
2. Get out a casserole dish at least 2" deep. Place brisket in a 2-gallon plastic bag in the casserole. Add brine to fill the bag and squeeze out as much air as possible. The brine should cover all sides of the meat. Lay flat in the casserole and refrigerate. Turn daily and squeeze bag to distribute brine evenly.
3. After 10 days (minimum of 7 if you're in a rush), remove brisket from the bag and rinse thoroughly. Place in a pot just large enough to hold it. Add the mirepoix and add water to cover by 1". Bring to a boil over high heat, then cover and reduce to a simmer. Cook for 2-1/2 to 3 hours, until meat is fork tender. Remove meat from the water and discard the mirepoix. Slice cooled brisket thinly across the grain and serve hot or cold.
Makes about 50% to 60% of original brisket weight
Difficulty rating :)
Then we made it in culinary school from scratch. Like growing your own veggies, doing a big project like this makes you appreciate the process and the product. While corned beef was still not my first choice, it was no longer something to avoid.
I went through several recipes before deciding that Alton Brown's had the easiest math for the size of the brisket I had bought. The main substitution, and what I'm posting here, is using Prague Powder #1 instead of saltpeter. Either will give the brisket that pink color, but plain pickling salt won't. Even in L.A., I had to order it online after going to a whole lot of specialty markets. One pound is a lifetime supply, enough to cure over 200 pounds of meat. It's a bit nerve-wracking to receive a food product that is clearly labeled "toxic, use only as recipe directs", but technically nutmeg and rhubarb leaves also fall in the toxic category.
And yes, this is a horrendous list of ingredients that you may never use again. I hit the spice bins at Sprouts for the odd things like Allspice and Juniper berries, plus one-offs for other recipes I had planned. Since I got so little of each spice, she just weighed all the bags at once and I paid something like 50¢ for all of them.
Just a heads up on timing. You need about a two-week lead time for this. 4-5 days for the Prague Powder to arrive (unless you have Prime) and a minimum of 7 days brining. I did 7 days and there was one tiny half-bite in the middle that didn't cure. 12 more hours would have been enough. Don't look at this recipe today and expect to have everything done tomorrow. The actual process is beyond easy, but you have up to 10 days of inactive time.
2 quarts (8 cups) water
1 C kosher salt (2/3 if you want lower sodium)
1/2 C brown sugar
1 tsp Prague Powder #1
*1 cinnamon stick, broken (optional)
*1 tsp mustard seeds
*1 tsp whole black peppercorns
*8 whole cloves
8 whole allspice
12 whole juniper berries
*2 bay leaves, crumbled
1/2 tsp ground ginger
2 pounds ice
1 4 to 5 lb brisket, trimmed to 1/4" fat or less
2 C mirepoix (onion, carrot, and celery trimmings)
1. In a large stockpot, place water and next 11 ingredients (down to the ginger). Bring everything to a boil, stirring occasionally. Boil for at least three minutes, to make sure all the salt and sugar are dissolved. Remove from heat. Add ice and stir to dissolve. If brine is not yet cooled to at least 45º, place in refrigerator.
2. Get out a casserole dish at least 2" deep. Place brisket in a 2-gallon plastic bag in the casserole. Add brine to fill the bag and squeeze out as much air as possible. The brine should cover all sides of the meat. Lay flat in the casserole and refrigerate. Turn daily and squeeze bag to distribute brine evenly.
3. After 10 days (minimum of 7 if you're in a rush), remove brisket from the bag and rinse thoroughly. Place in a pot just large enough to hold it. Add the mirepoix and add water to cover by 1". Bring to a boil over high heat, then cover and reduce to a simmer. Cook for 2-1/2 to 3 hours, until meat is fork tender. Remove meat from the water and discard the mirepoix. Slice cooled brisket thinly across the grain and serve hot or cold.
Makes about 50% to 60% of original brisket weight
Difficulty rating :)
Subscribe to:
Posts (Atom)